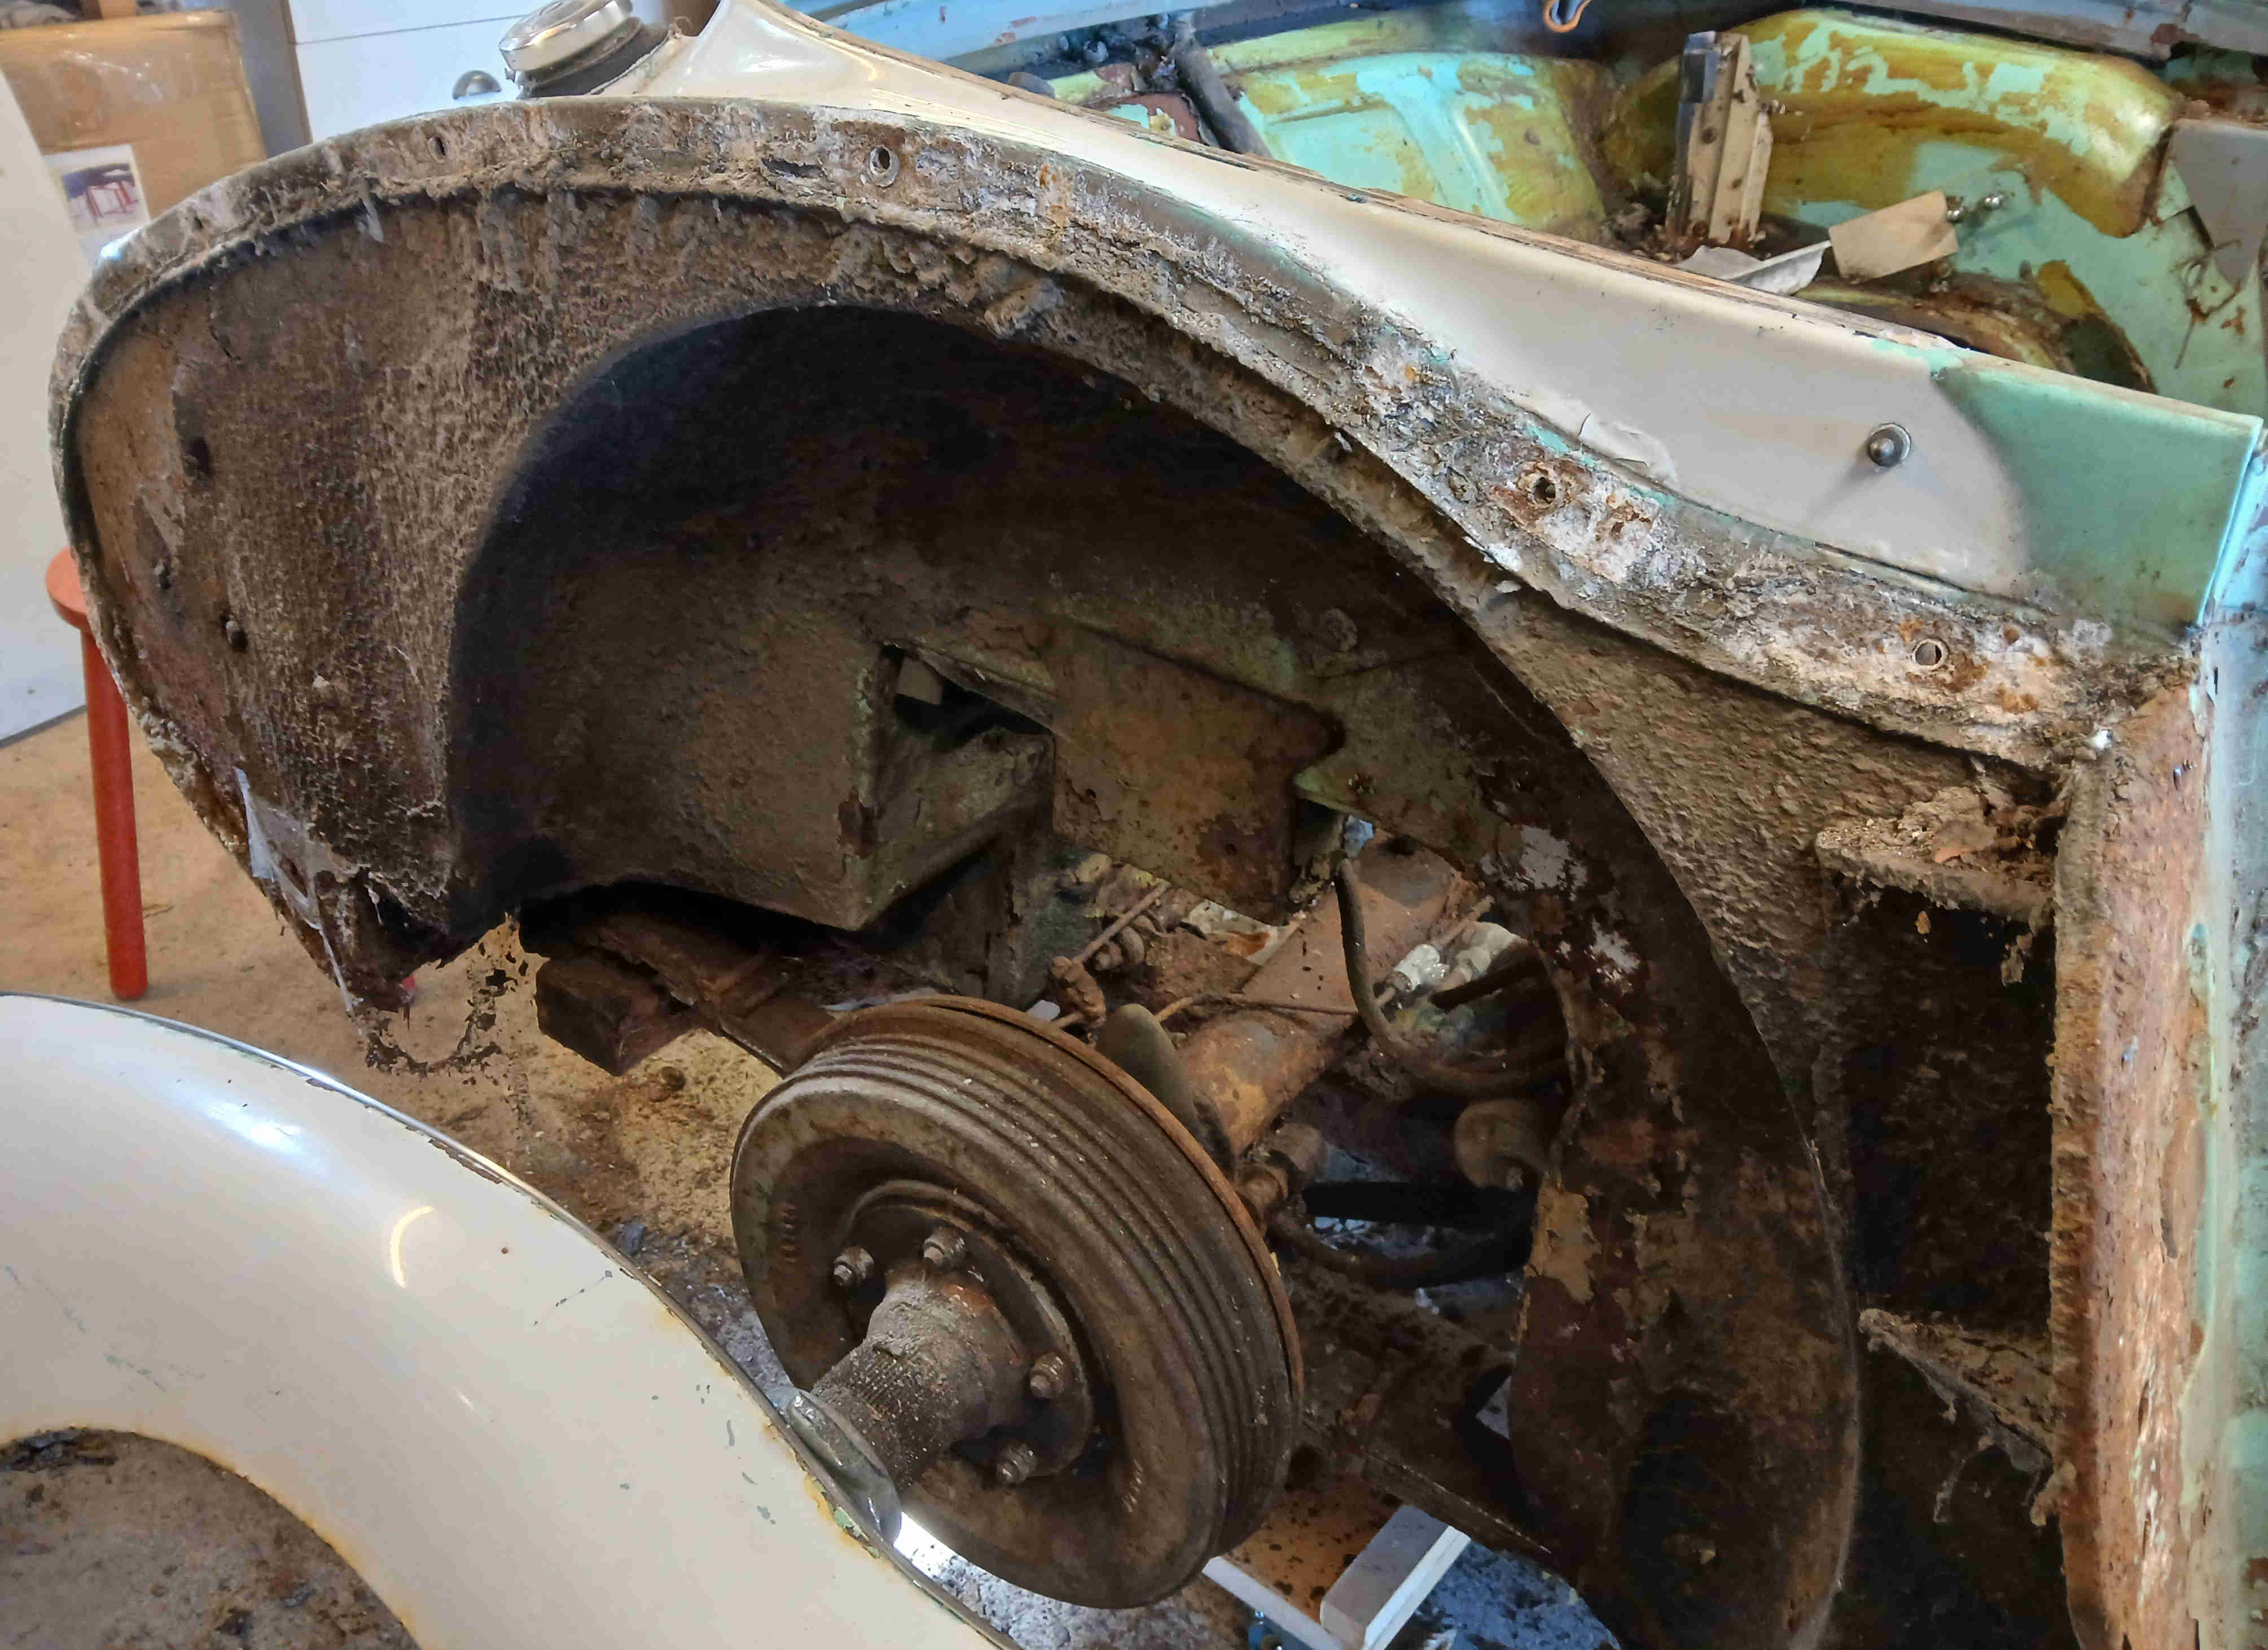
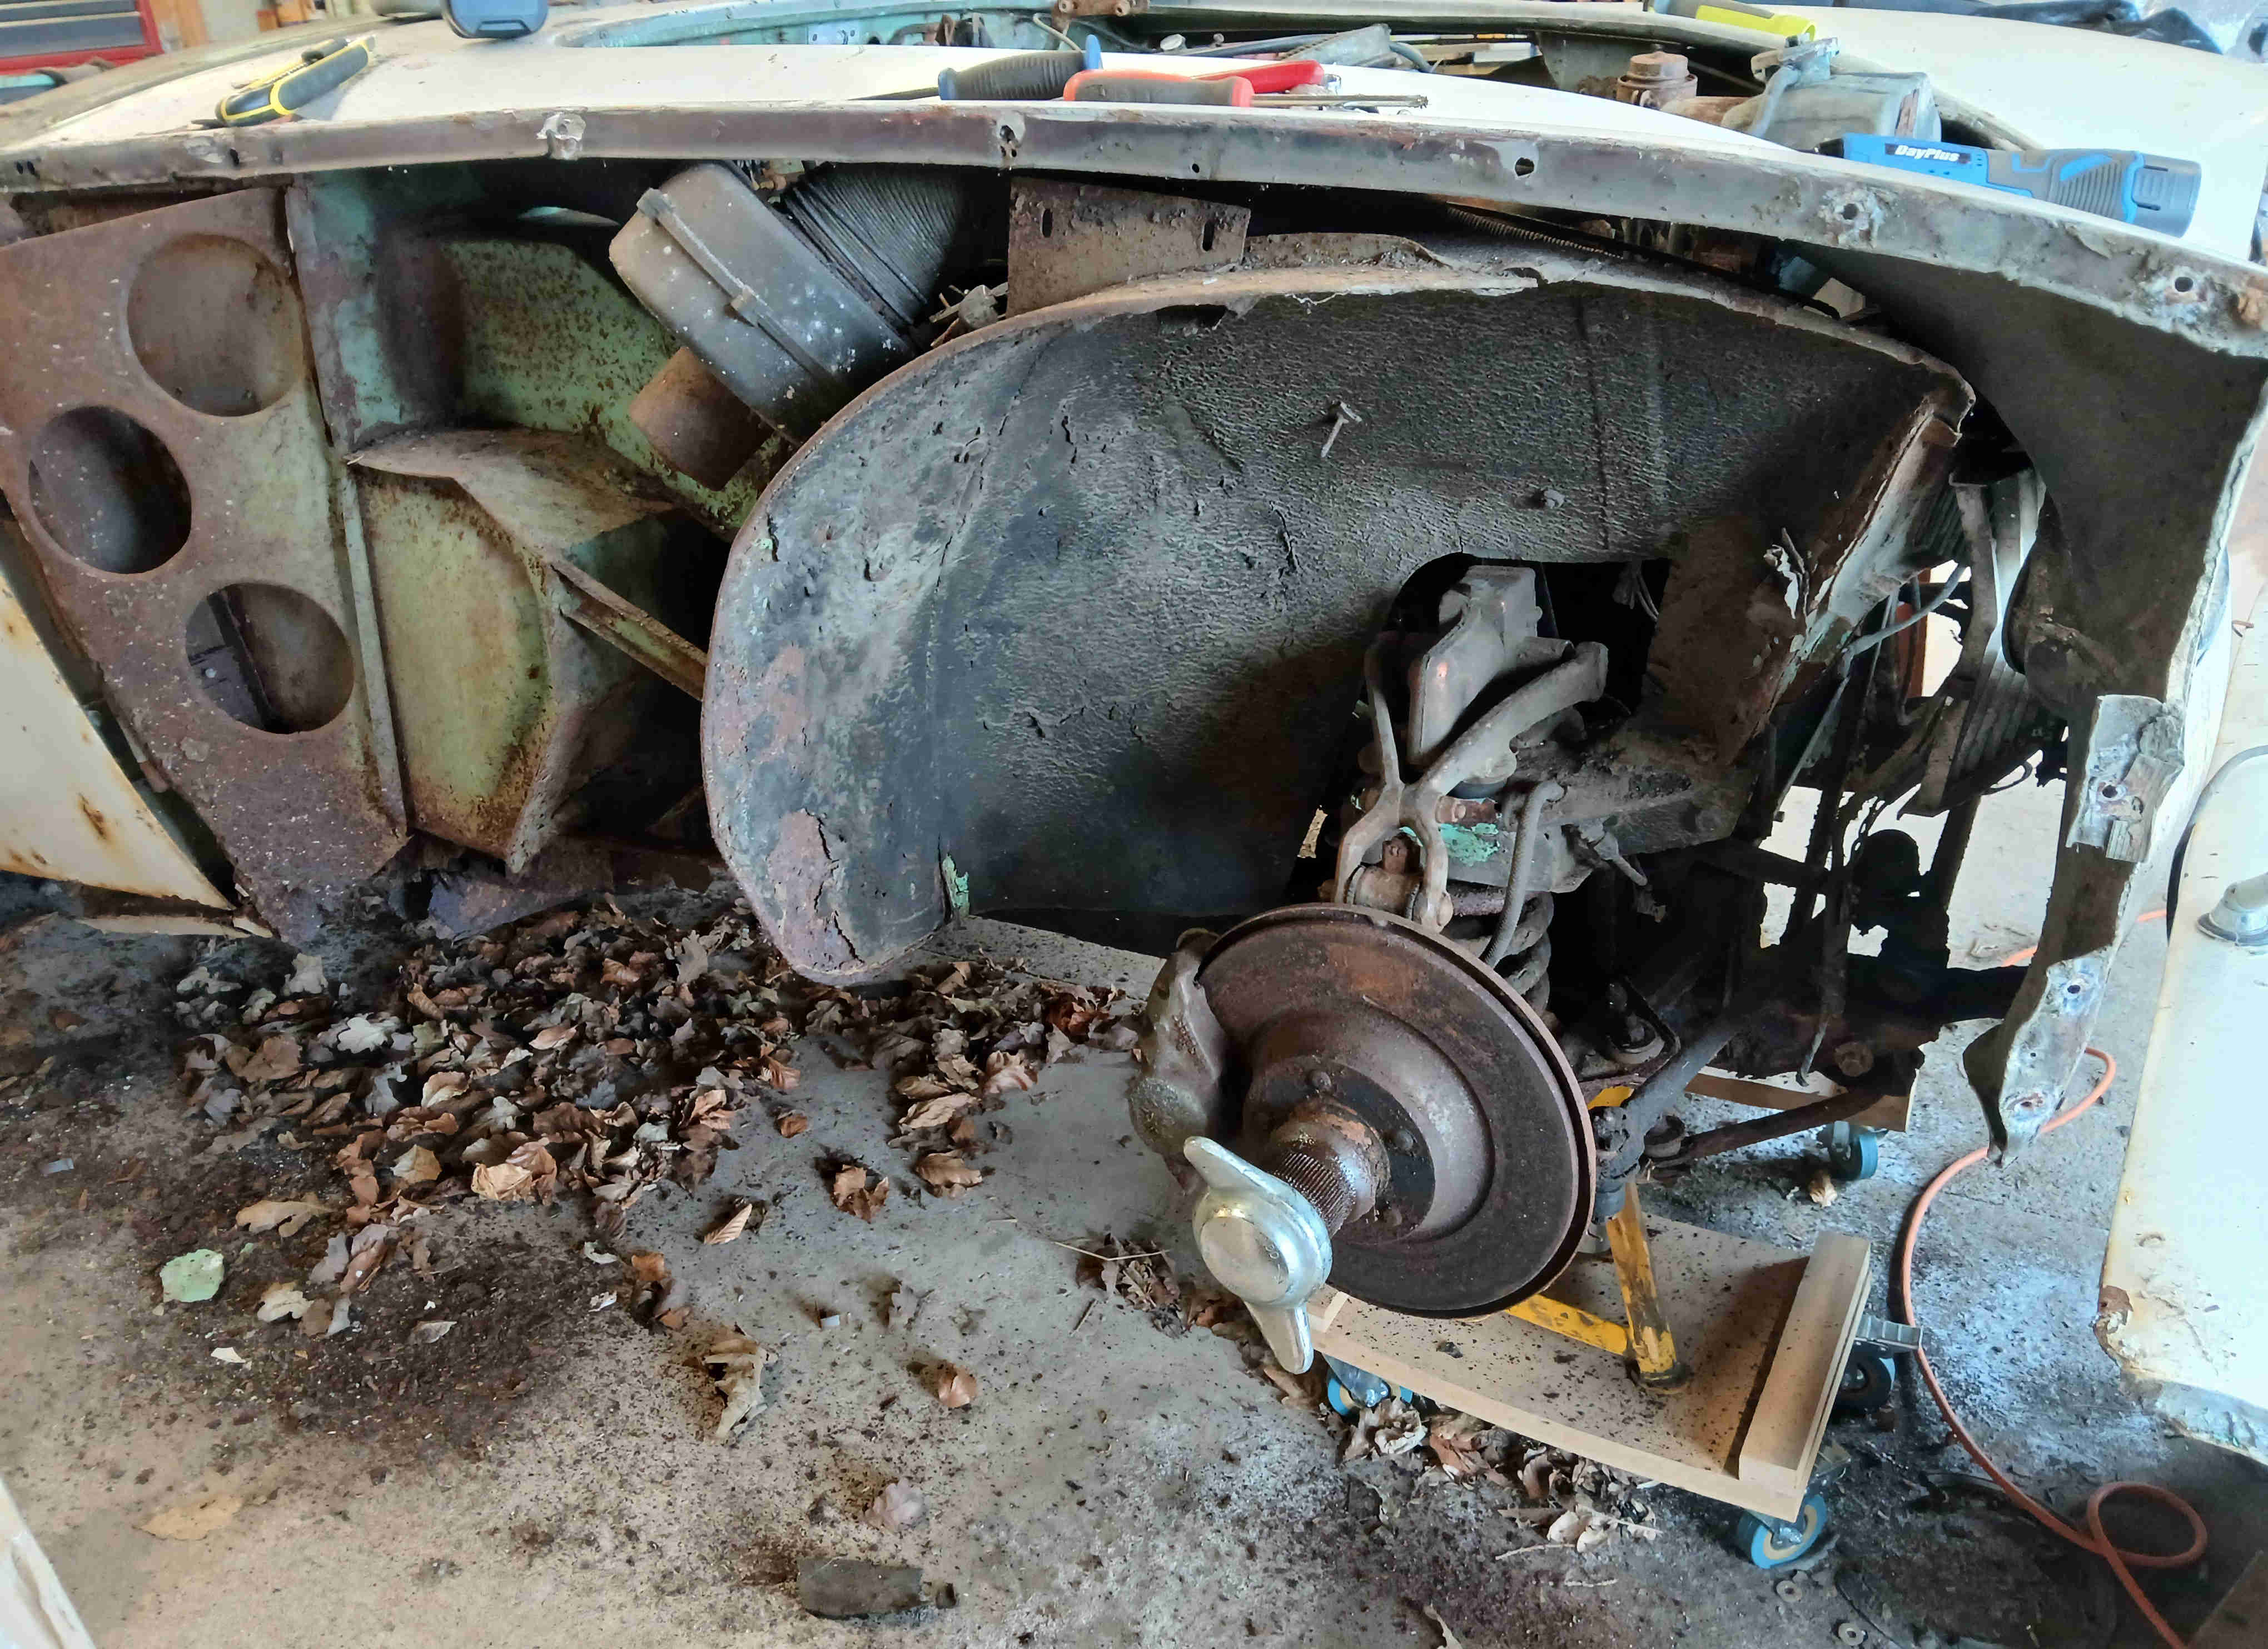
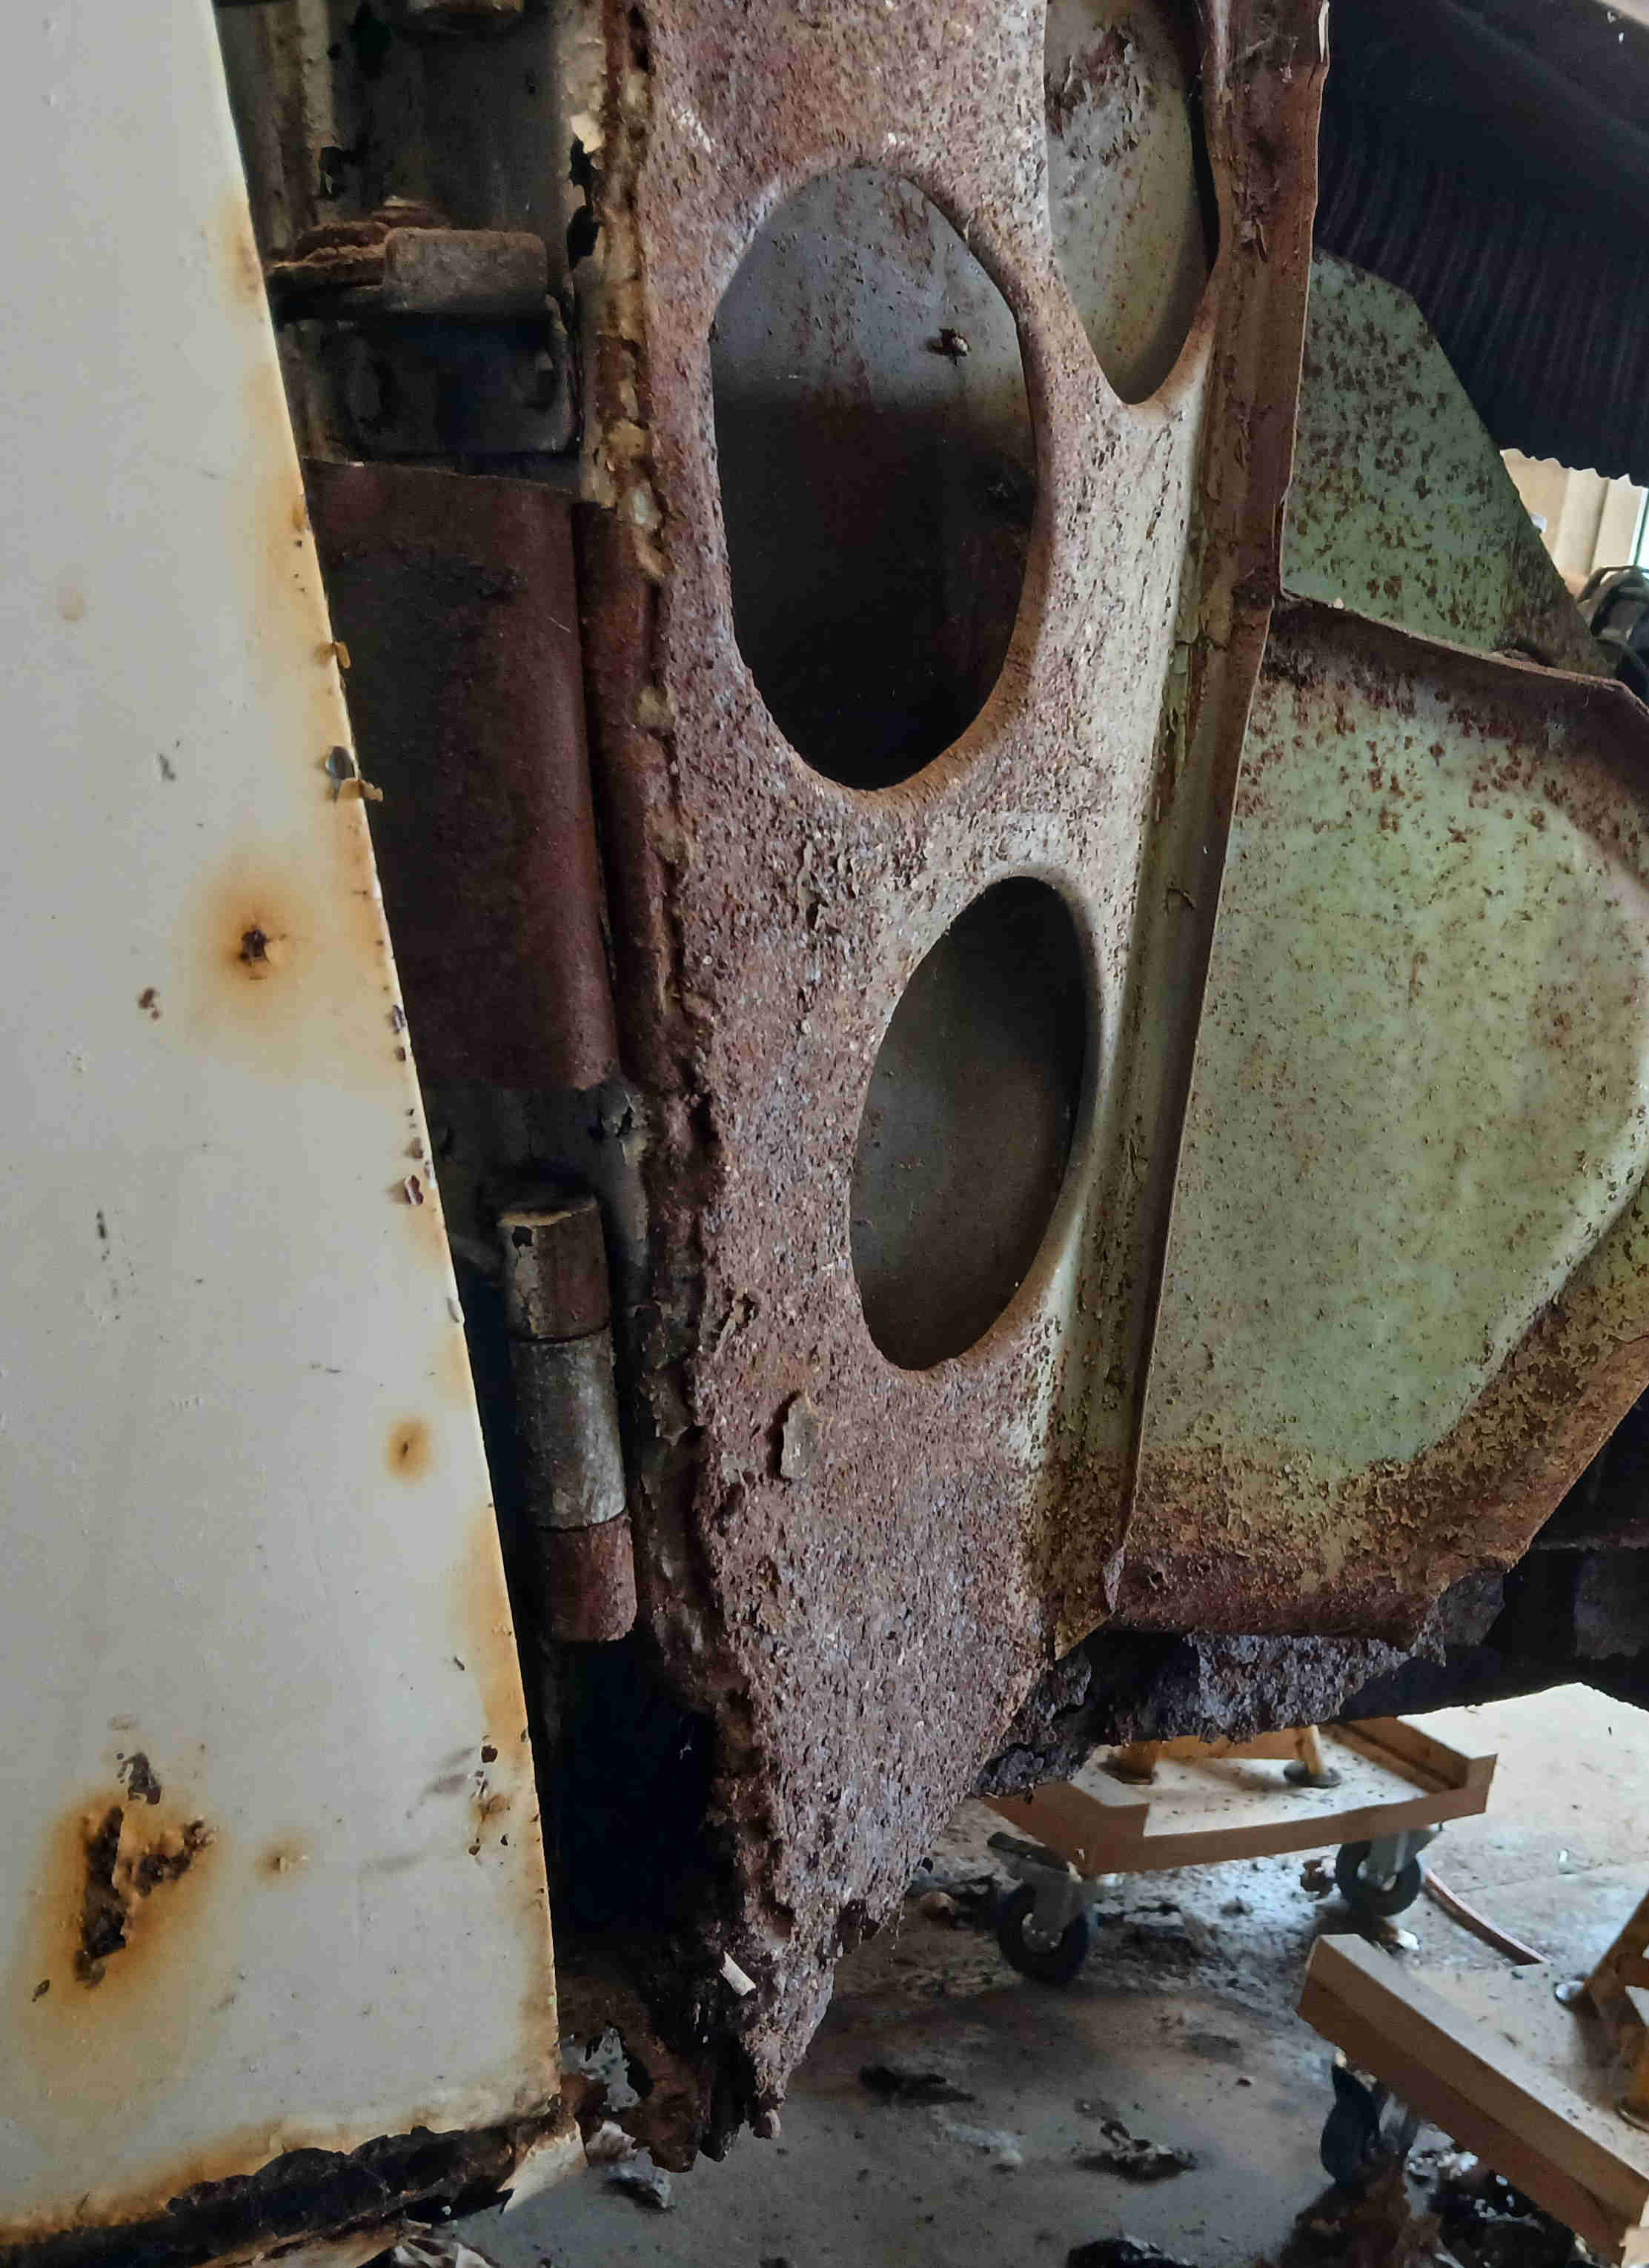
Onto the wings. For no particular reason I decided to tackle the rear wings first starting with the left. To access the screws securing the front part of the wing required removing the aluminium carpet covers, sill and pillar covers which revealed the full horror of the sills (but as expected). Removing the screws was impossible so they were drilled out. Getting to some of the wing fixing bolts bolts was a bit fiddly and smaller than I was expecting but perseverance saved the day.
Click thumbnail
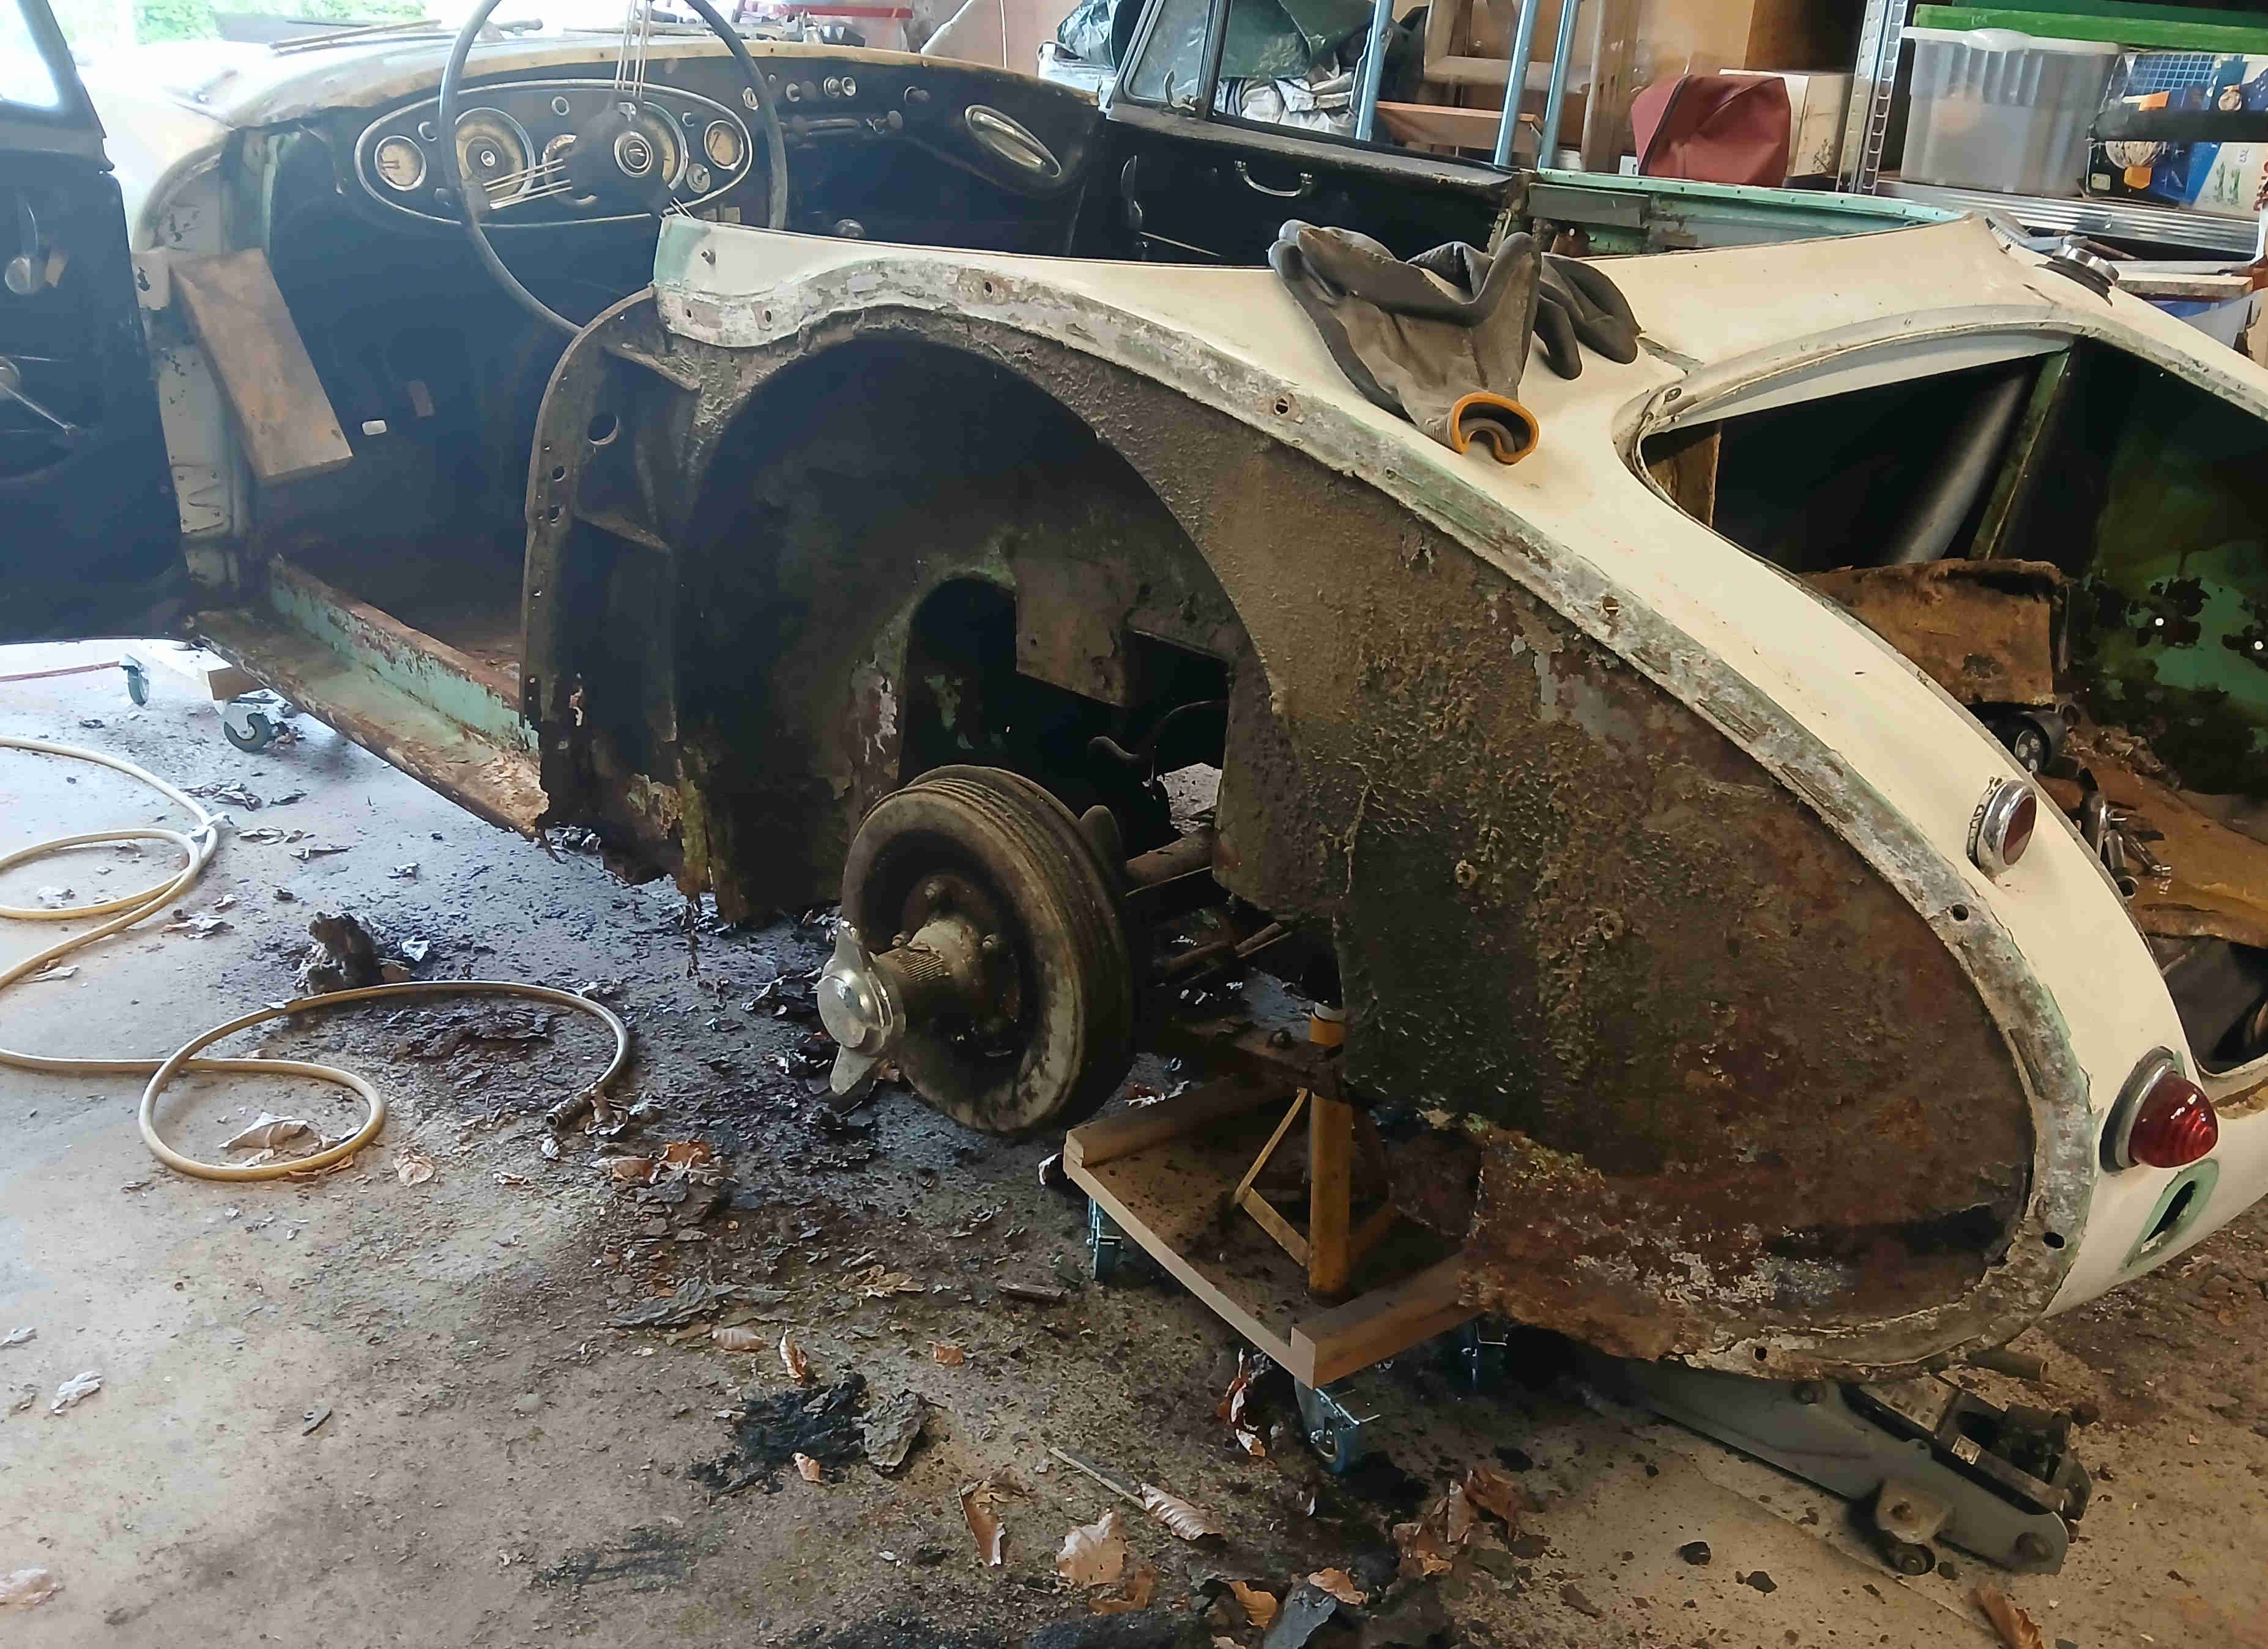
The right wing was just as difficult and revealed even worse sill corrosion but, again, as expected.
Click thumbnail
The front wing bolts were just as difficult. The first two bolts at the very front came out but several of the others gave up there captivated nuts which just turn round. Finally I had to resort to pulling out the chrome beading which gave just enough room to use the angle grinder cutting disc to get in and cut the bolts in the middle. The screws at the back of the wing in the door opening were easy enough to remove with a screwdriver so I was able to leave the doors conneted which will help when aligning the sills.
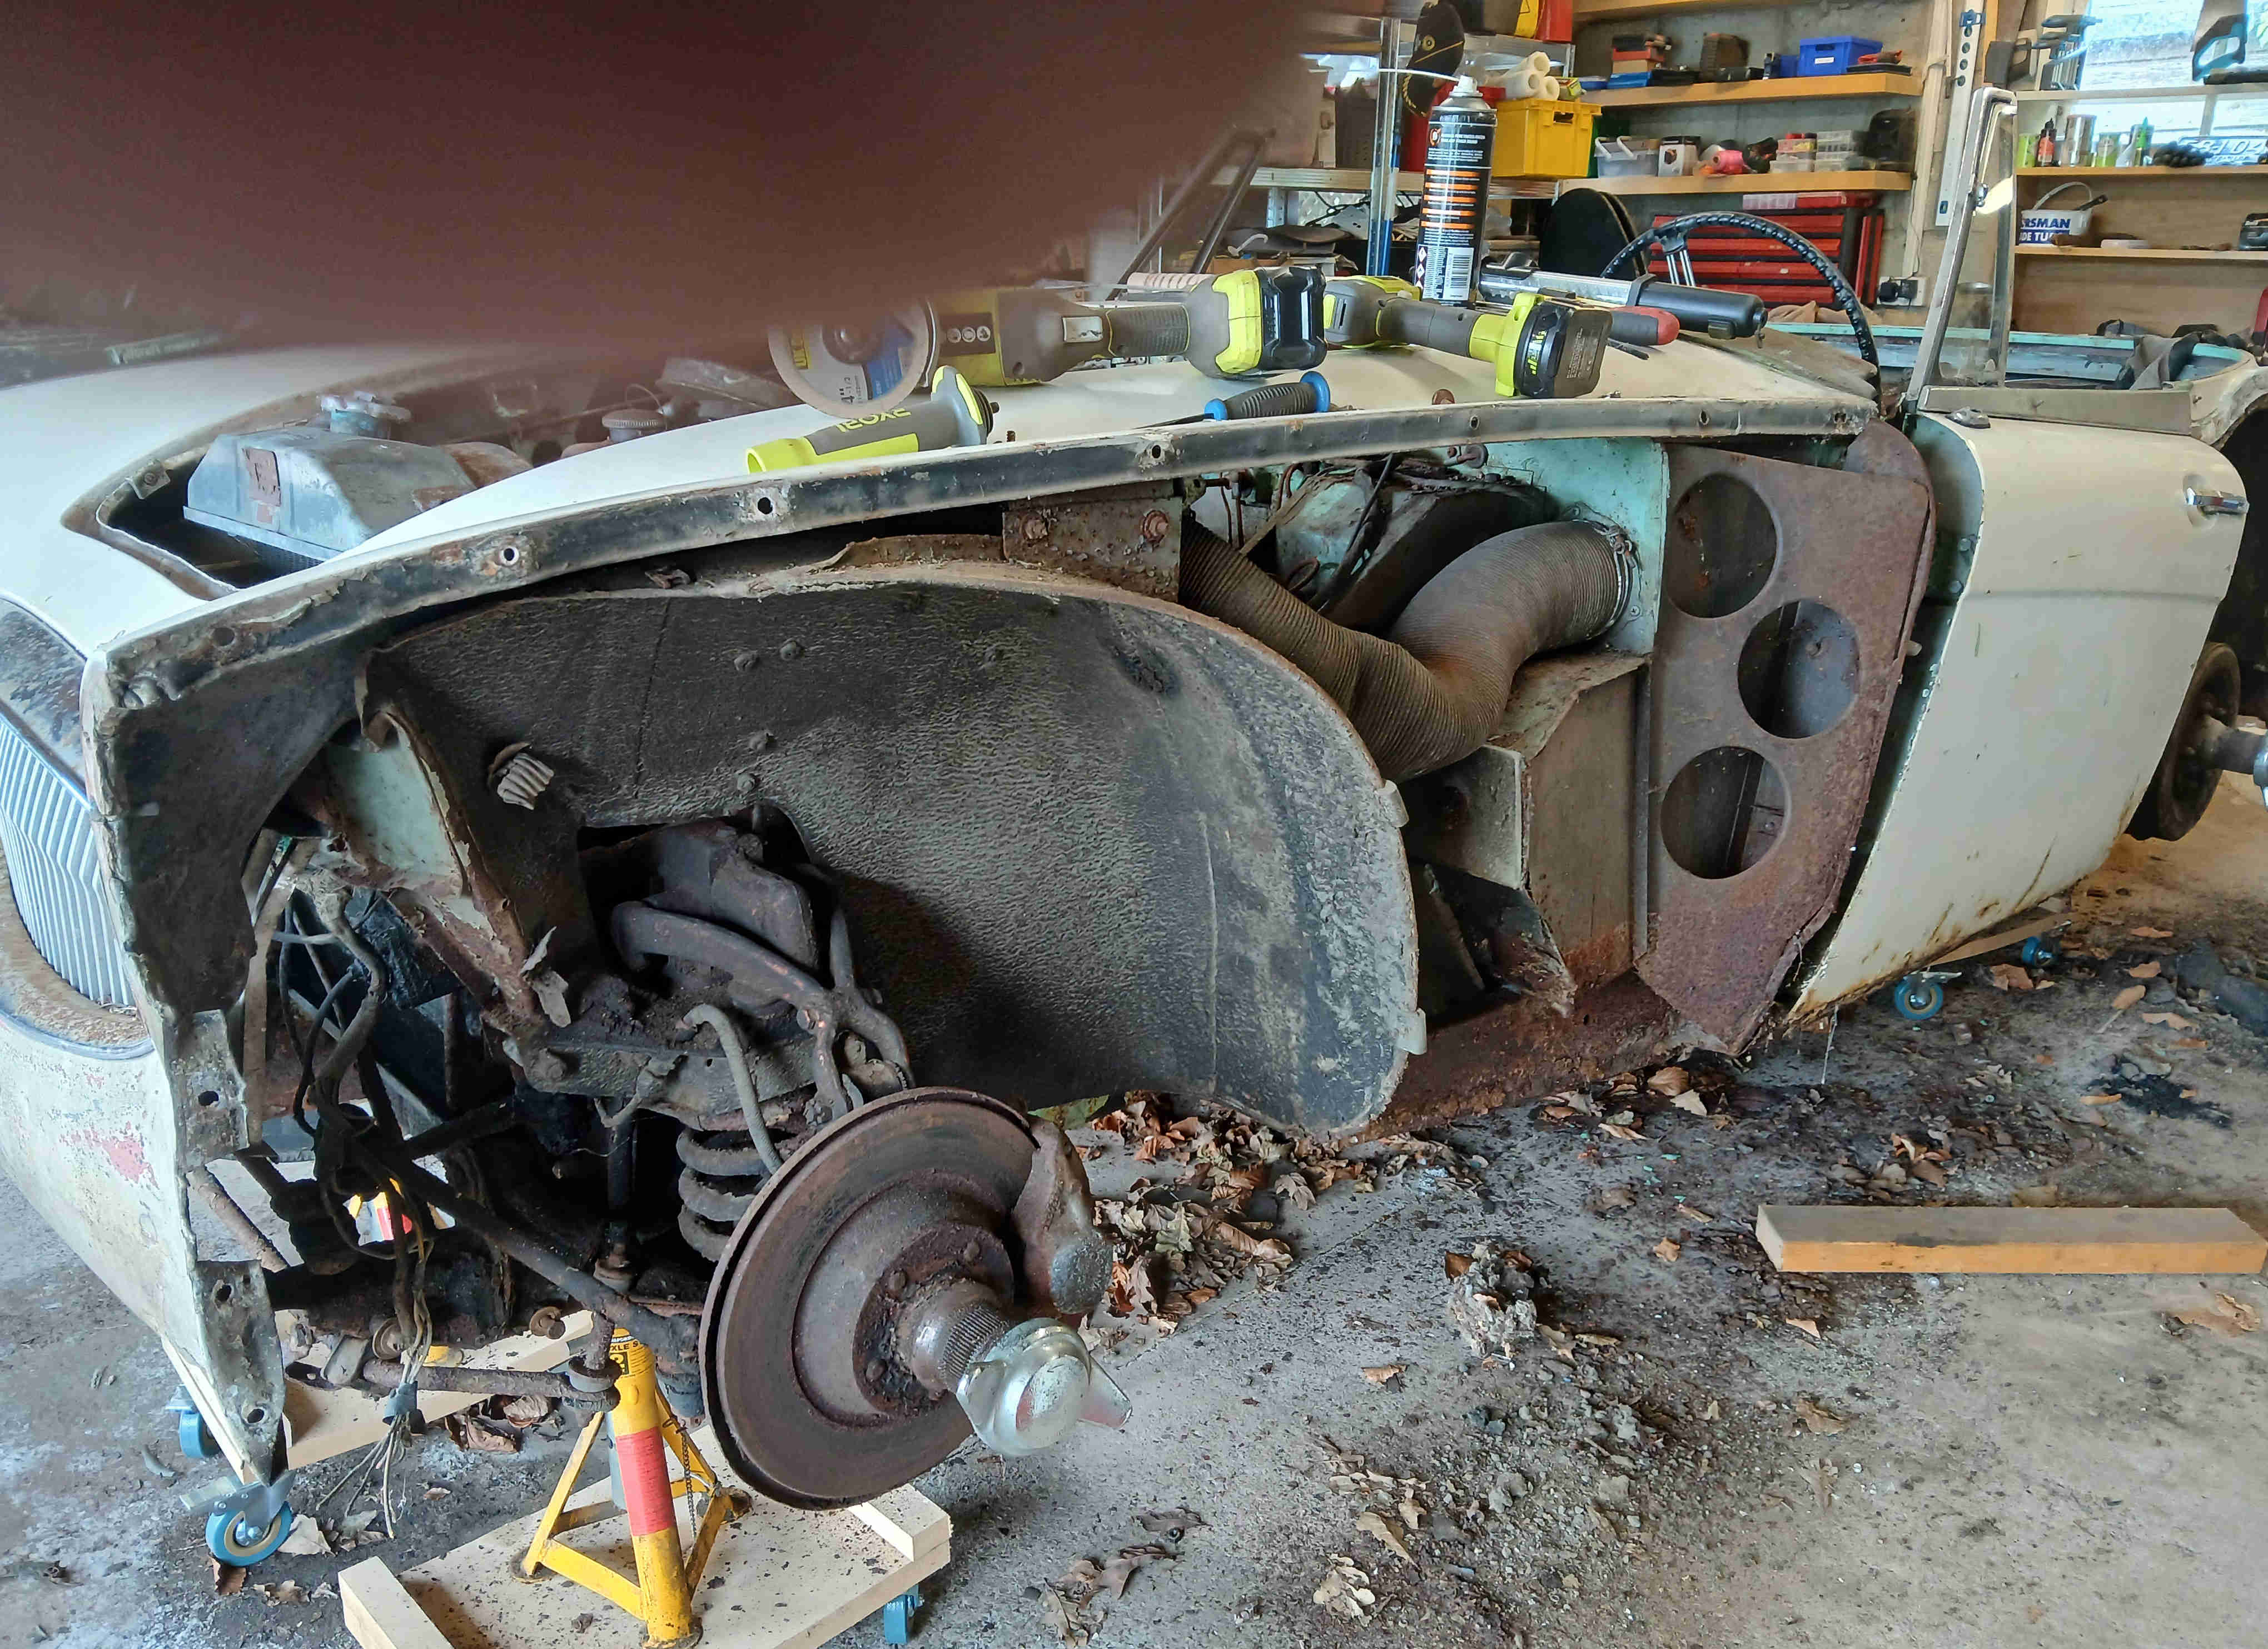
Click thumbnail
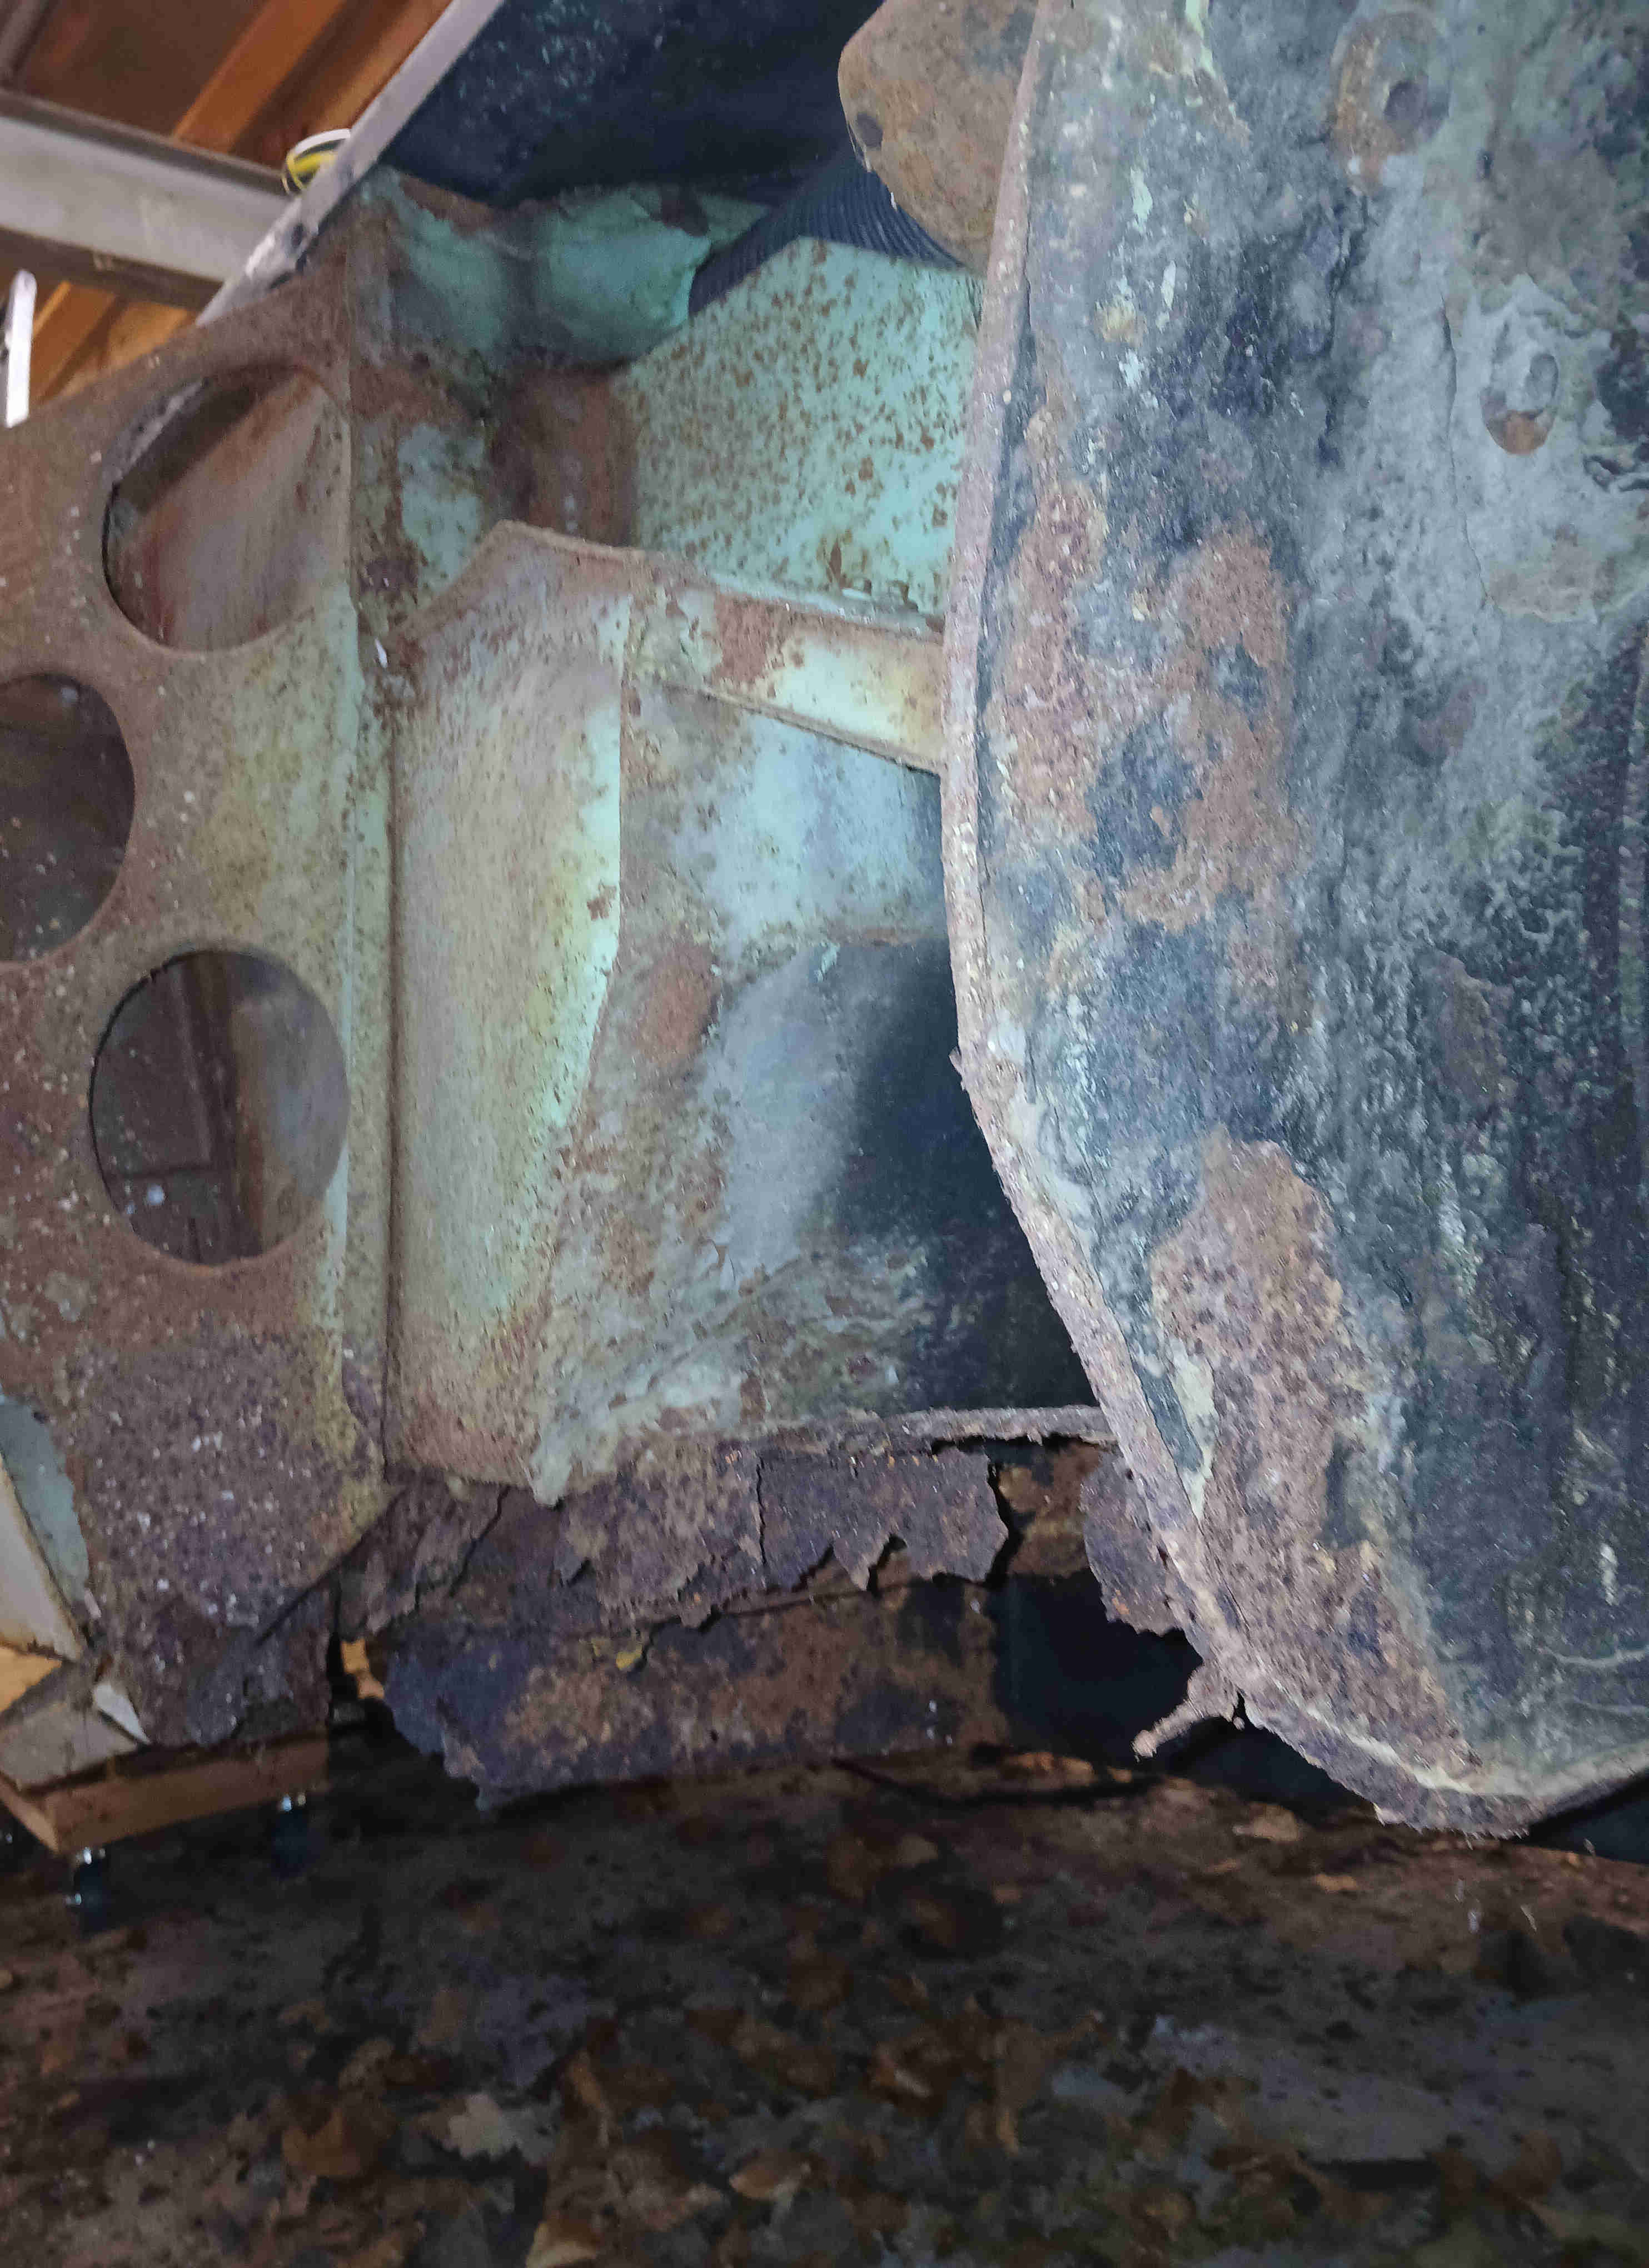
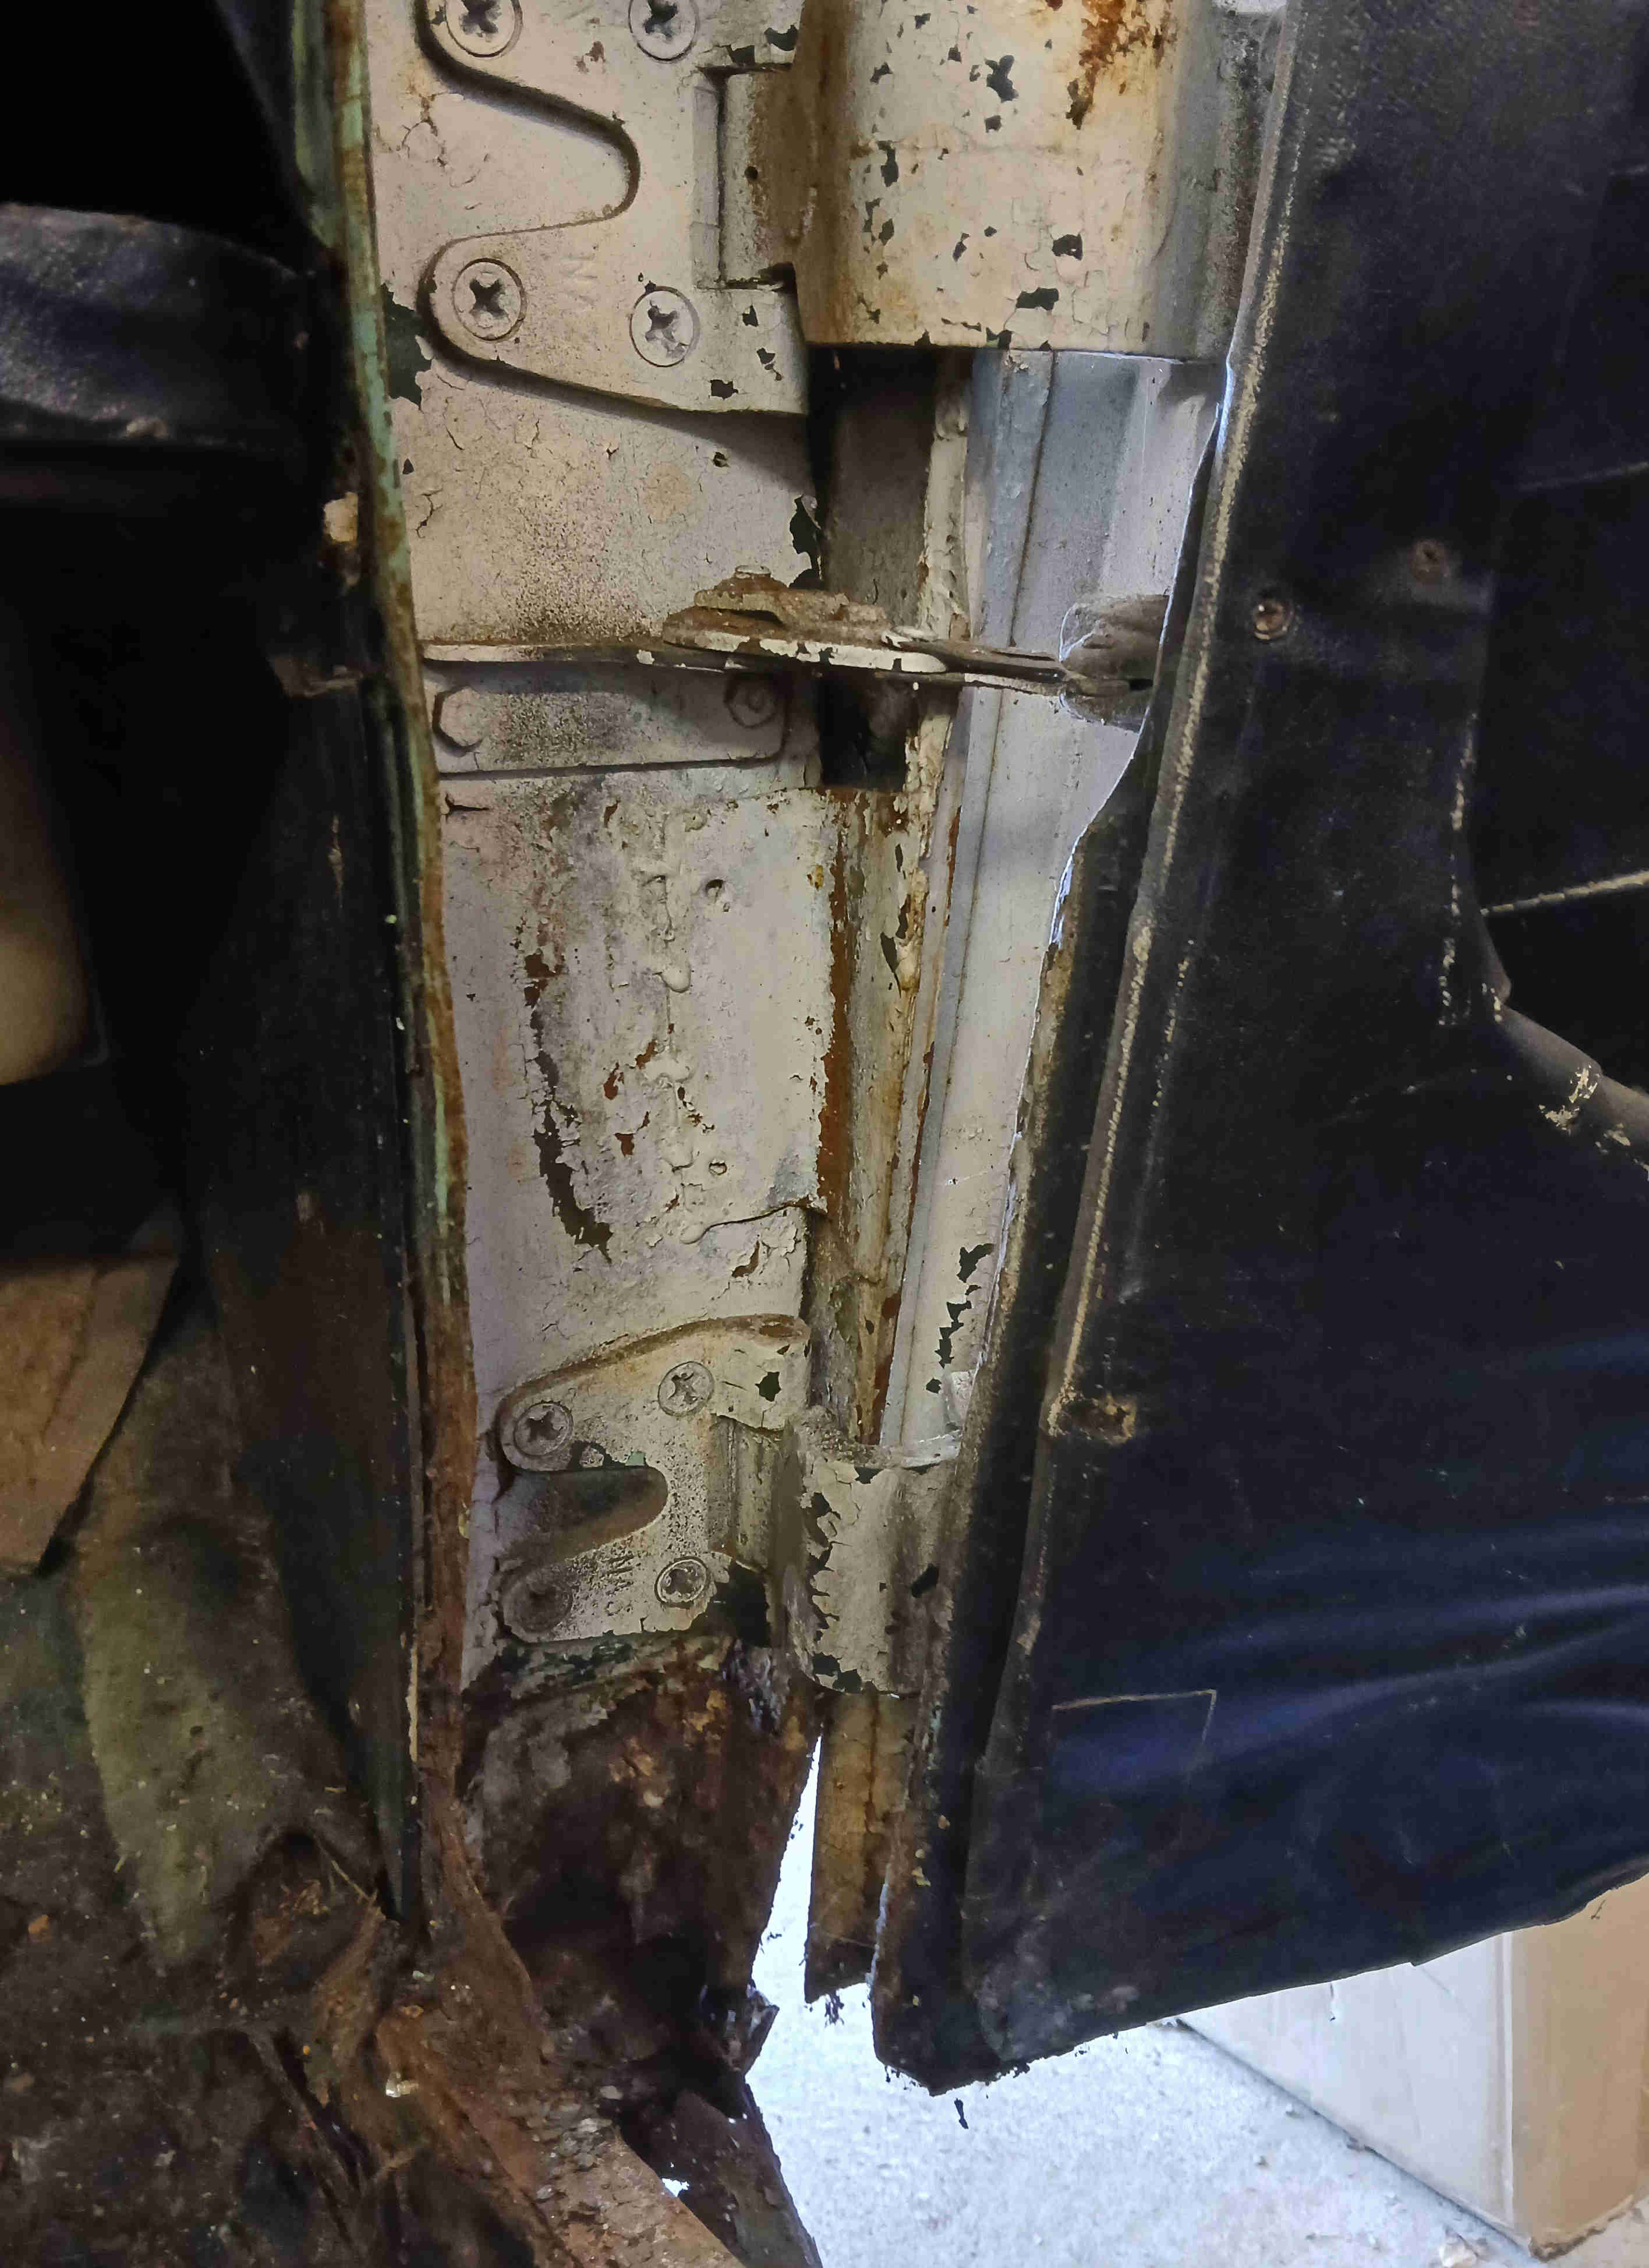
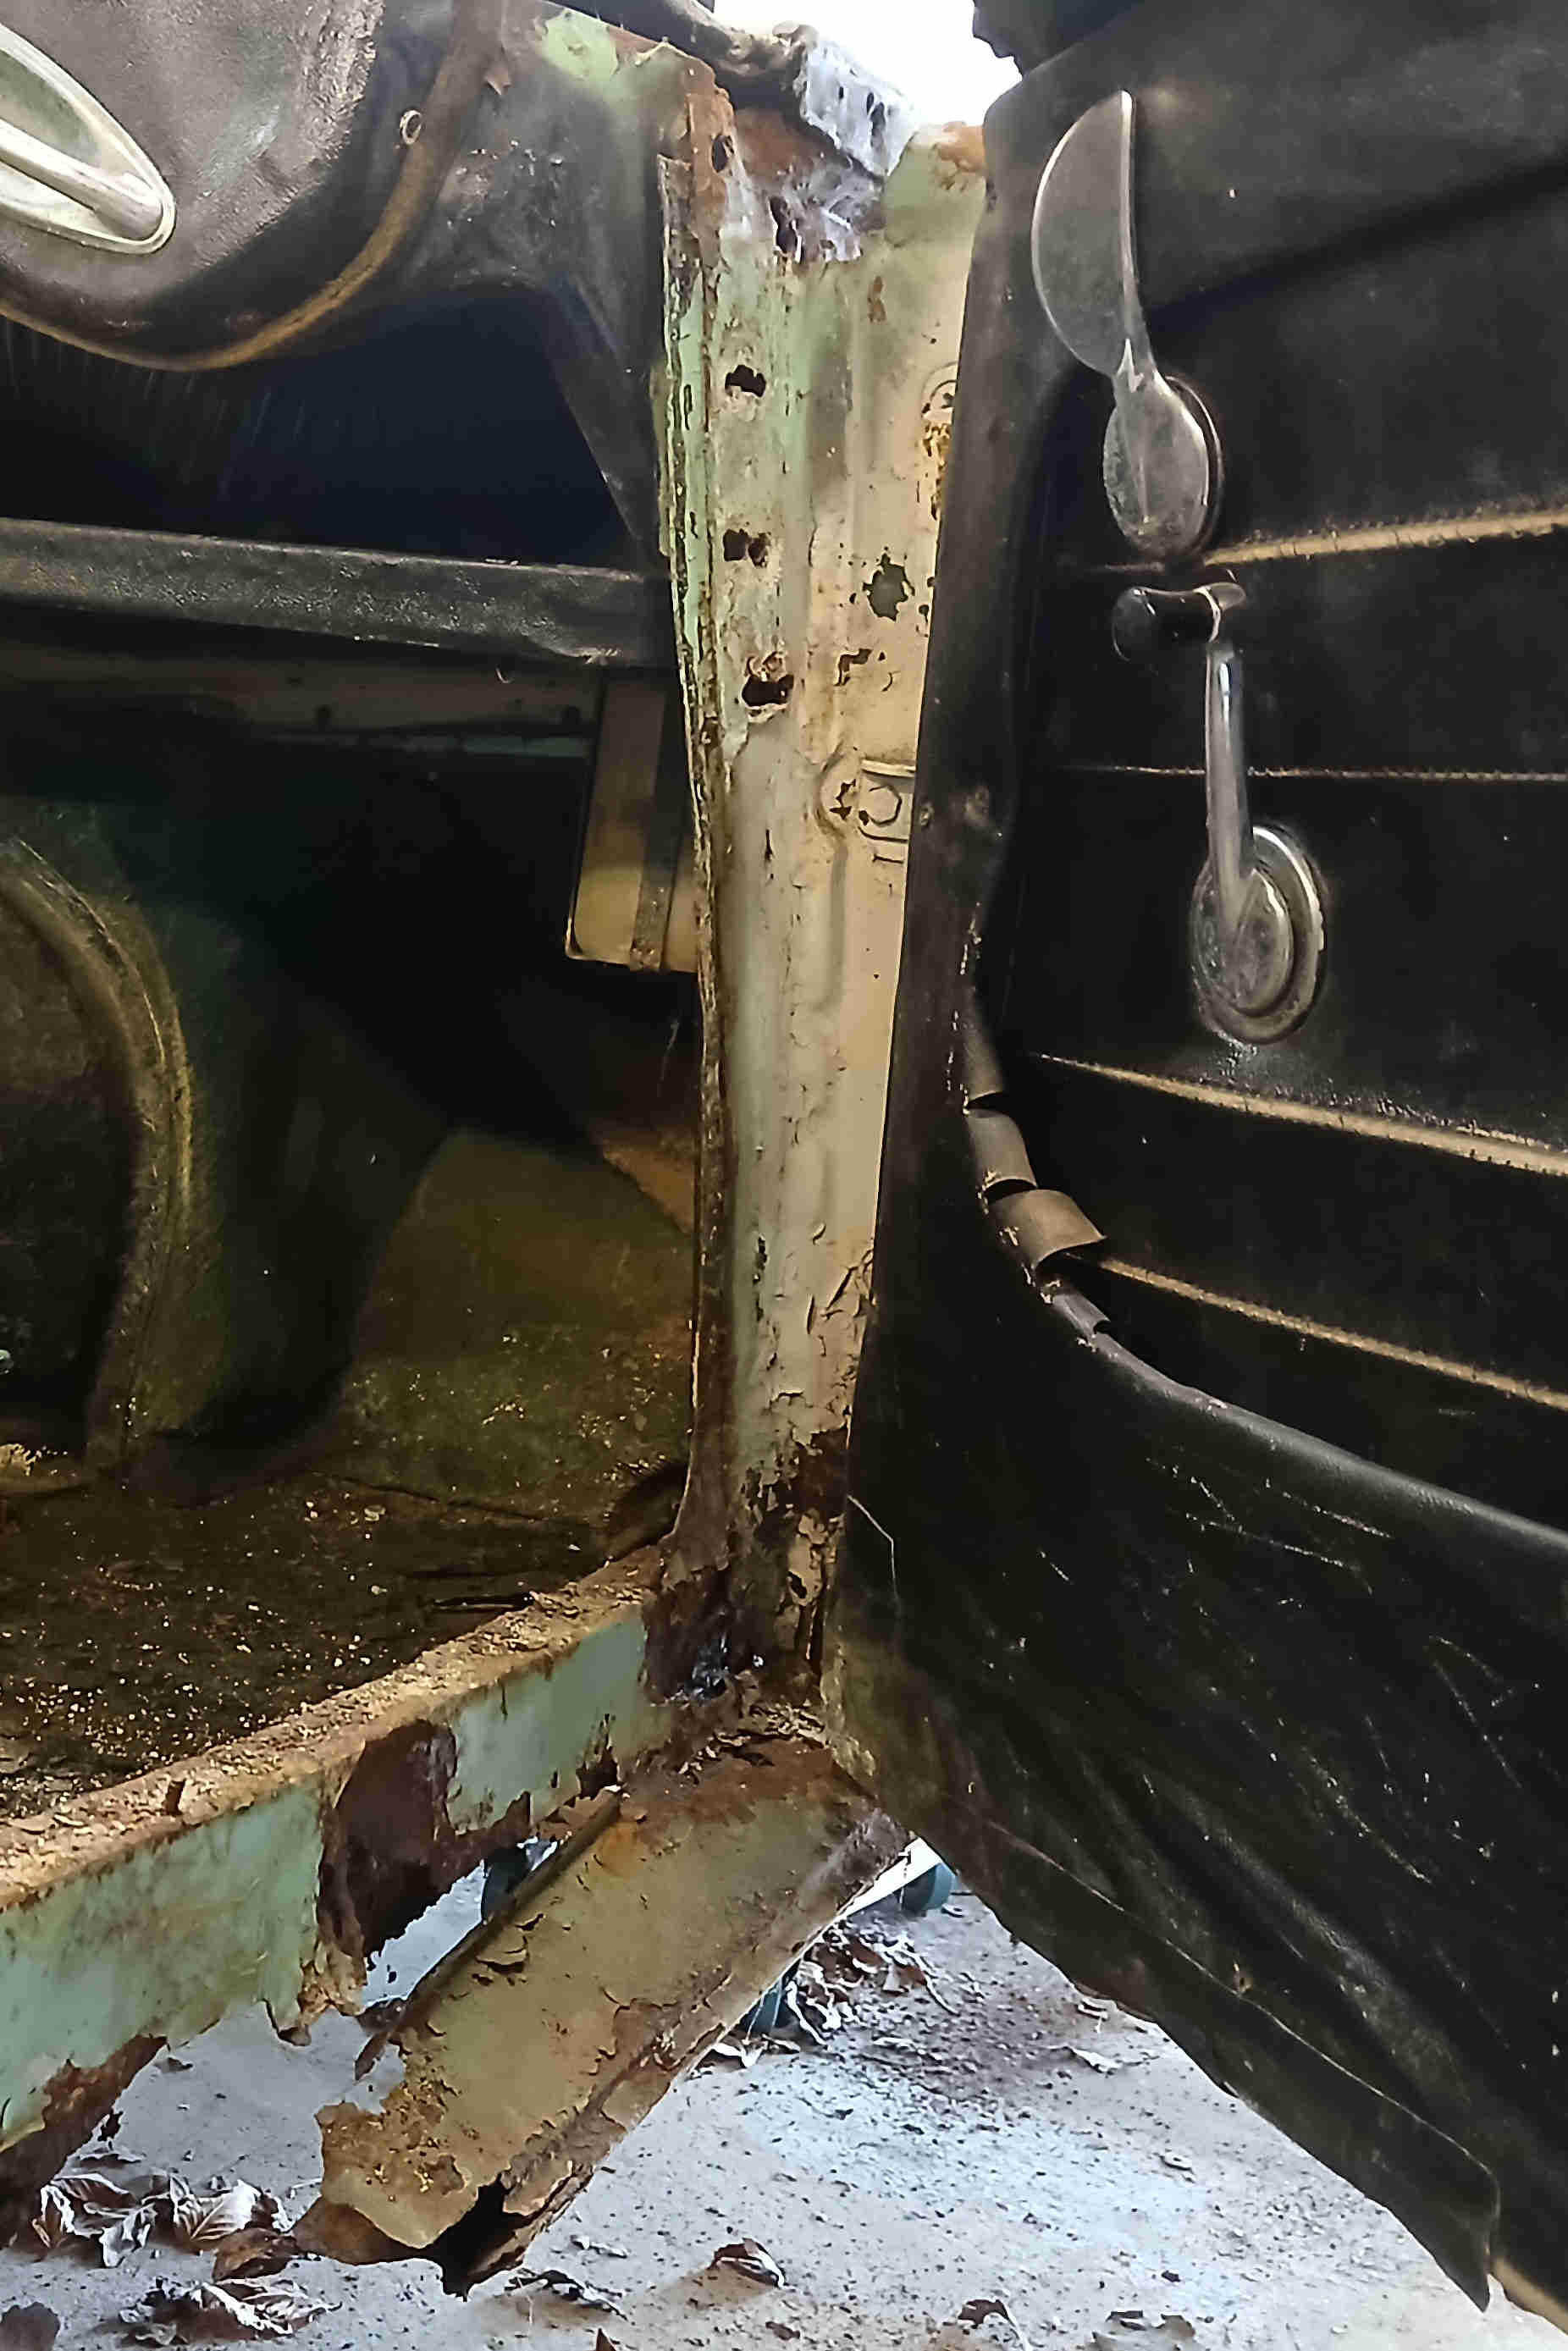
The front of the left hand sill was still in tact - rusty but still connected. The right hand side looked even worse. Having learnt the grinder trick it came off relatively easier but what lay underneath was horrible.
Click thumbnail
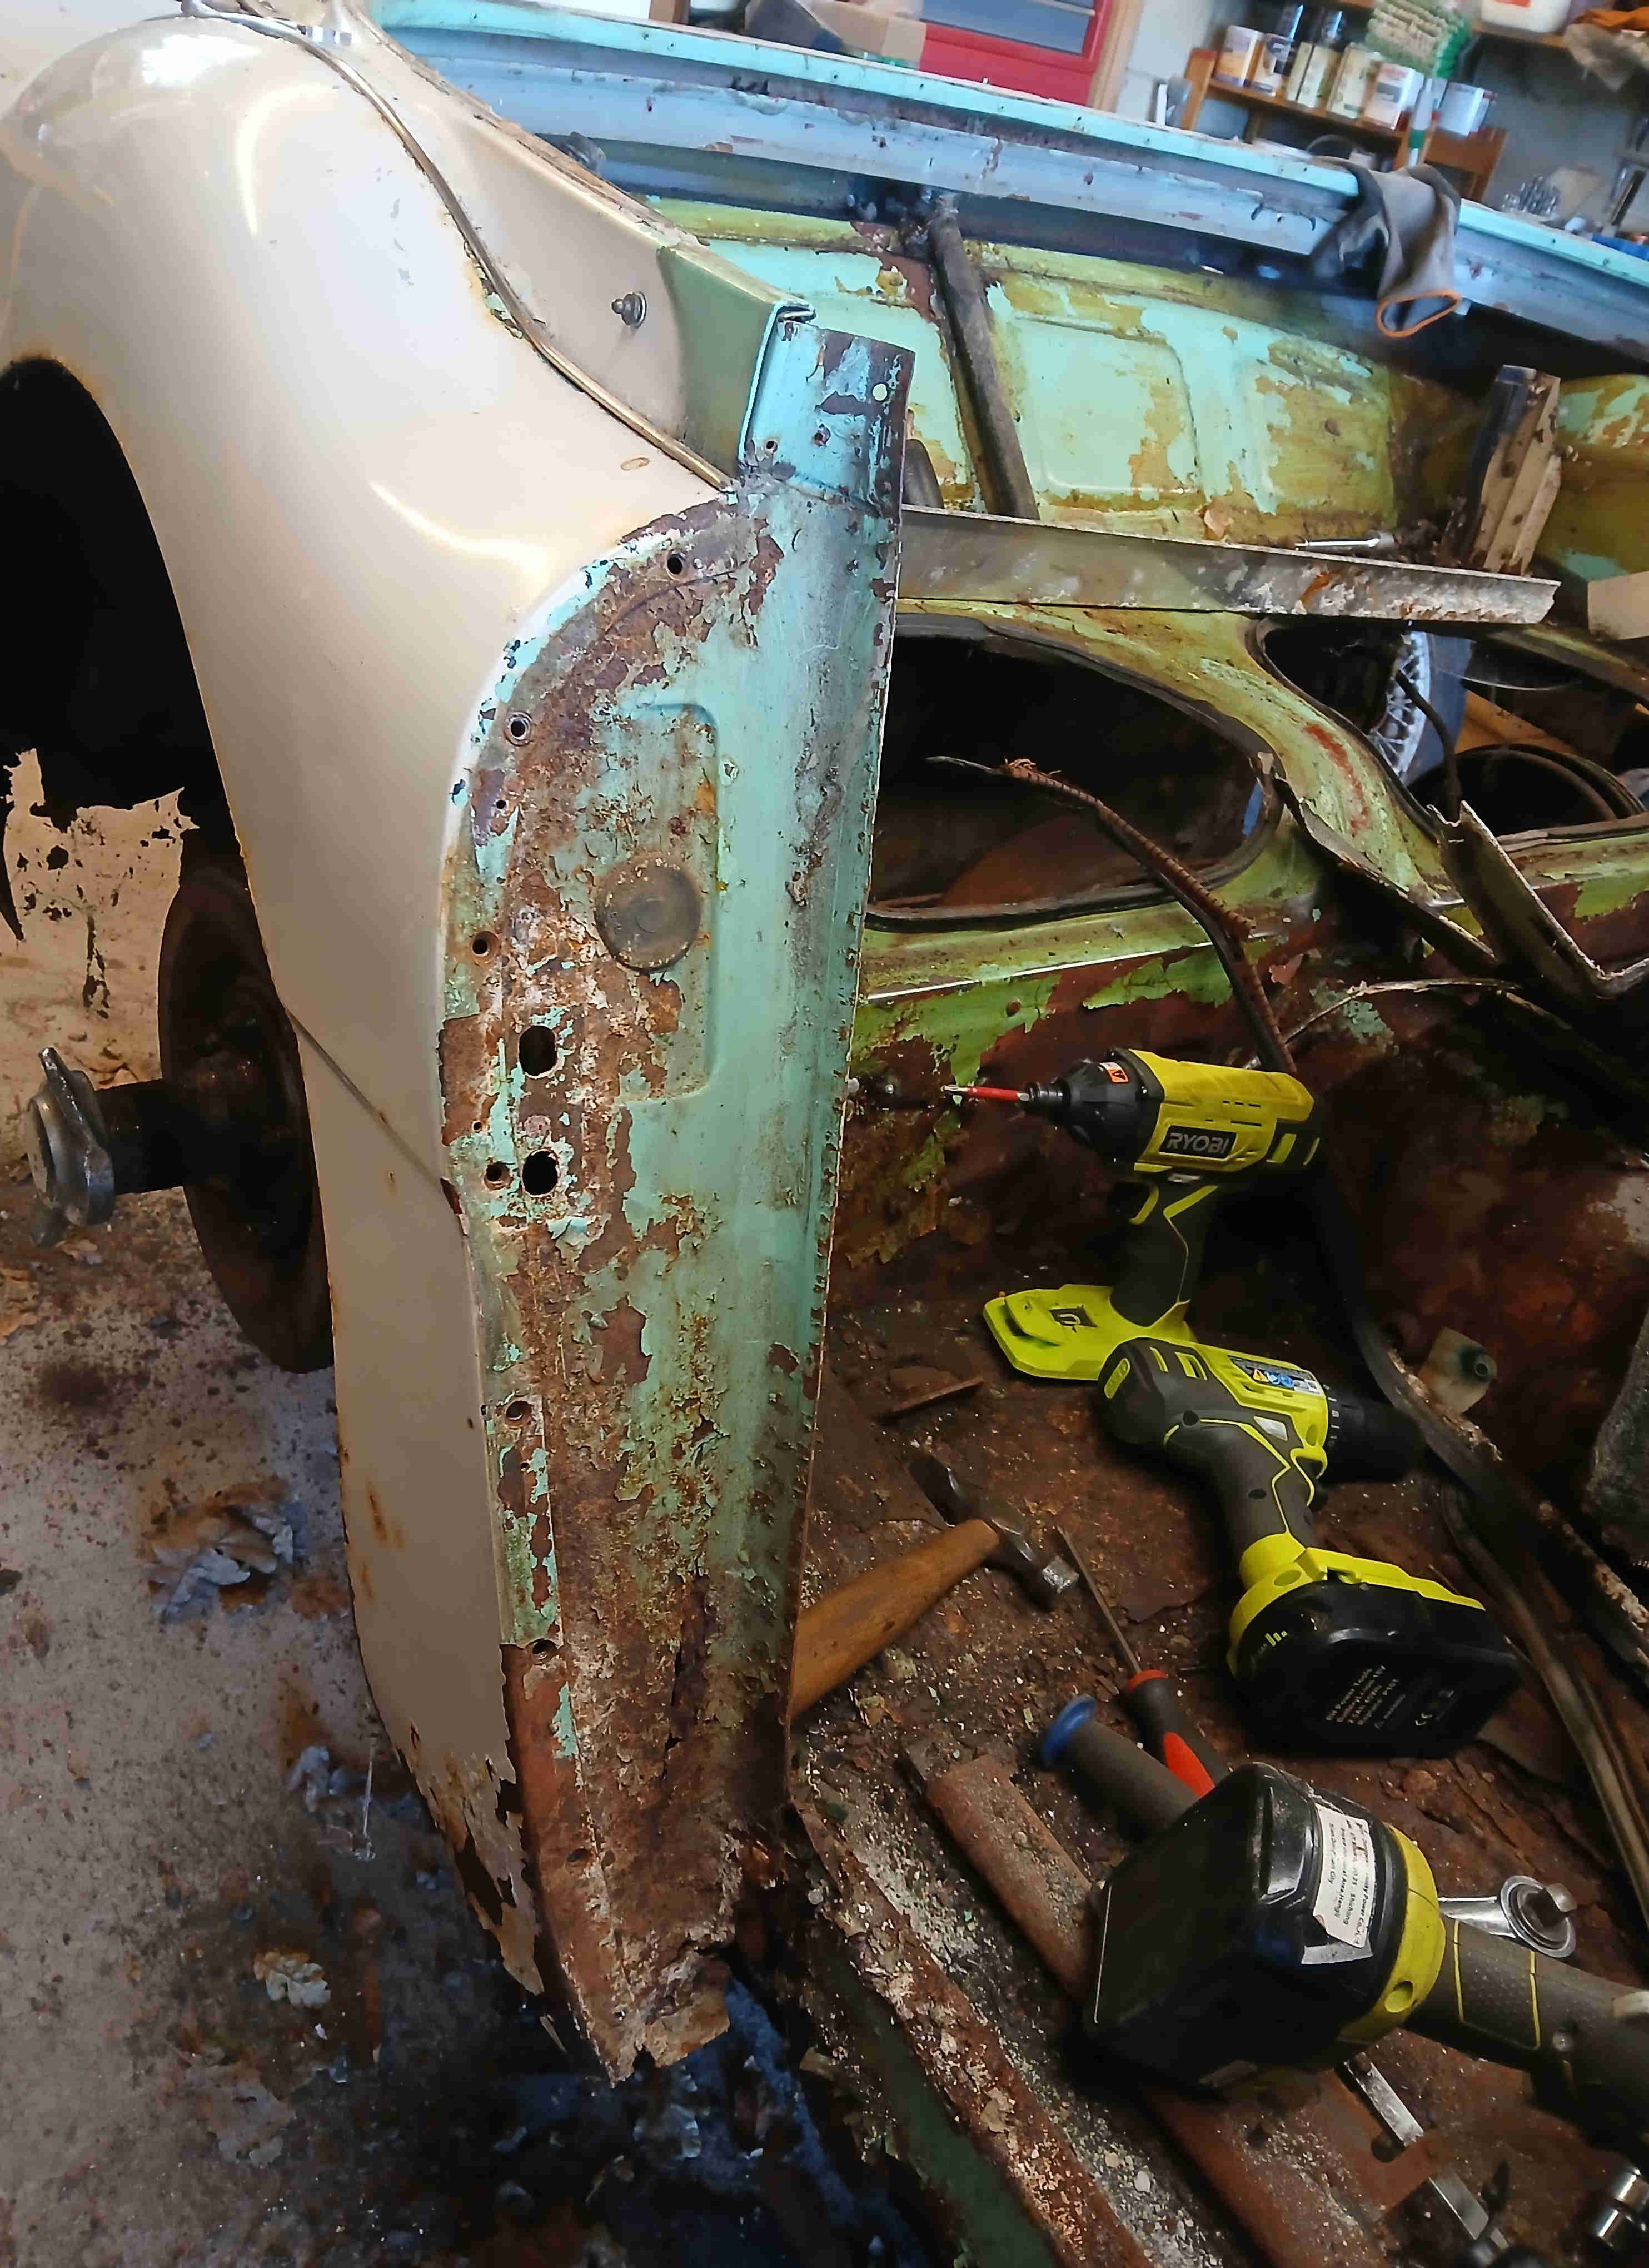
This revealed there had been some damage to this side which had been repaired - not too subtly. The A pillar had been butchered as had the hinge pillar reinforcement panel that was now was very crudely welded in over the pillar instead of being tucked in. Instead of the wing being fixed at the back end by nice screws it was welded in with a plate. The holes for the screen mount had been elongated to make it fit. A bit of a mess that will need to be sorted properly.
Click thumbnail
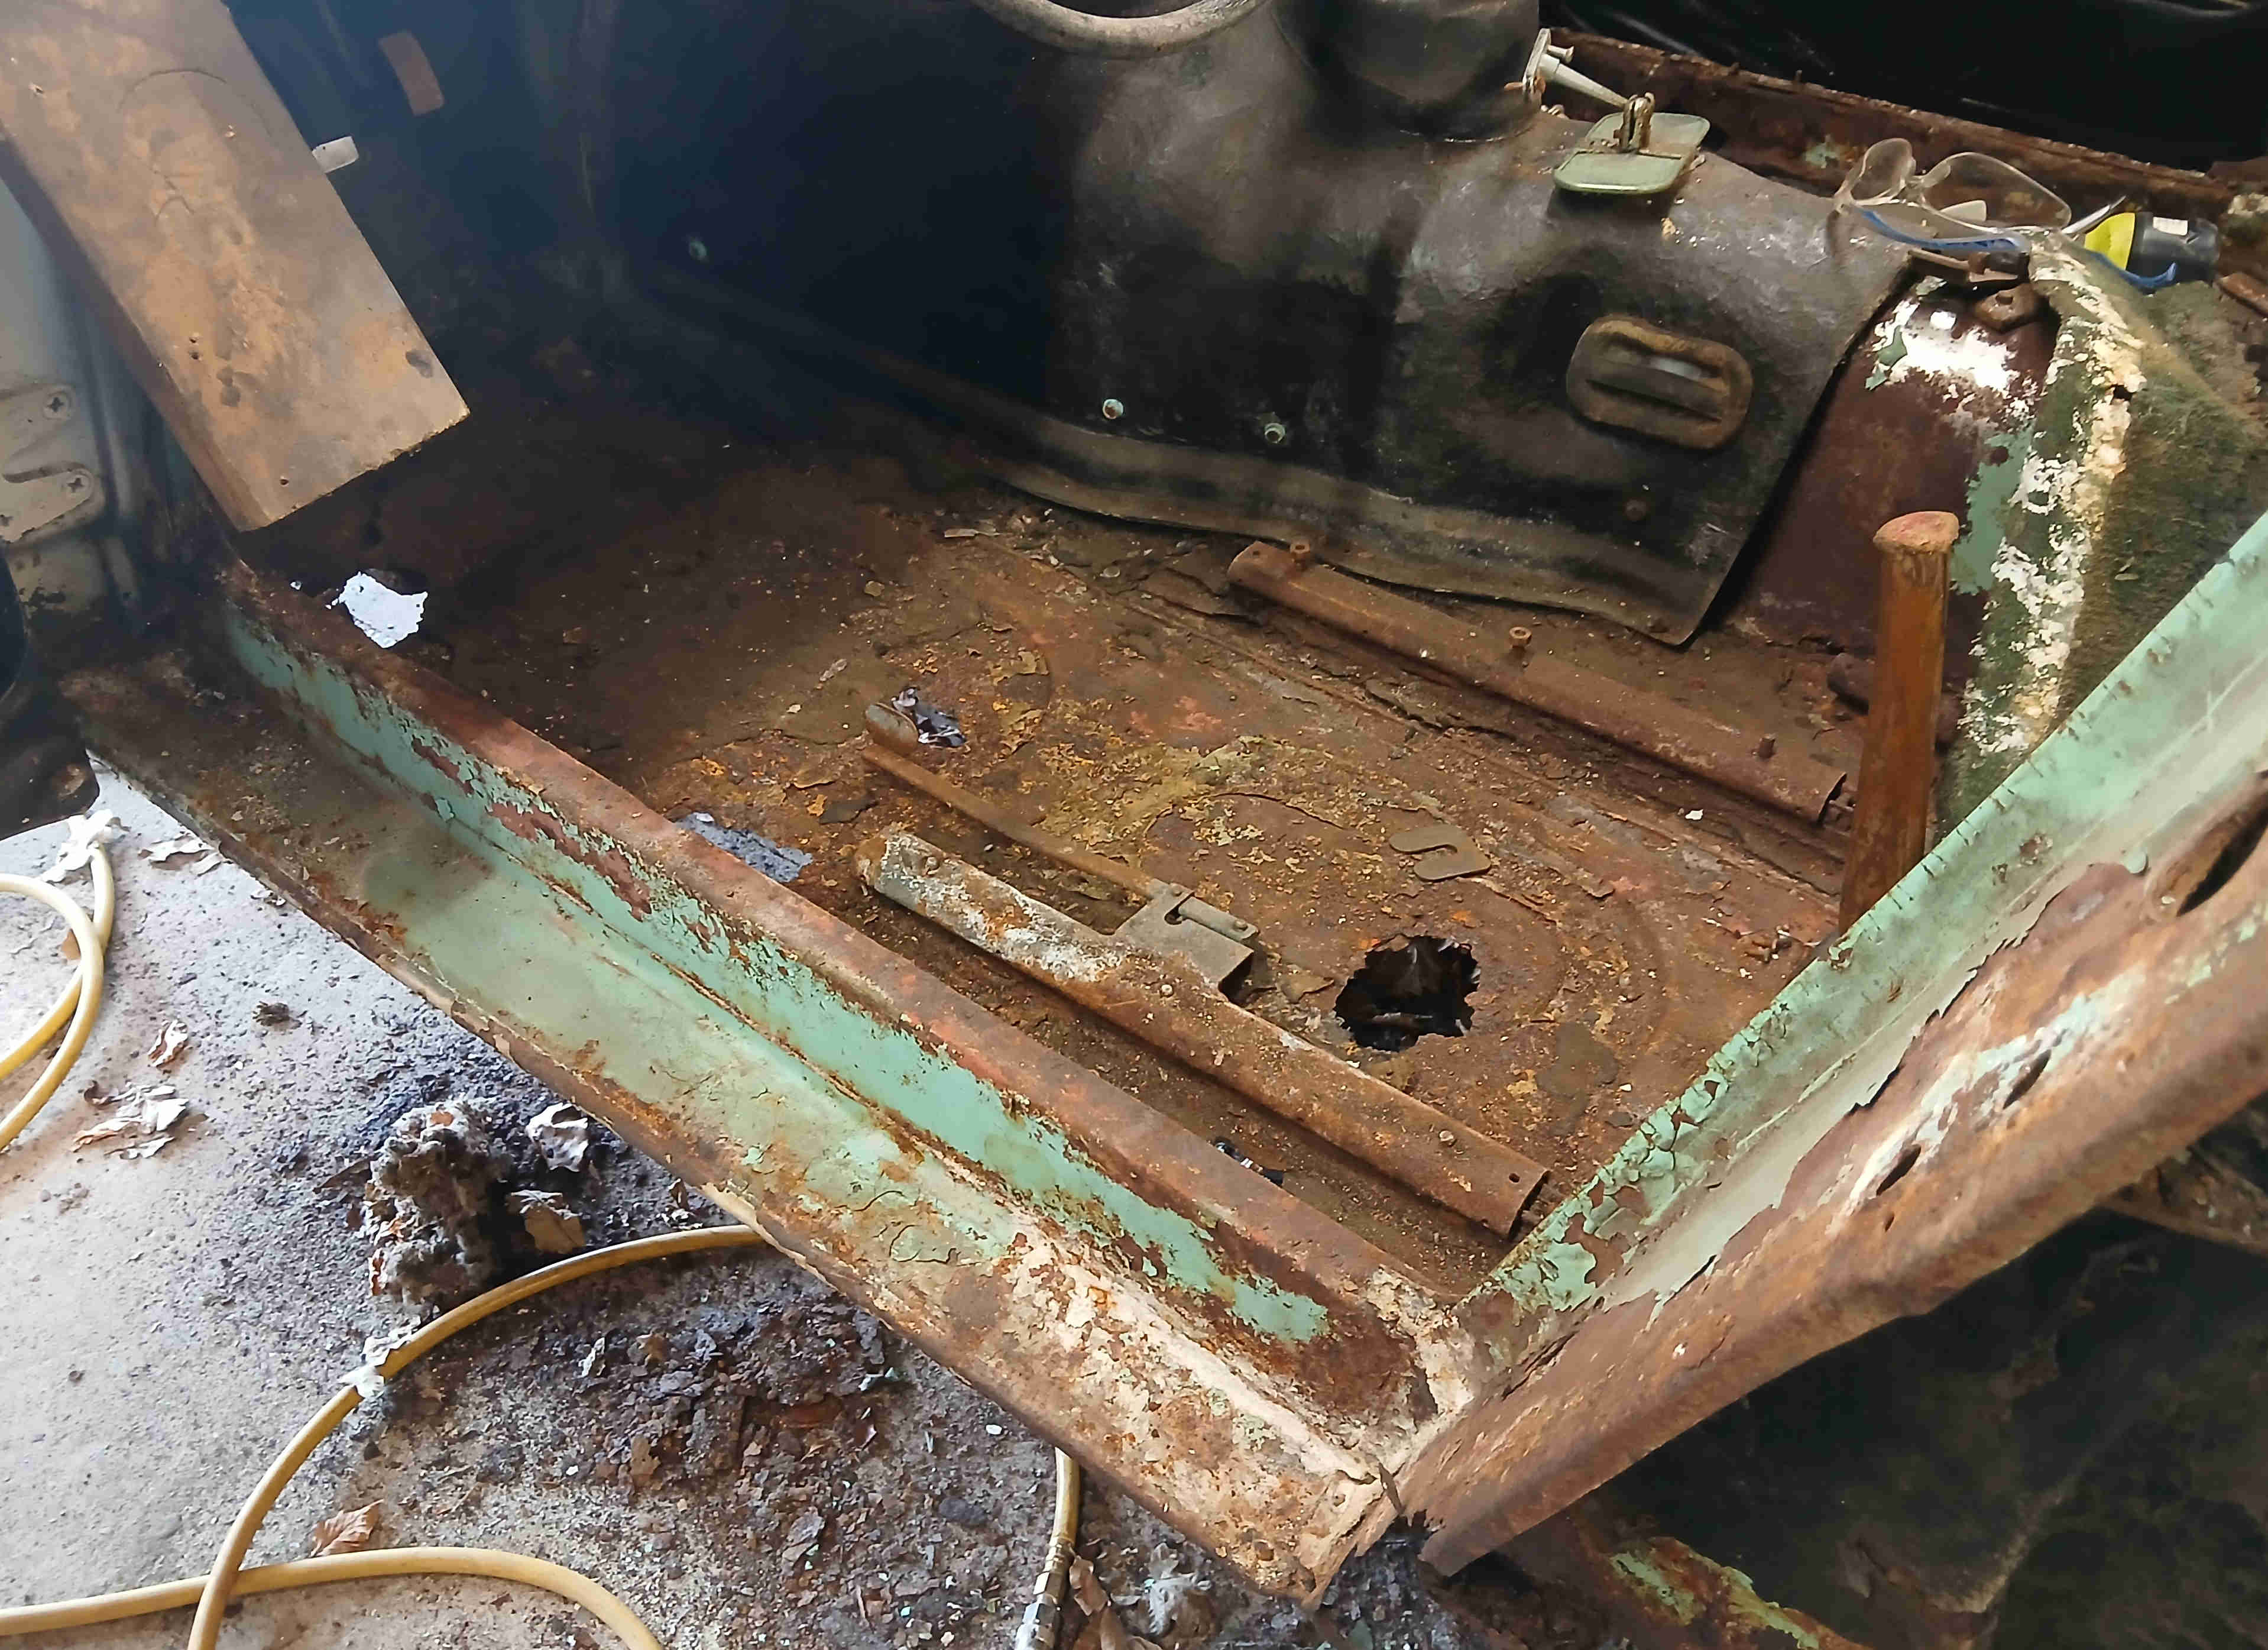
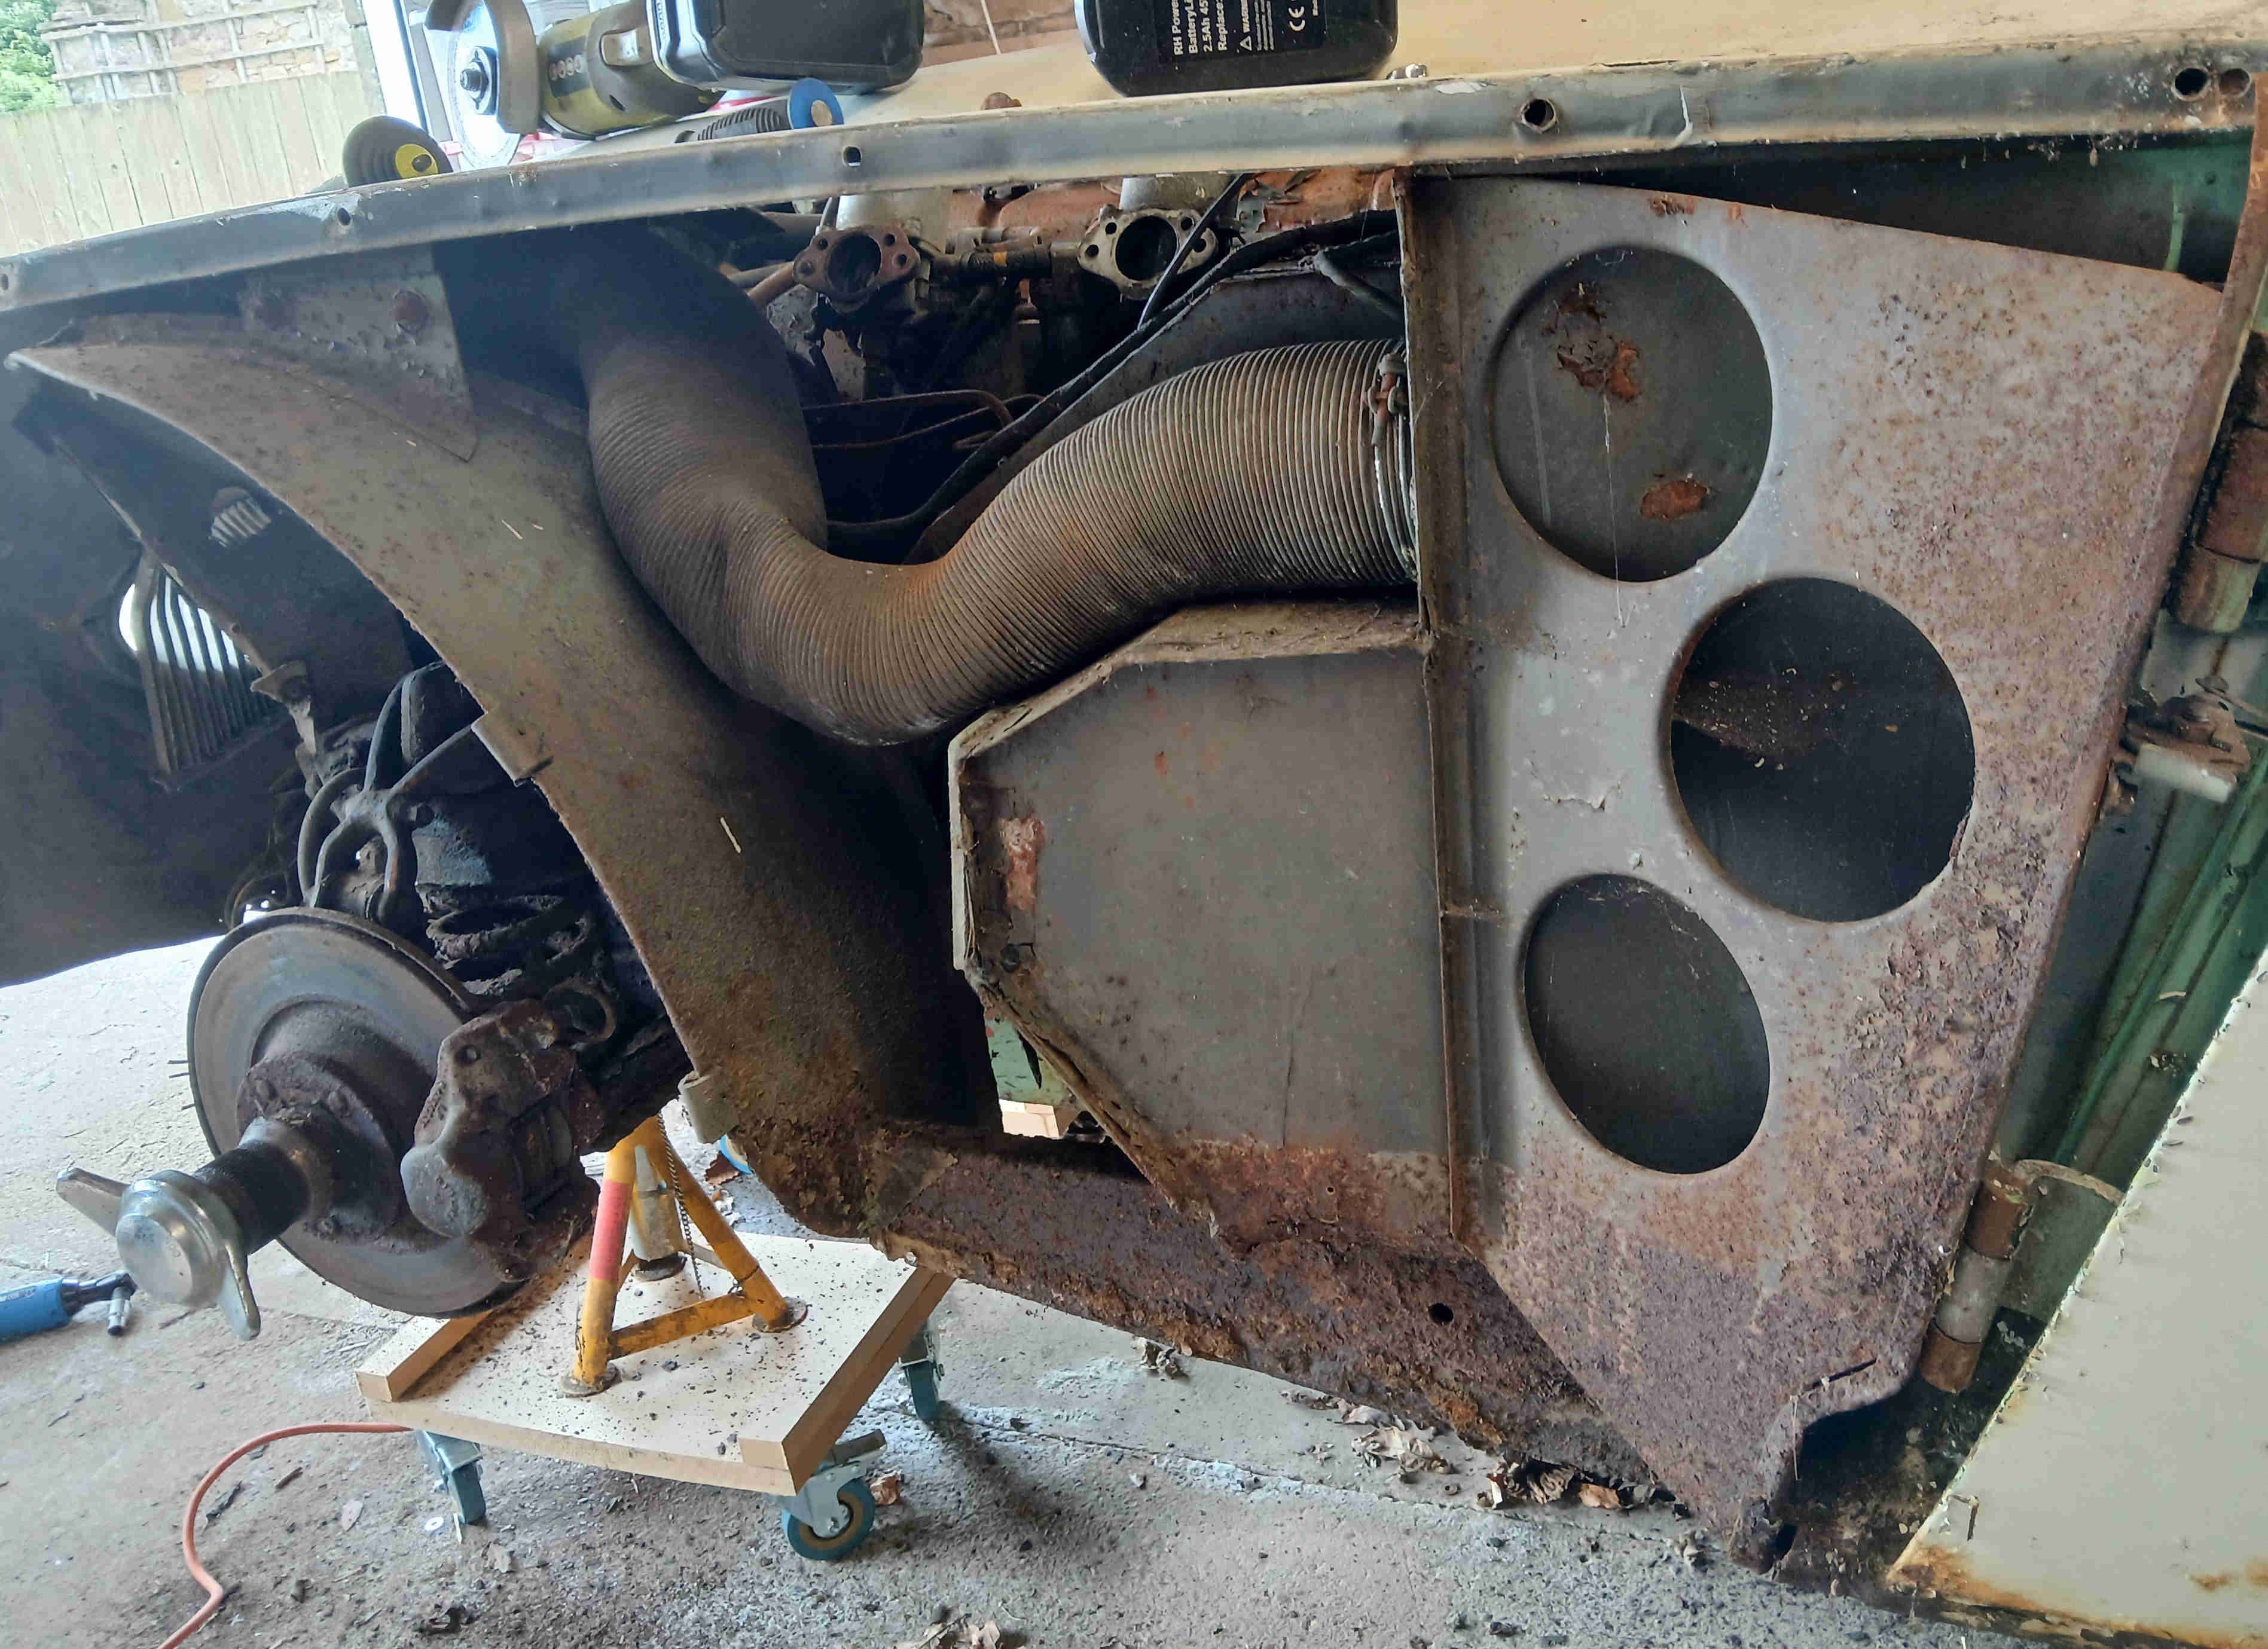
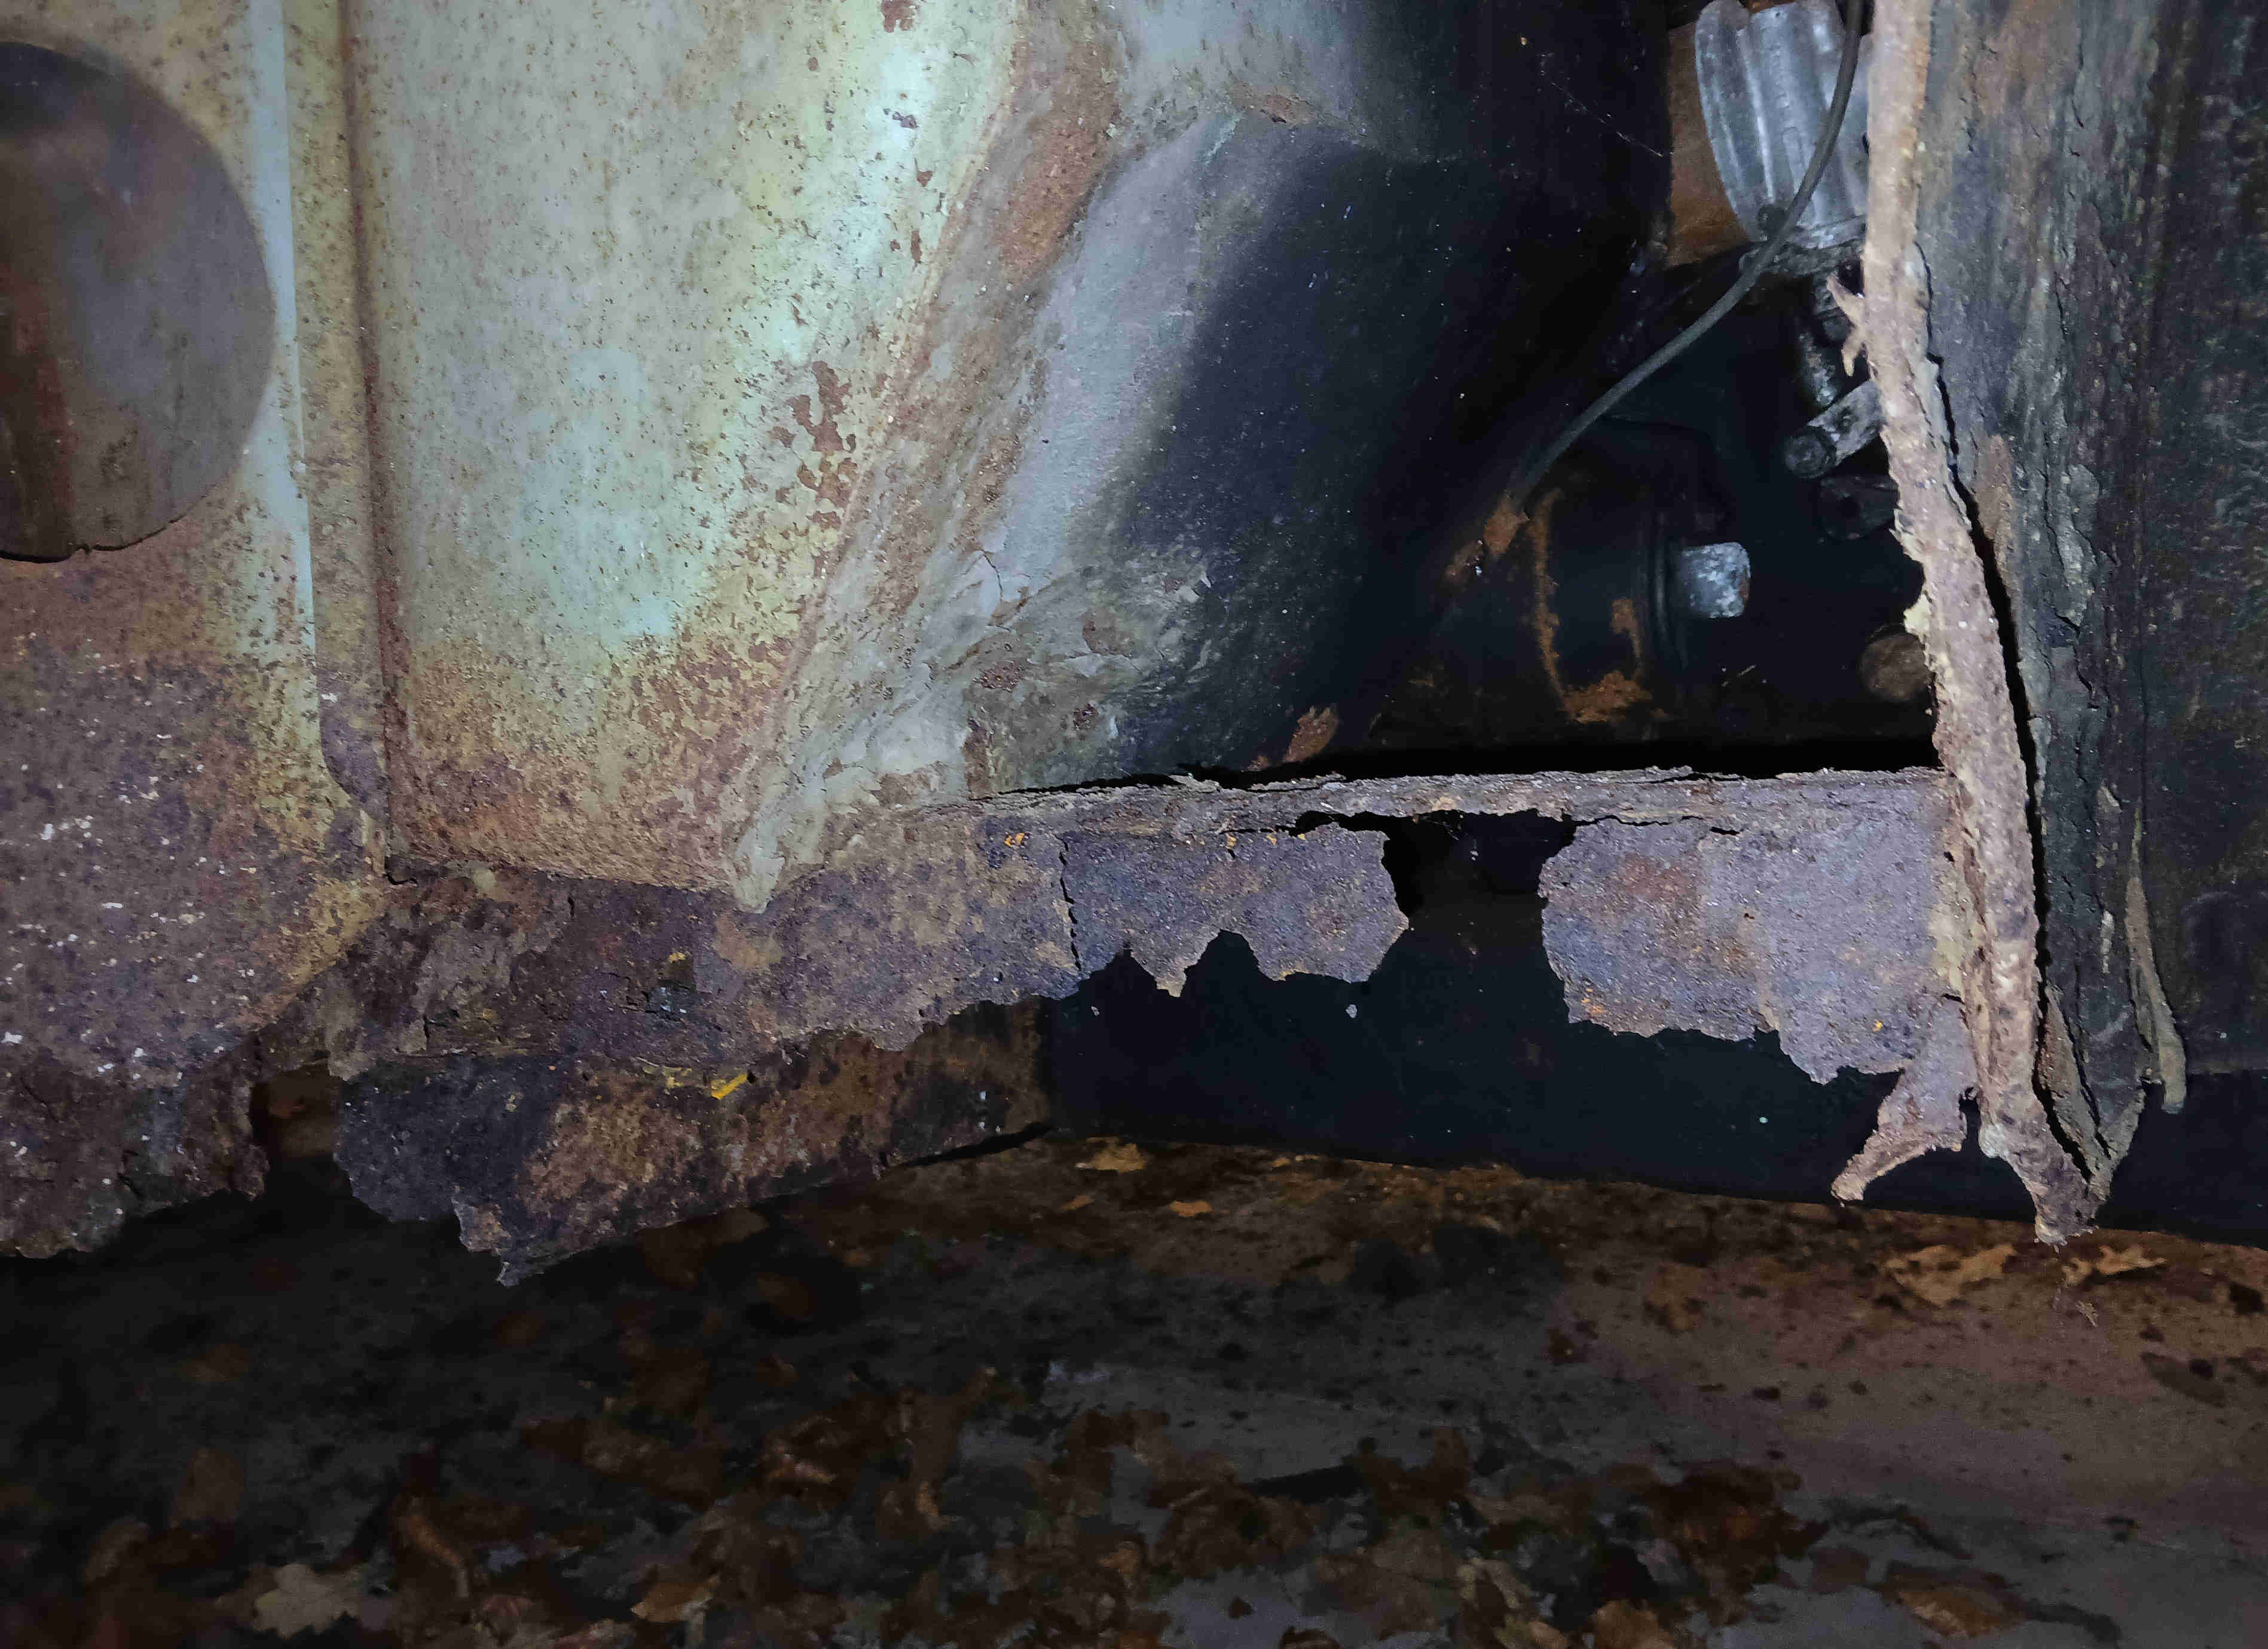
On to the rear shroud. This made from aluminium so is rivetted on with a combination of pop rivets and plain aluminium rivets. Just a case of drilling those out and off it comes. This revealed the true extent of the rot in the boot.
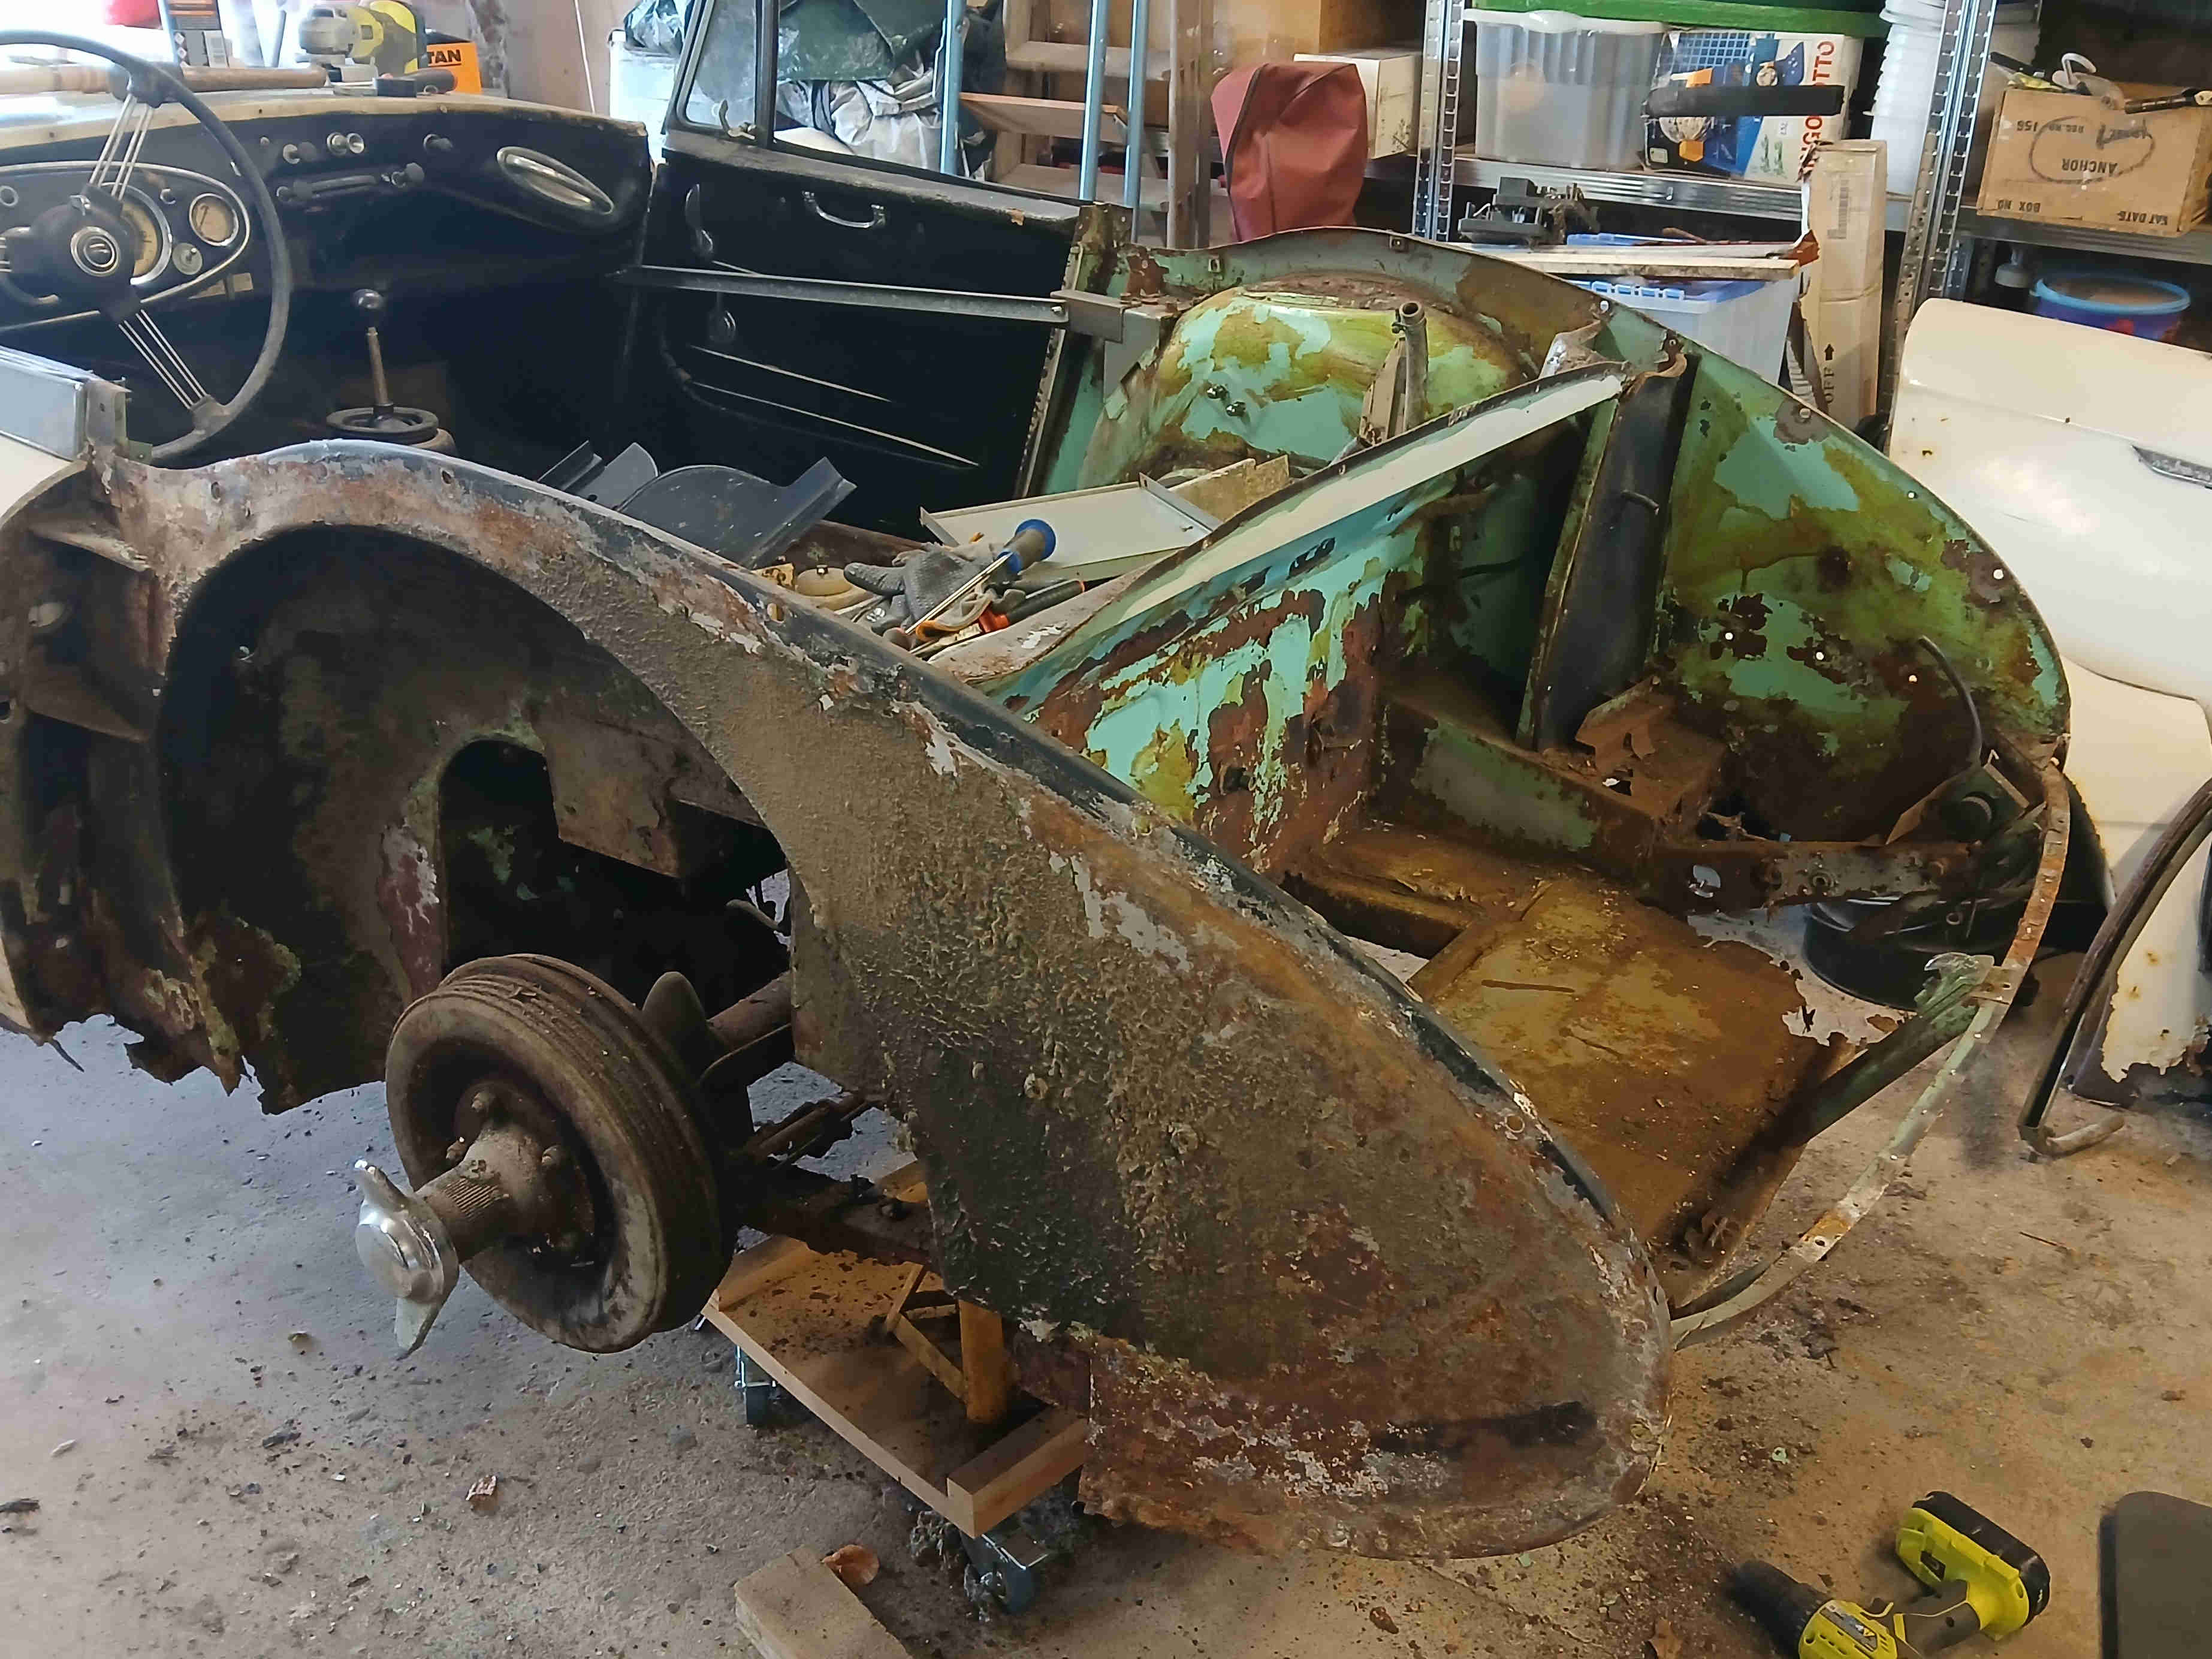
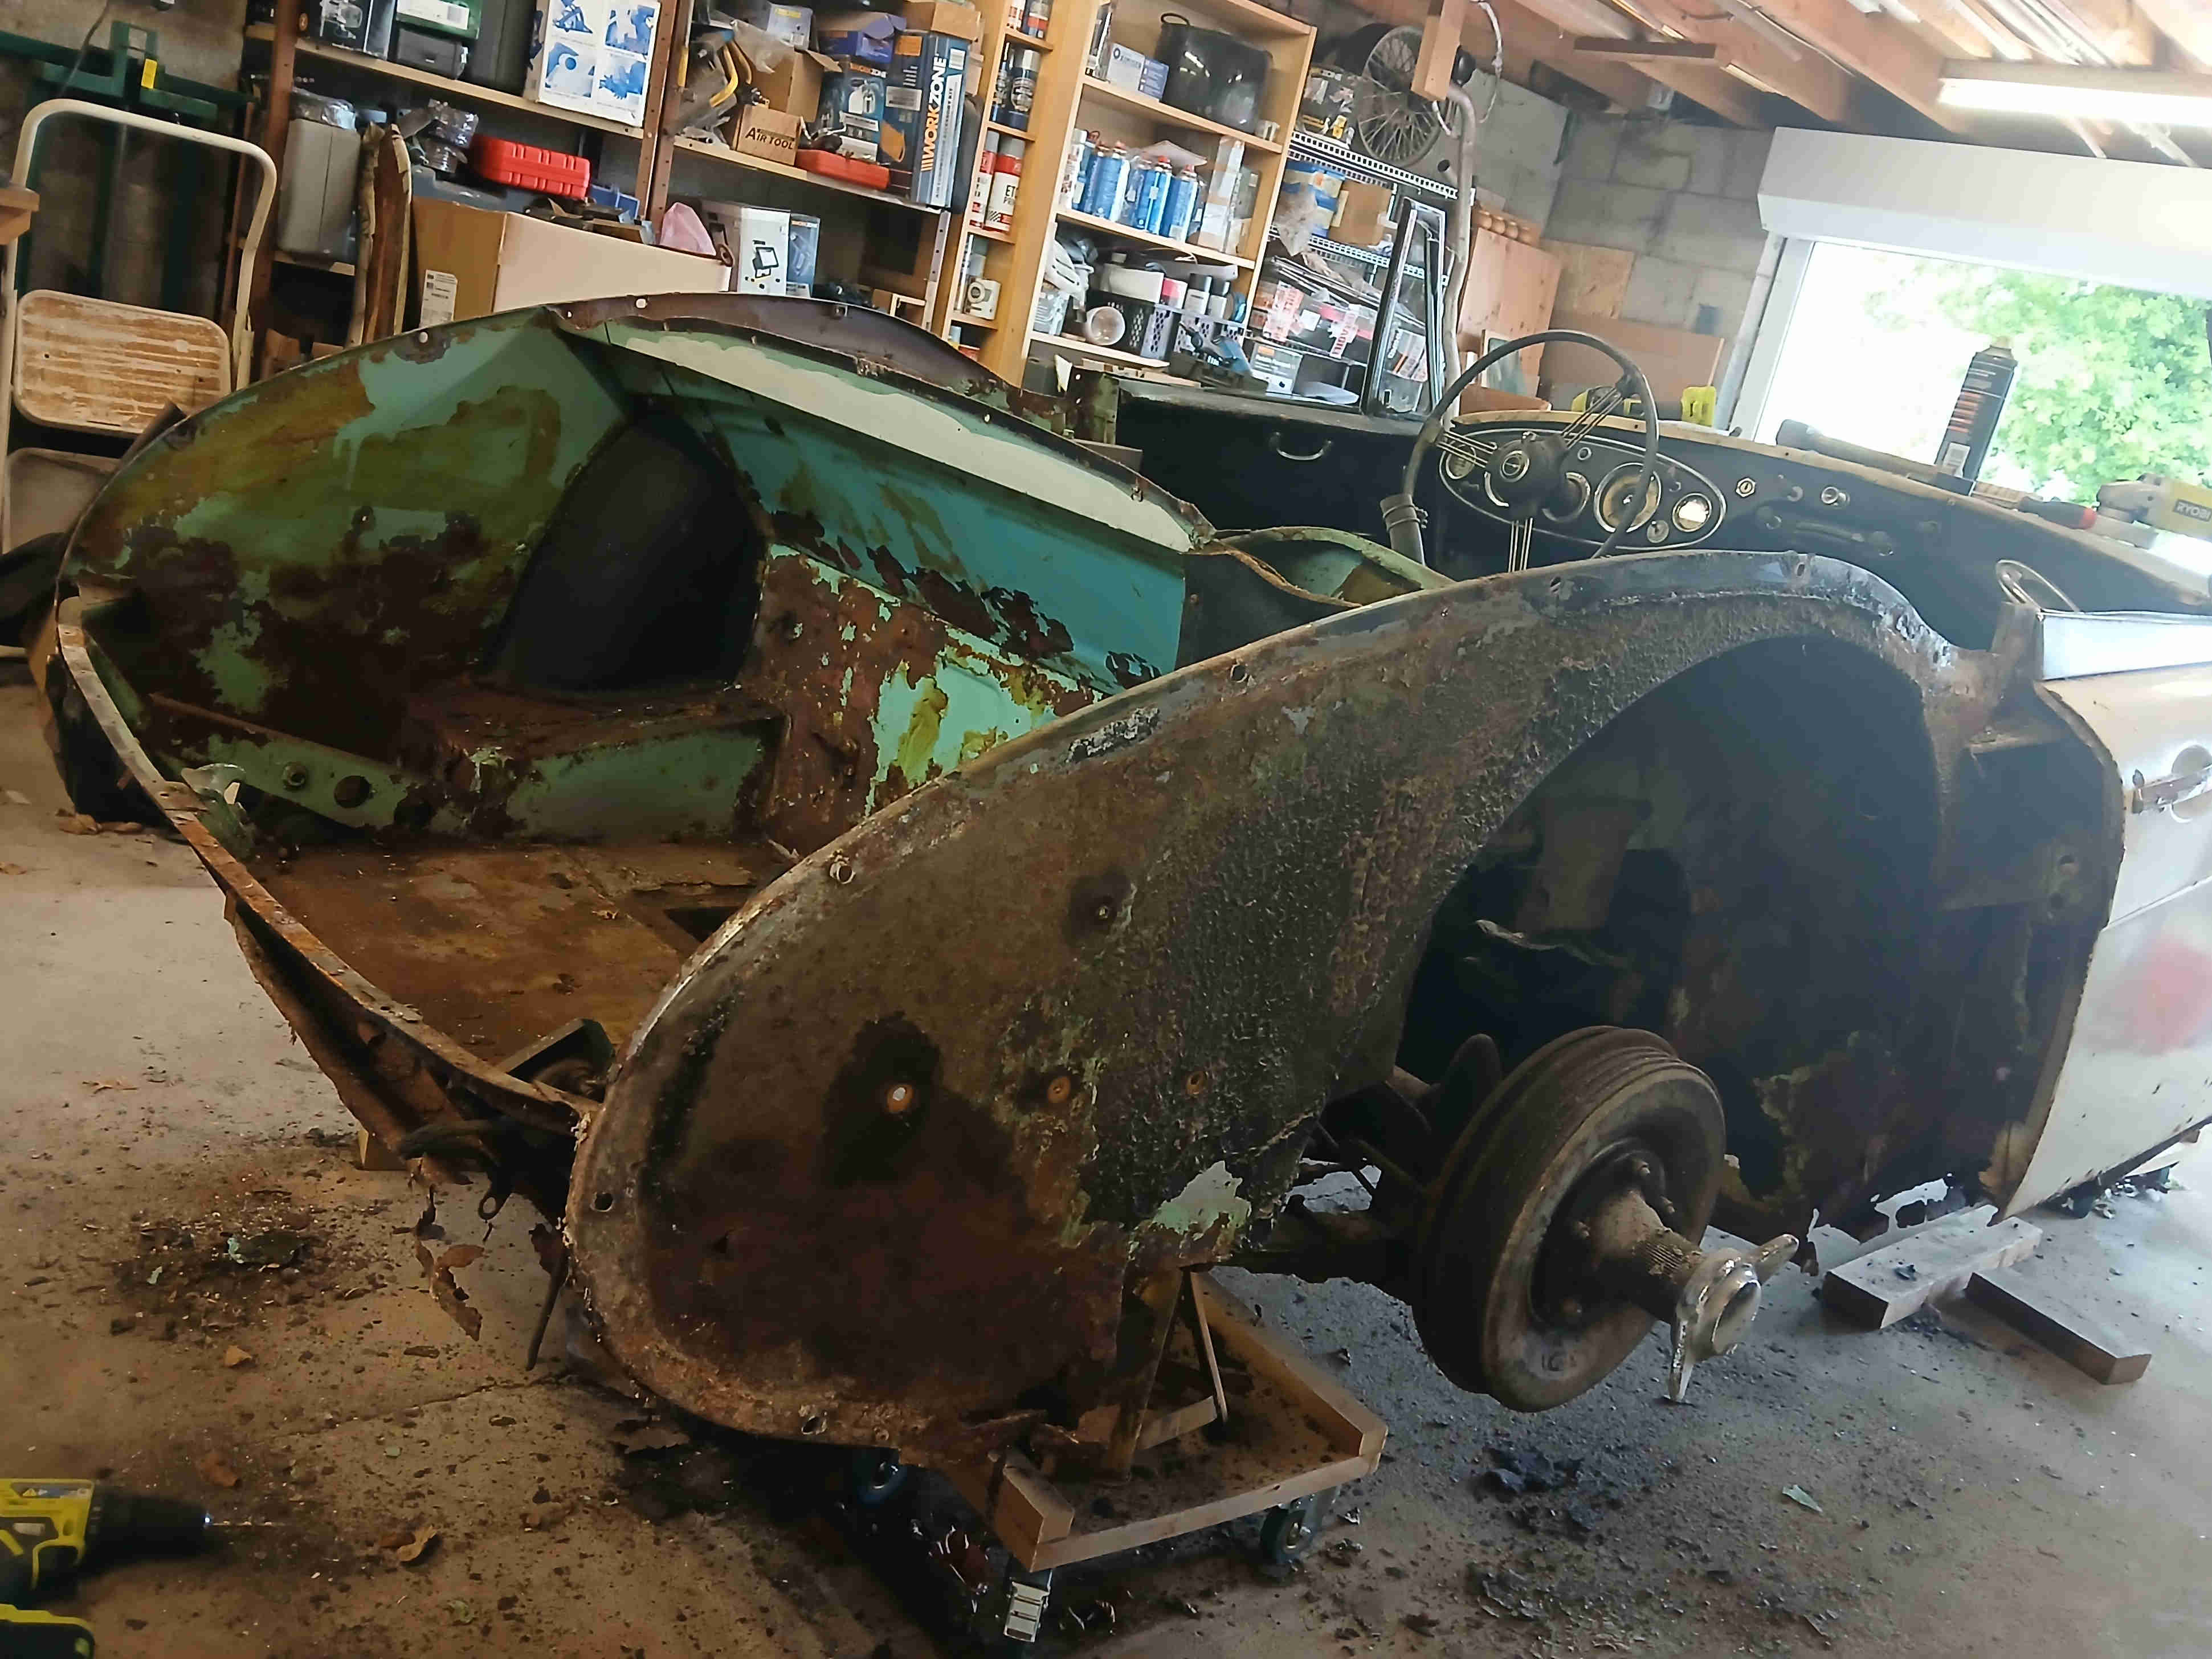
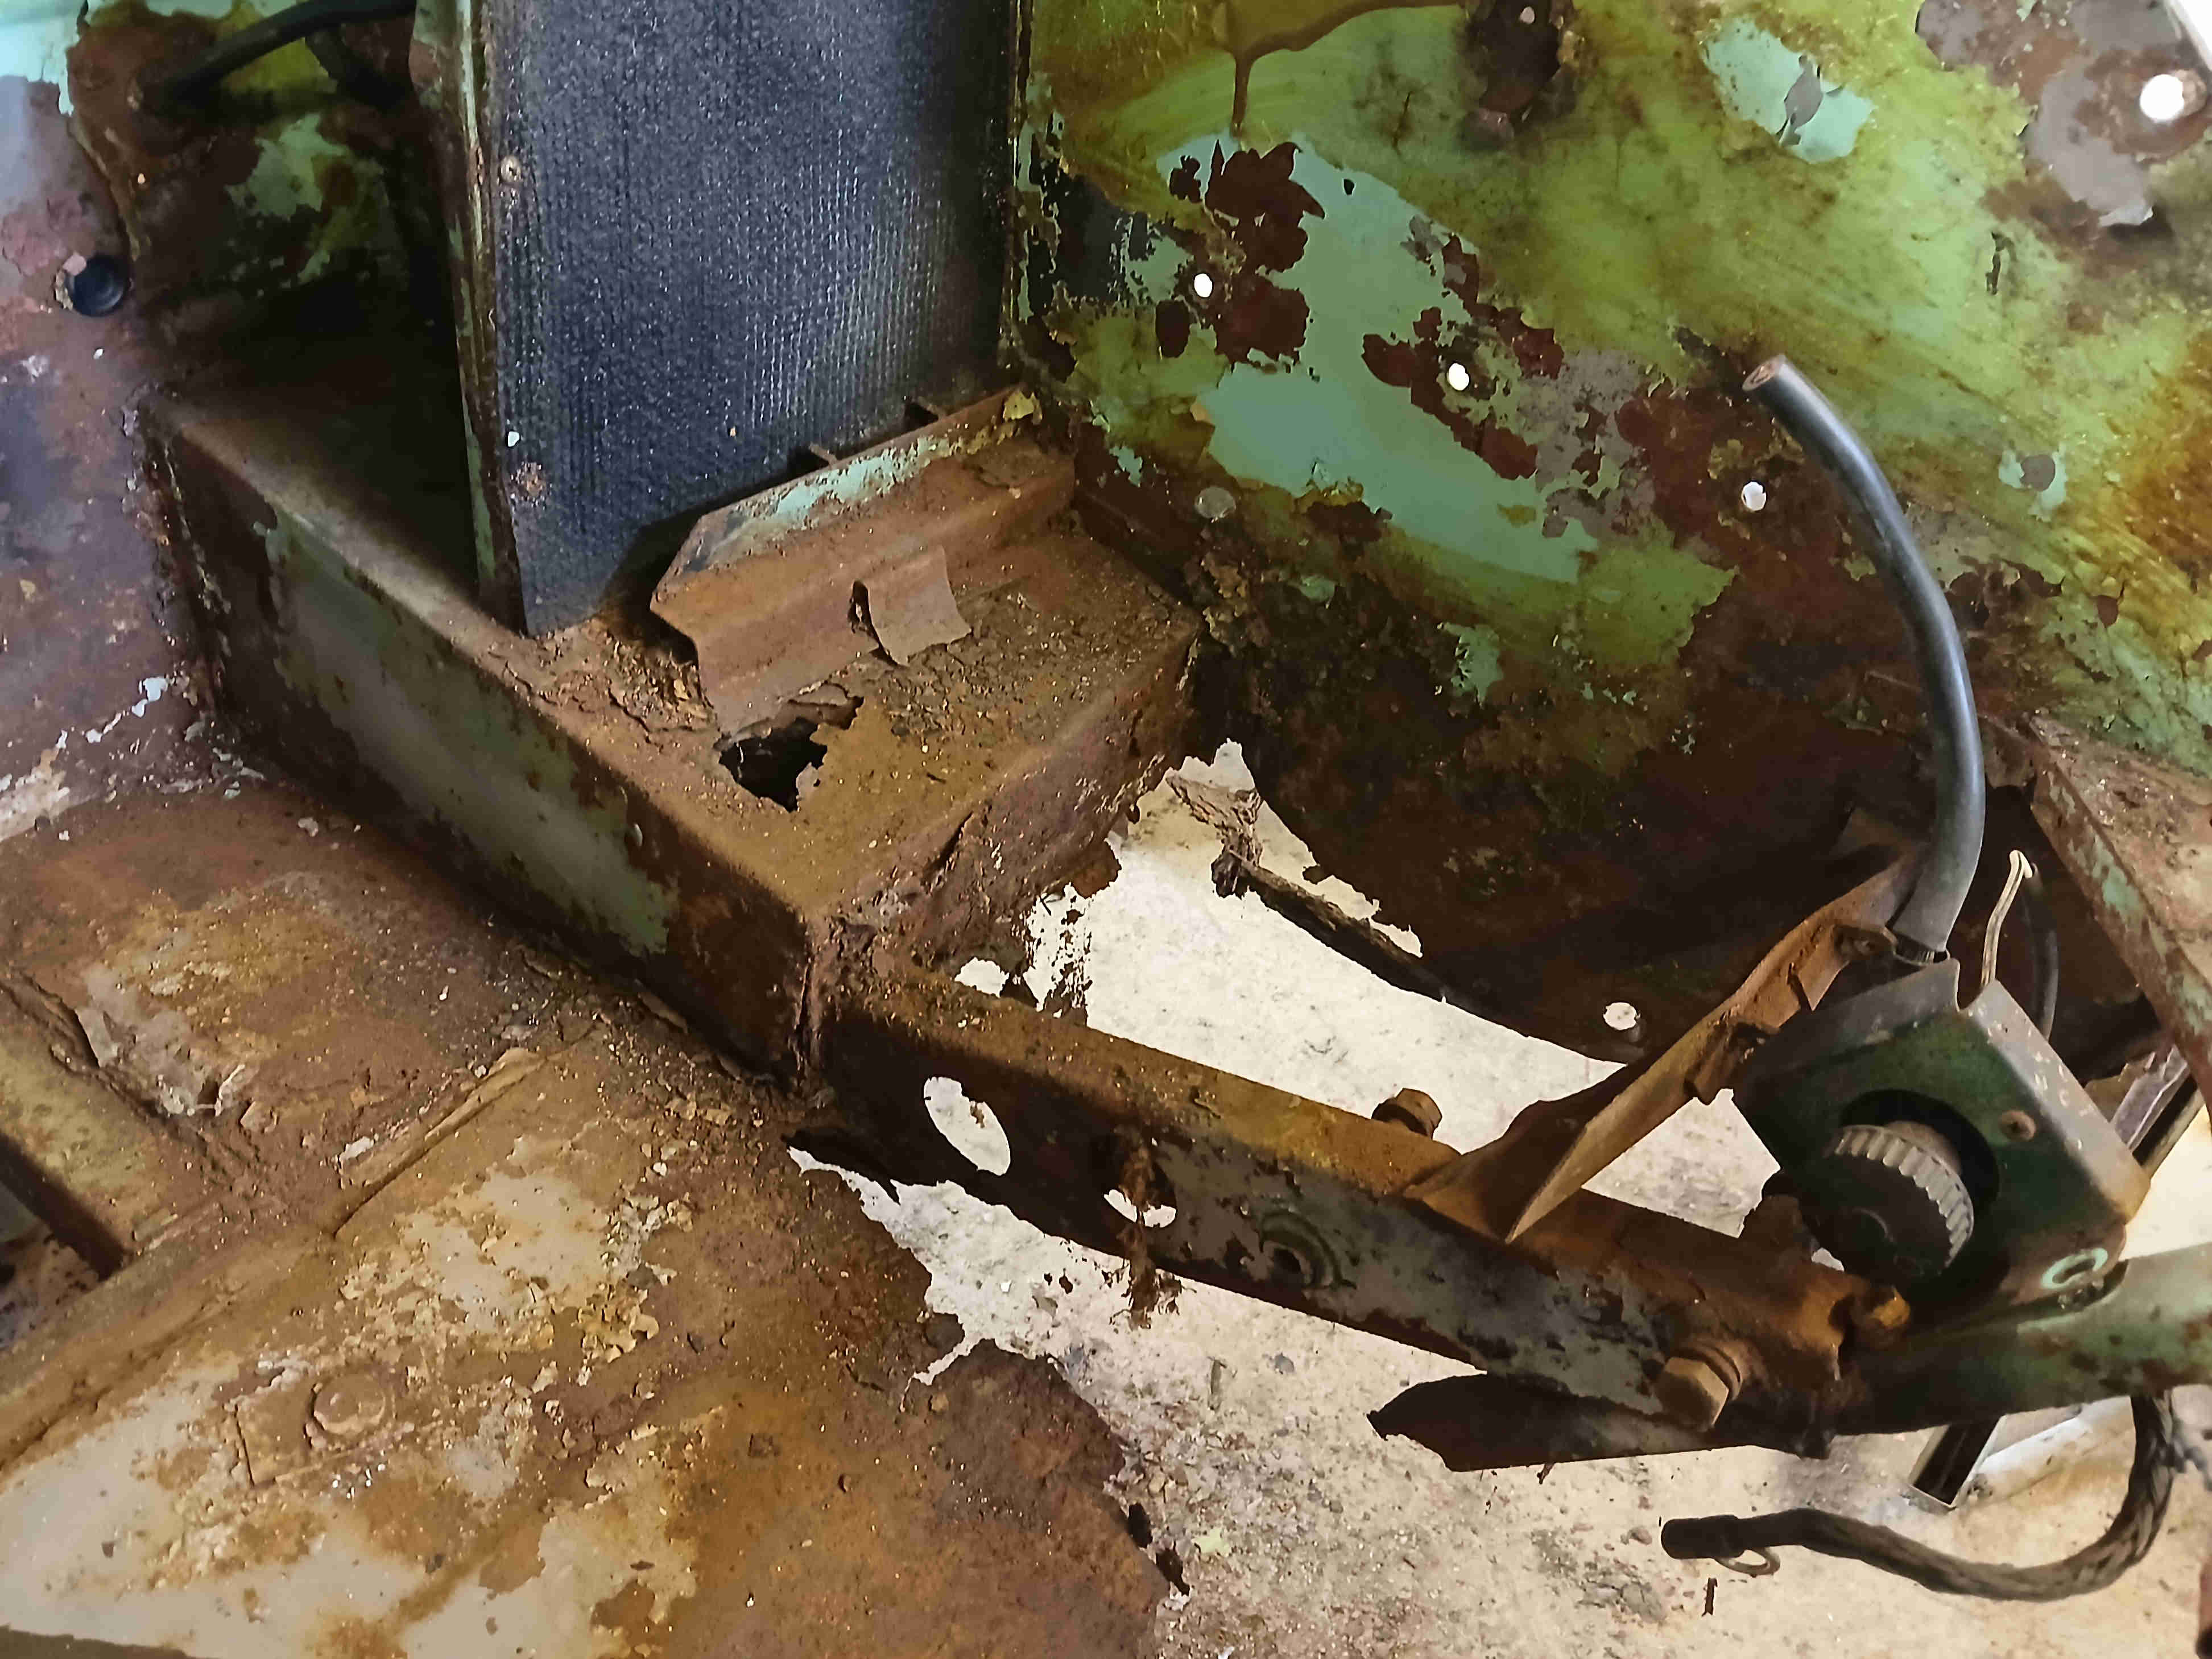

Click thumbnail
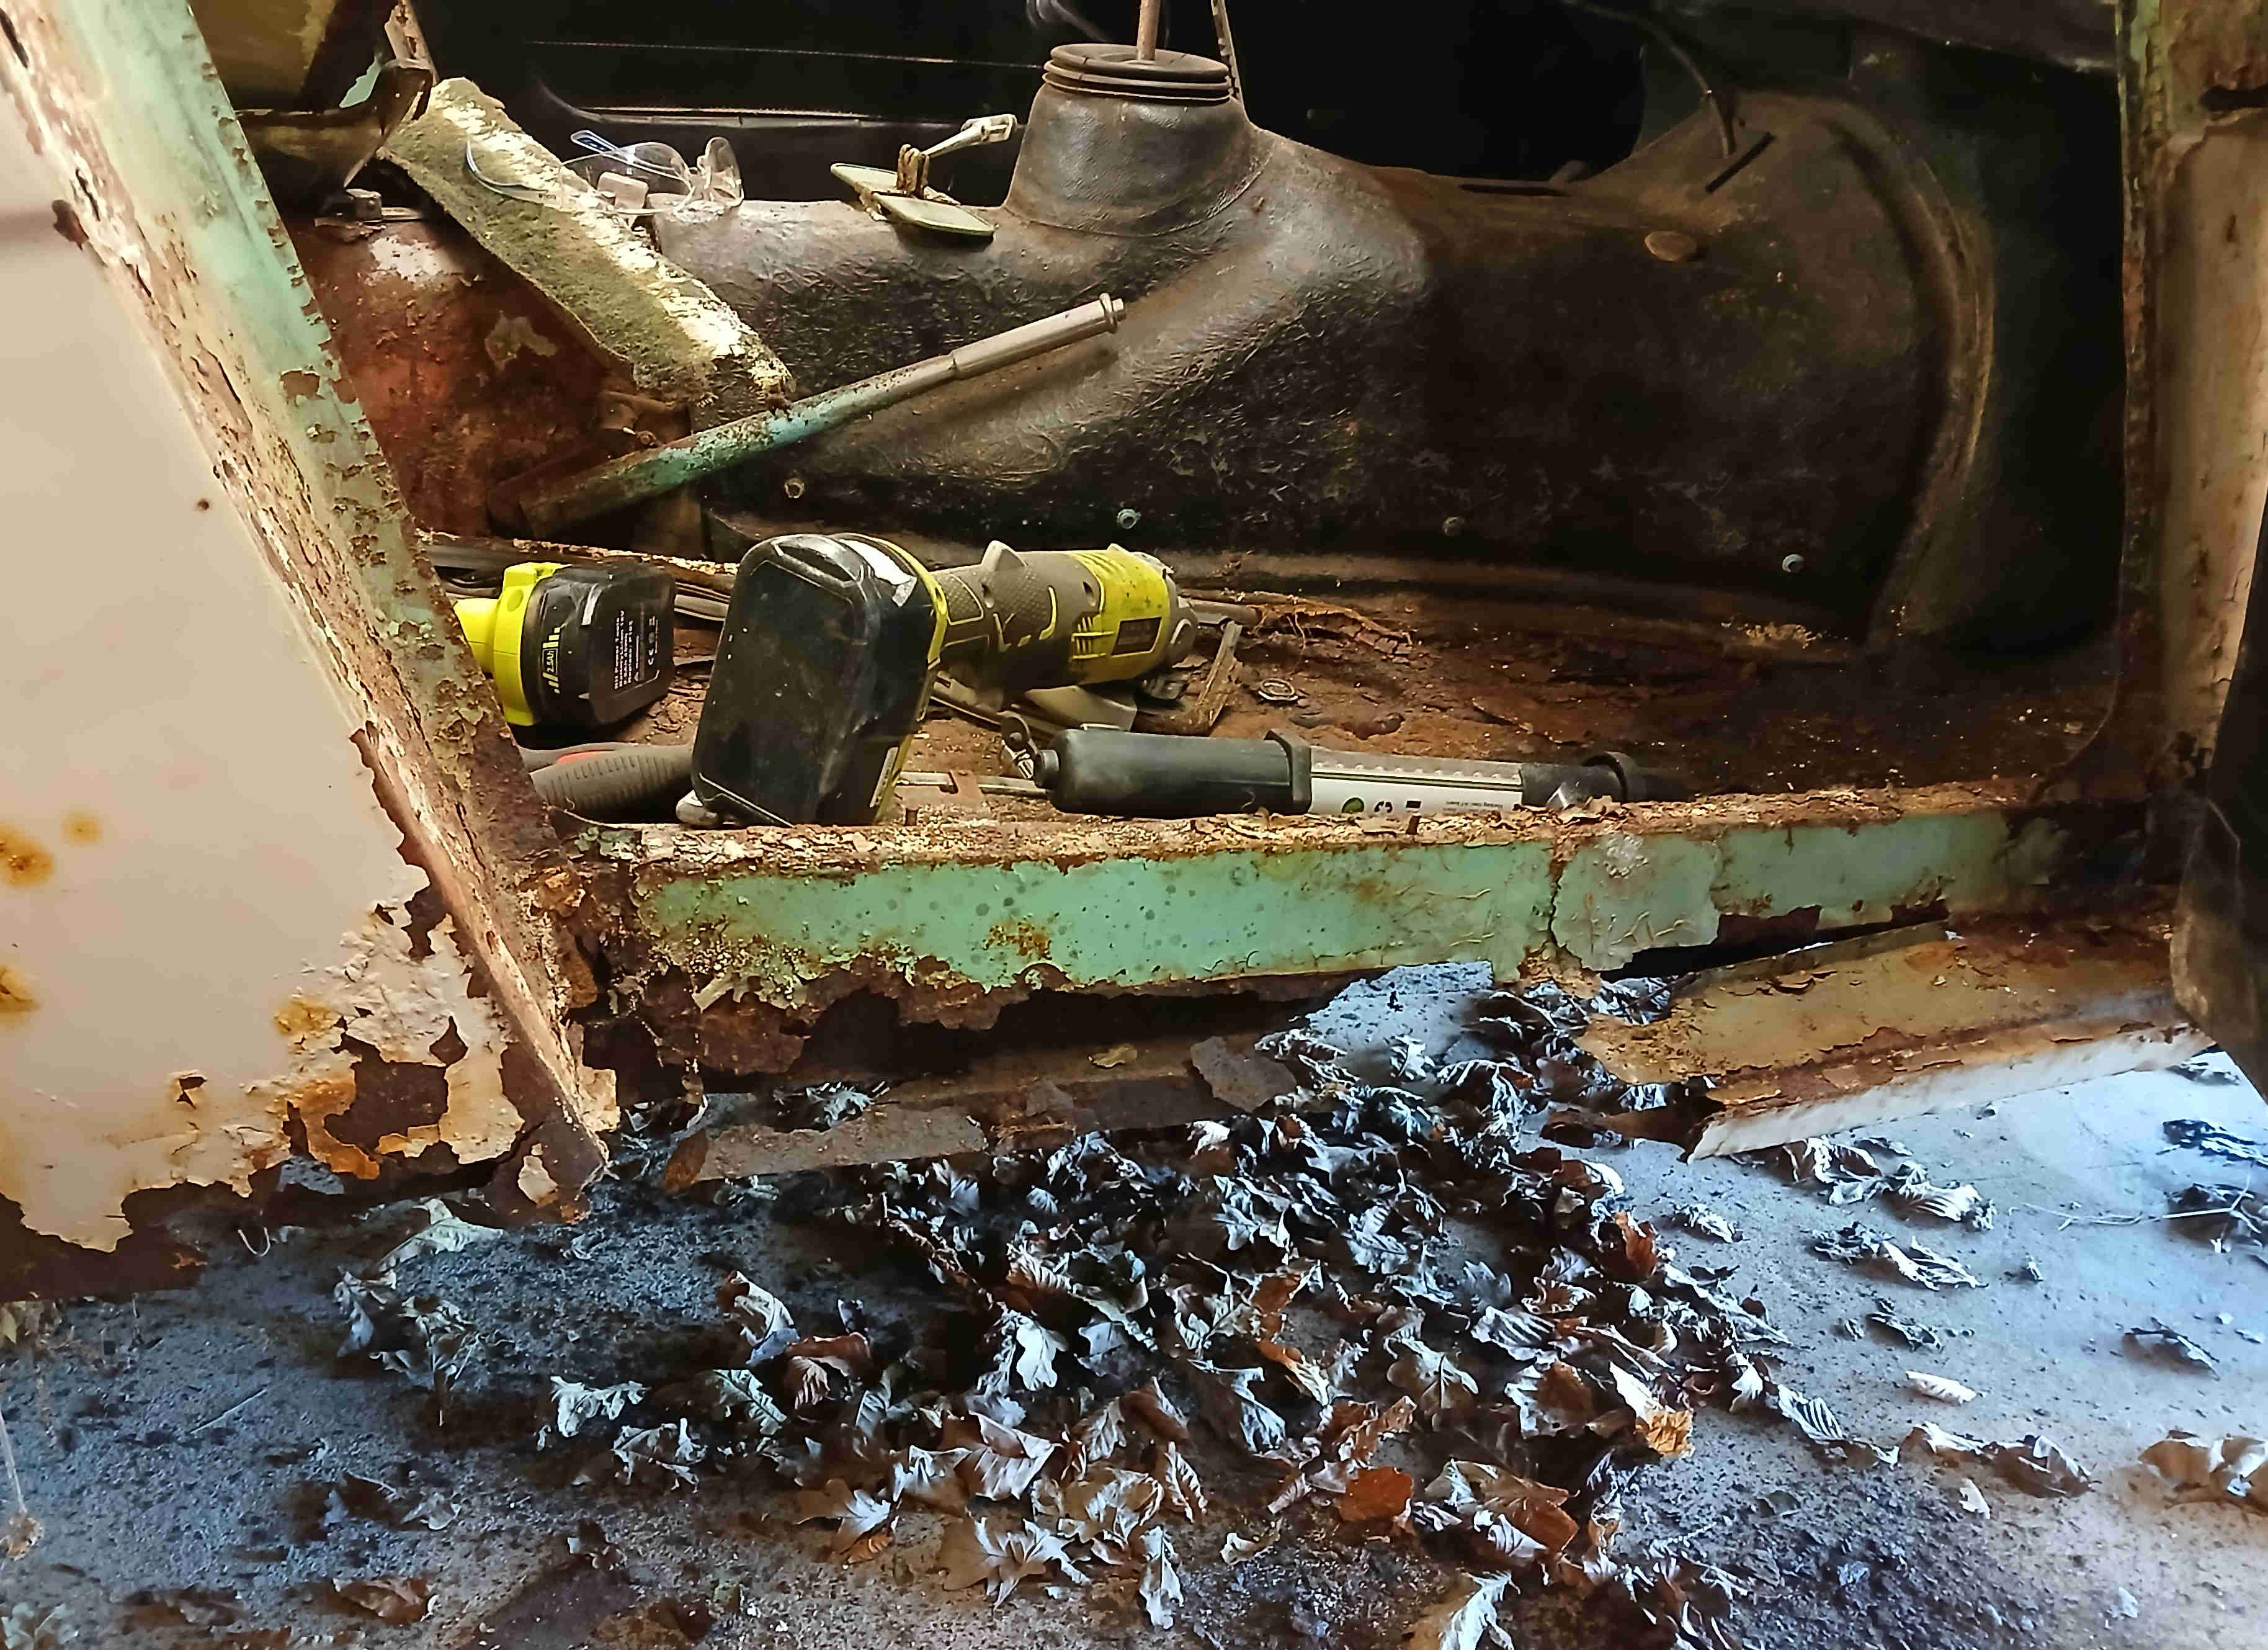
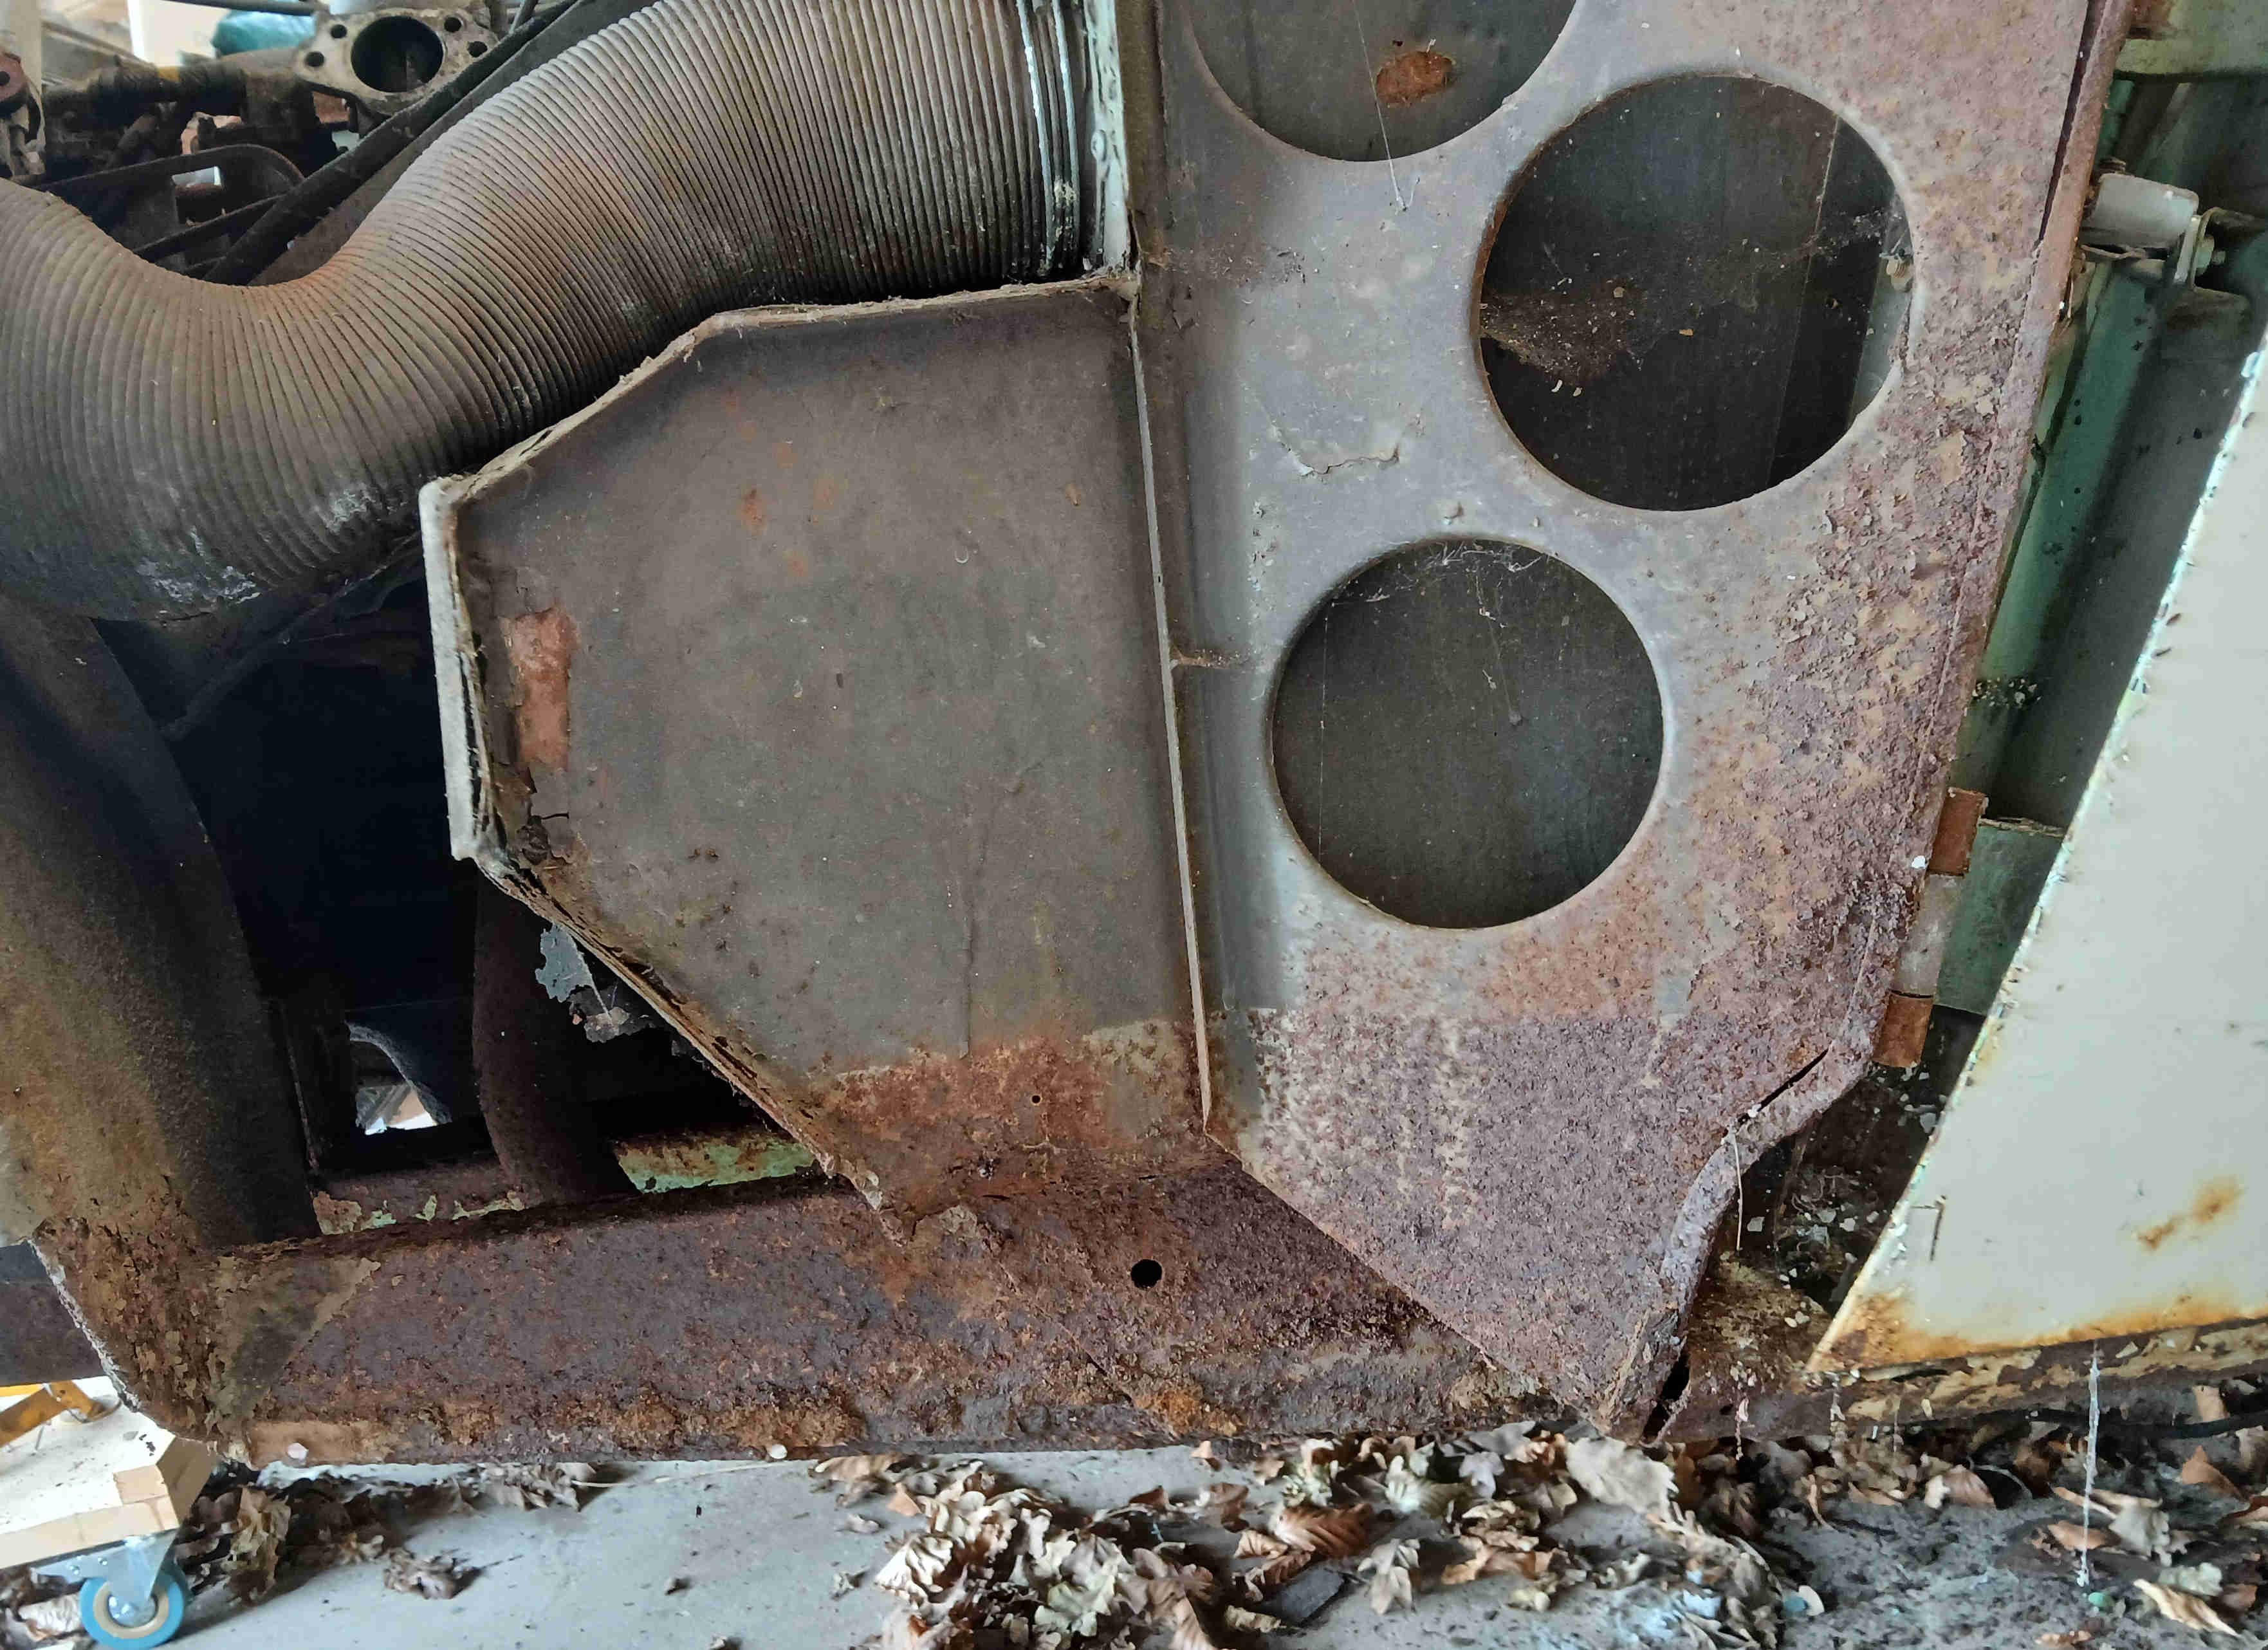
The front shroud was a similar process. This revealed that the dodgy repair work extended up into the scuttle panel.Also the cross brace panel in front of the radiator looks a bit twisted and will need sorting too.
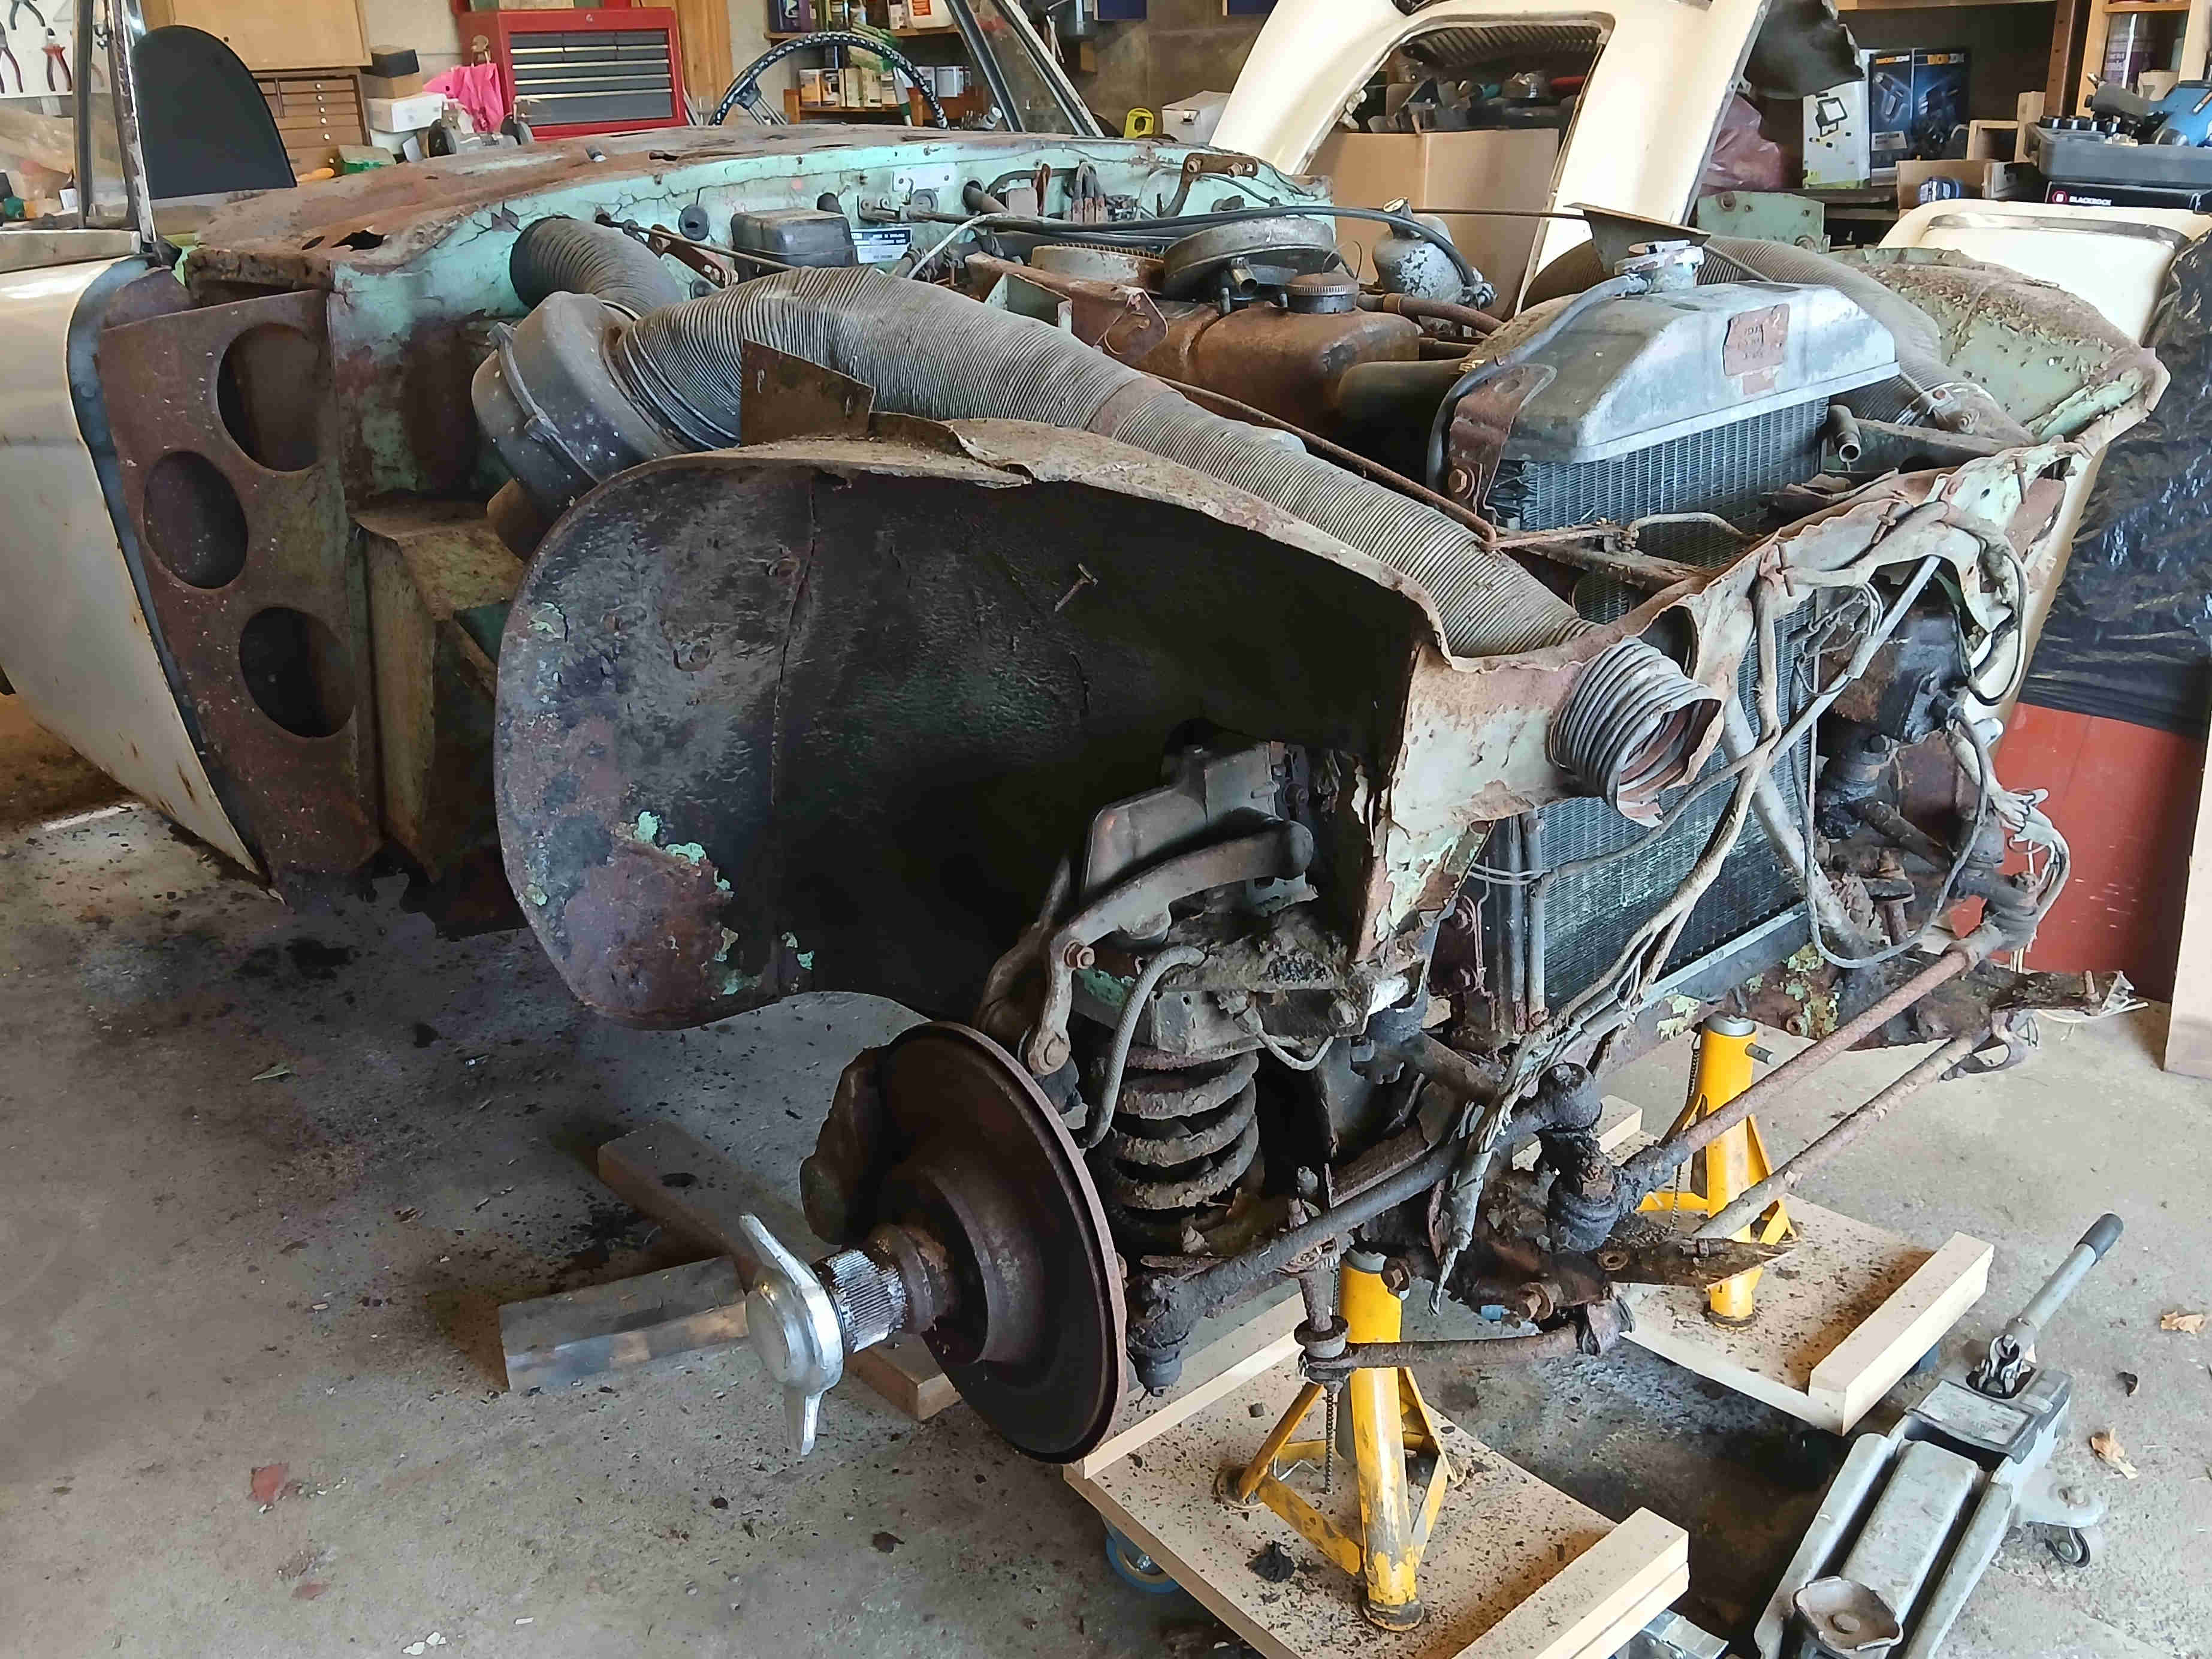
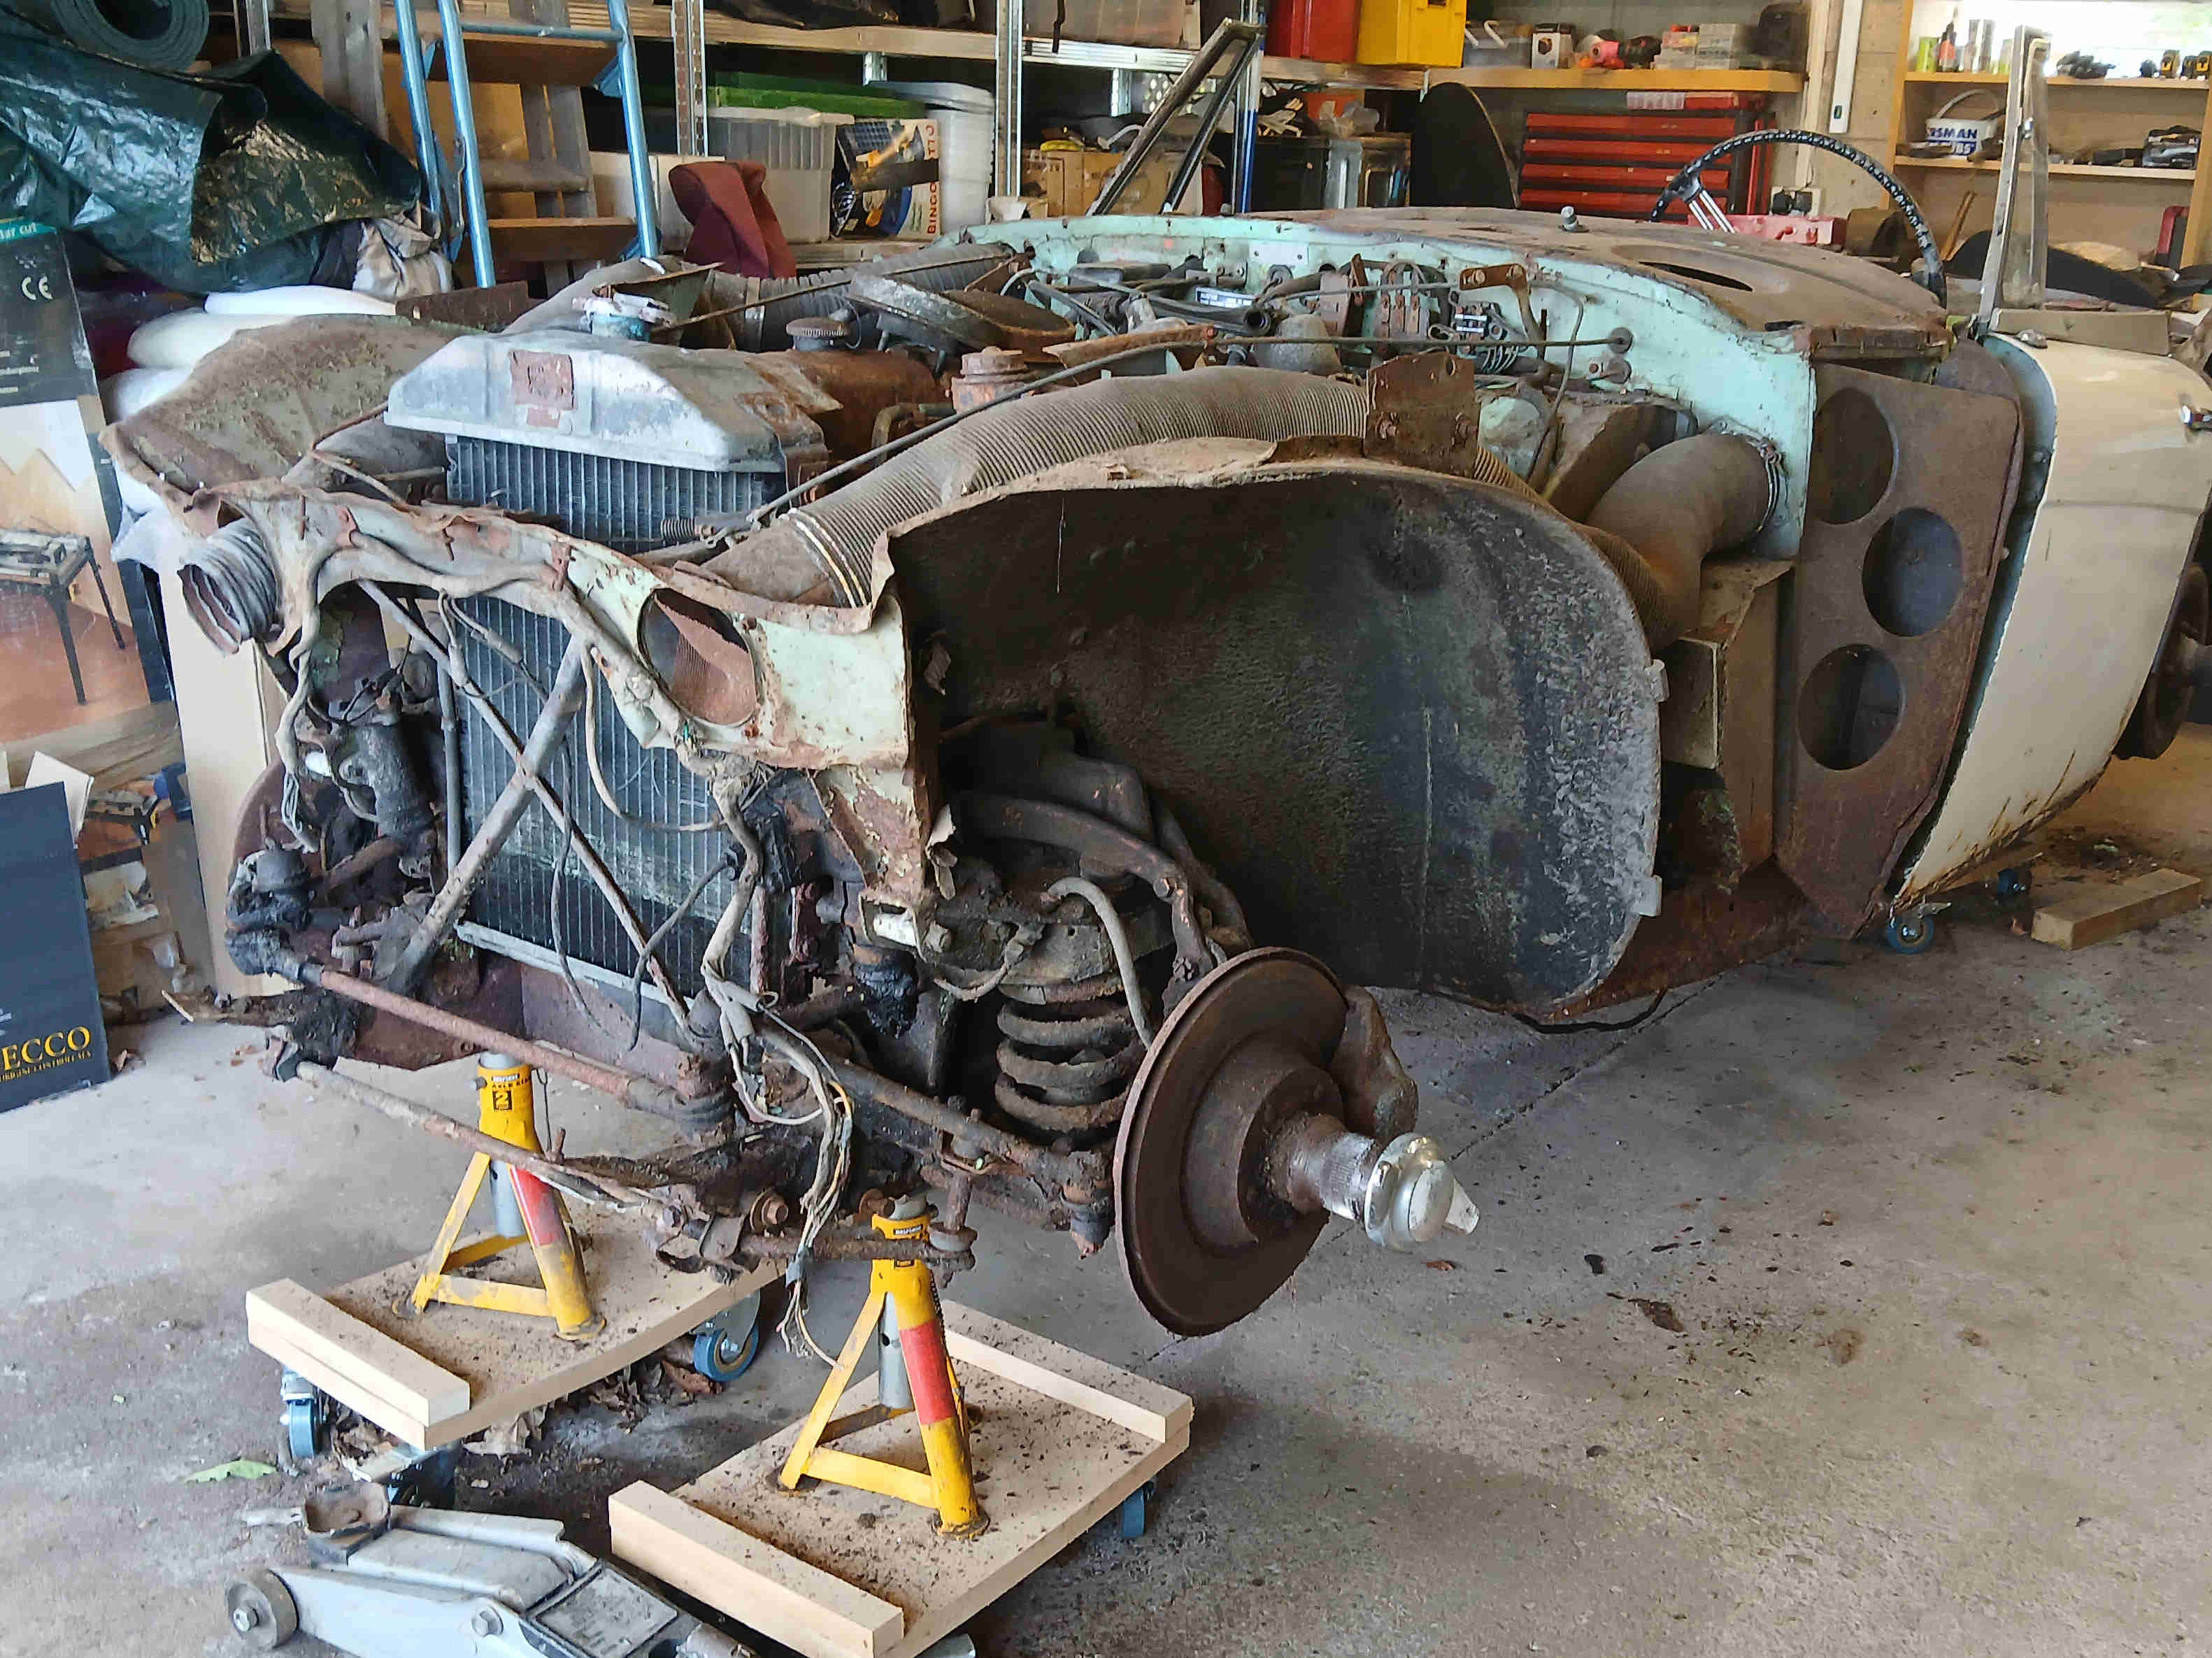
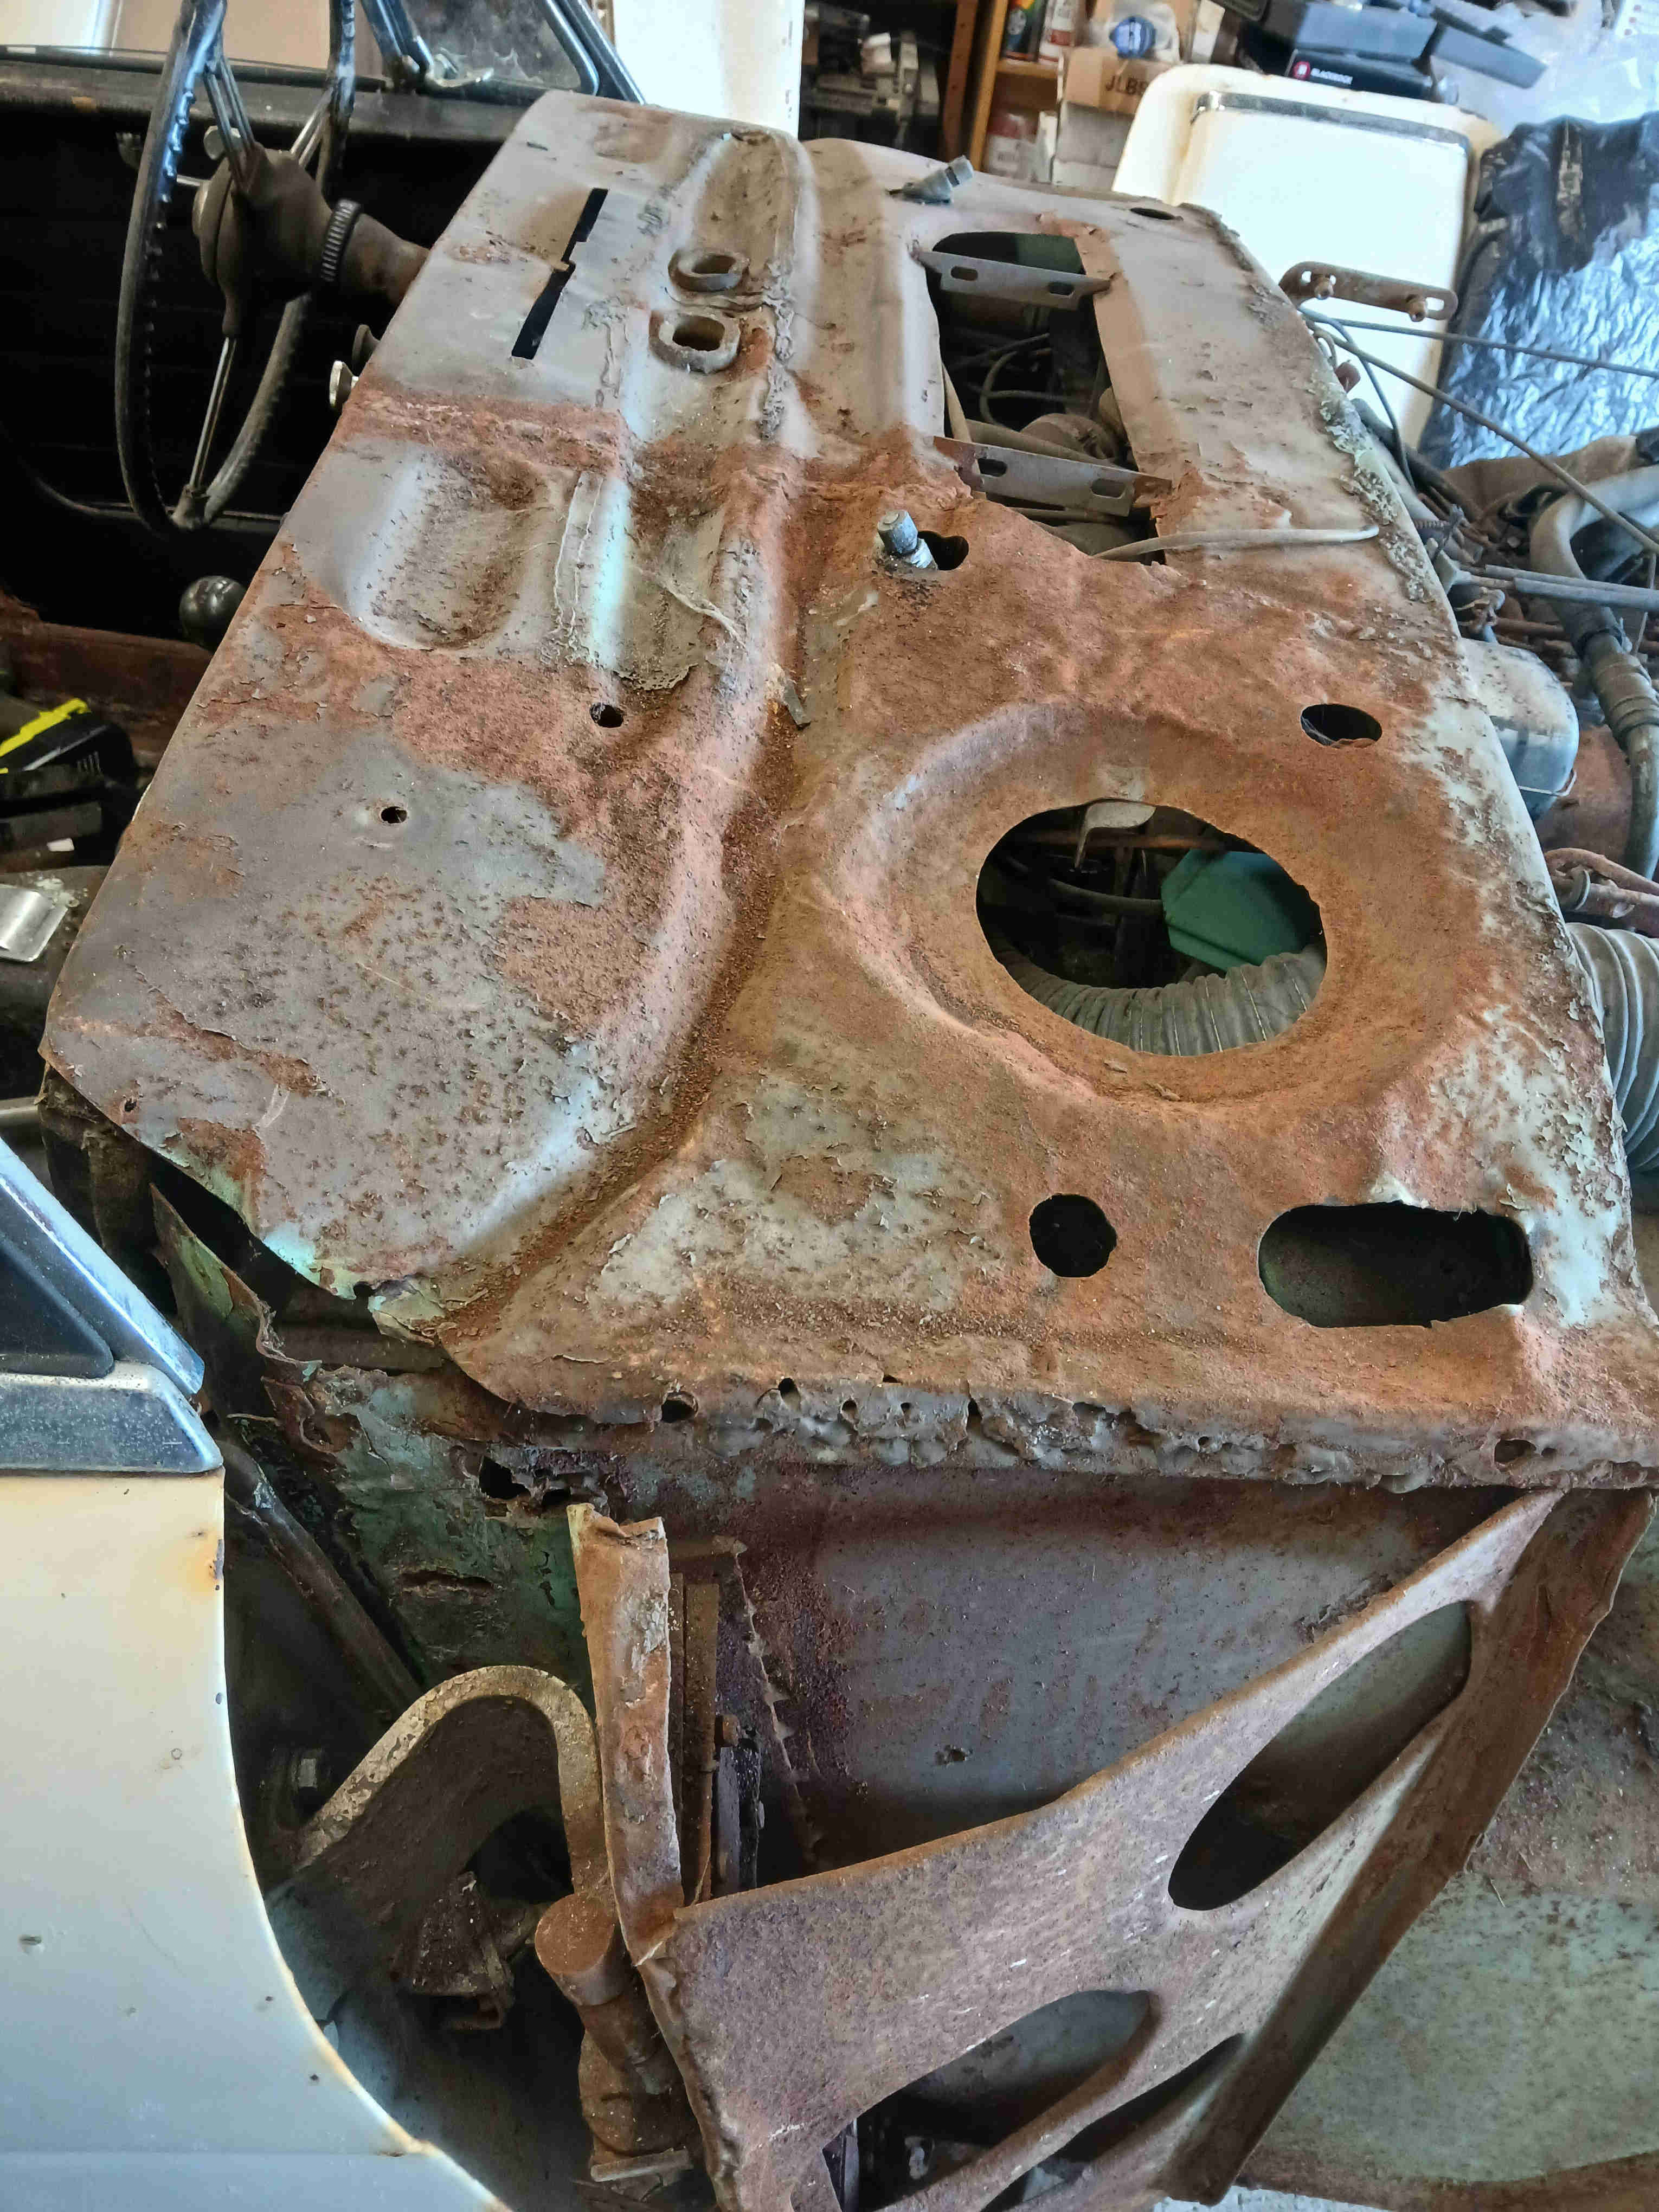
Click thumbnail
Next up will be removing the major mechanicals before getting the MIG out and starting to repair those panels.